Before you draw
Auto-detect first, draw manually if needed
Auto-detect regions
Use this from Kaption's Regions screen when the game UI is standard. If it finds the dialogue box cleanly, you are done.
Choose region
Use manual selection when auto-detect picks the wrong place, your UI scale is unusual, or you want to be precise.
Manual selection also opens from in-game with Ctrl + Shift + R. You can change the shortcut in Settings → Shortcuts.
Manual setup
Draw it like this
- 01
Open a dialogue with a long NPC line
Quest NPCs, Paimon monologues, and cutscene chatter are useful. Shopkeepers and one-liners are too small and make you draw a box that cuts off later dialogue.
- 02
Press Ctrl + Shift + R
The screen dims and a crosshair appears. Drag around the actual dialogue text, not the portrait, not the speaker name, and not the button hint.
- 03
Leave room under the last line
Add roughly 20-40 pixels below the text. That is where a fourth line lands when the game wraps a sentence late.
- 04
Release the mouse and test one more line
Kaption remembers the region per game. Redraw it only after a resolution change, UI-scale change, monitor change, or a game patch that moves the dialogue box.
What to include
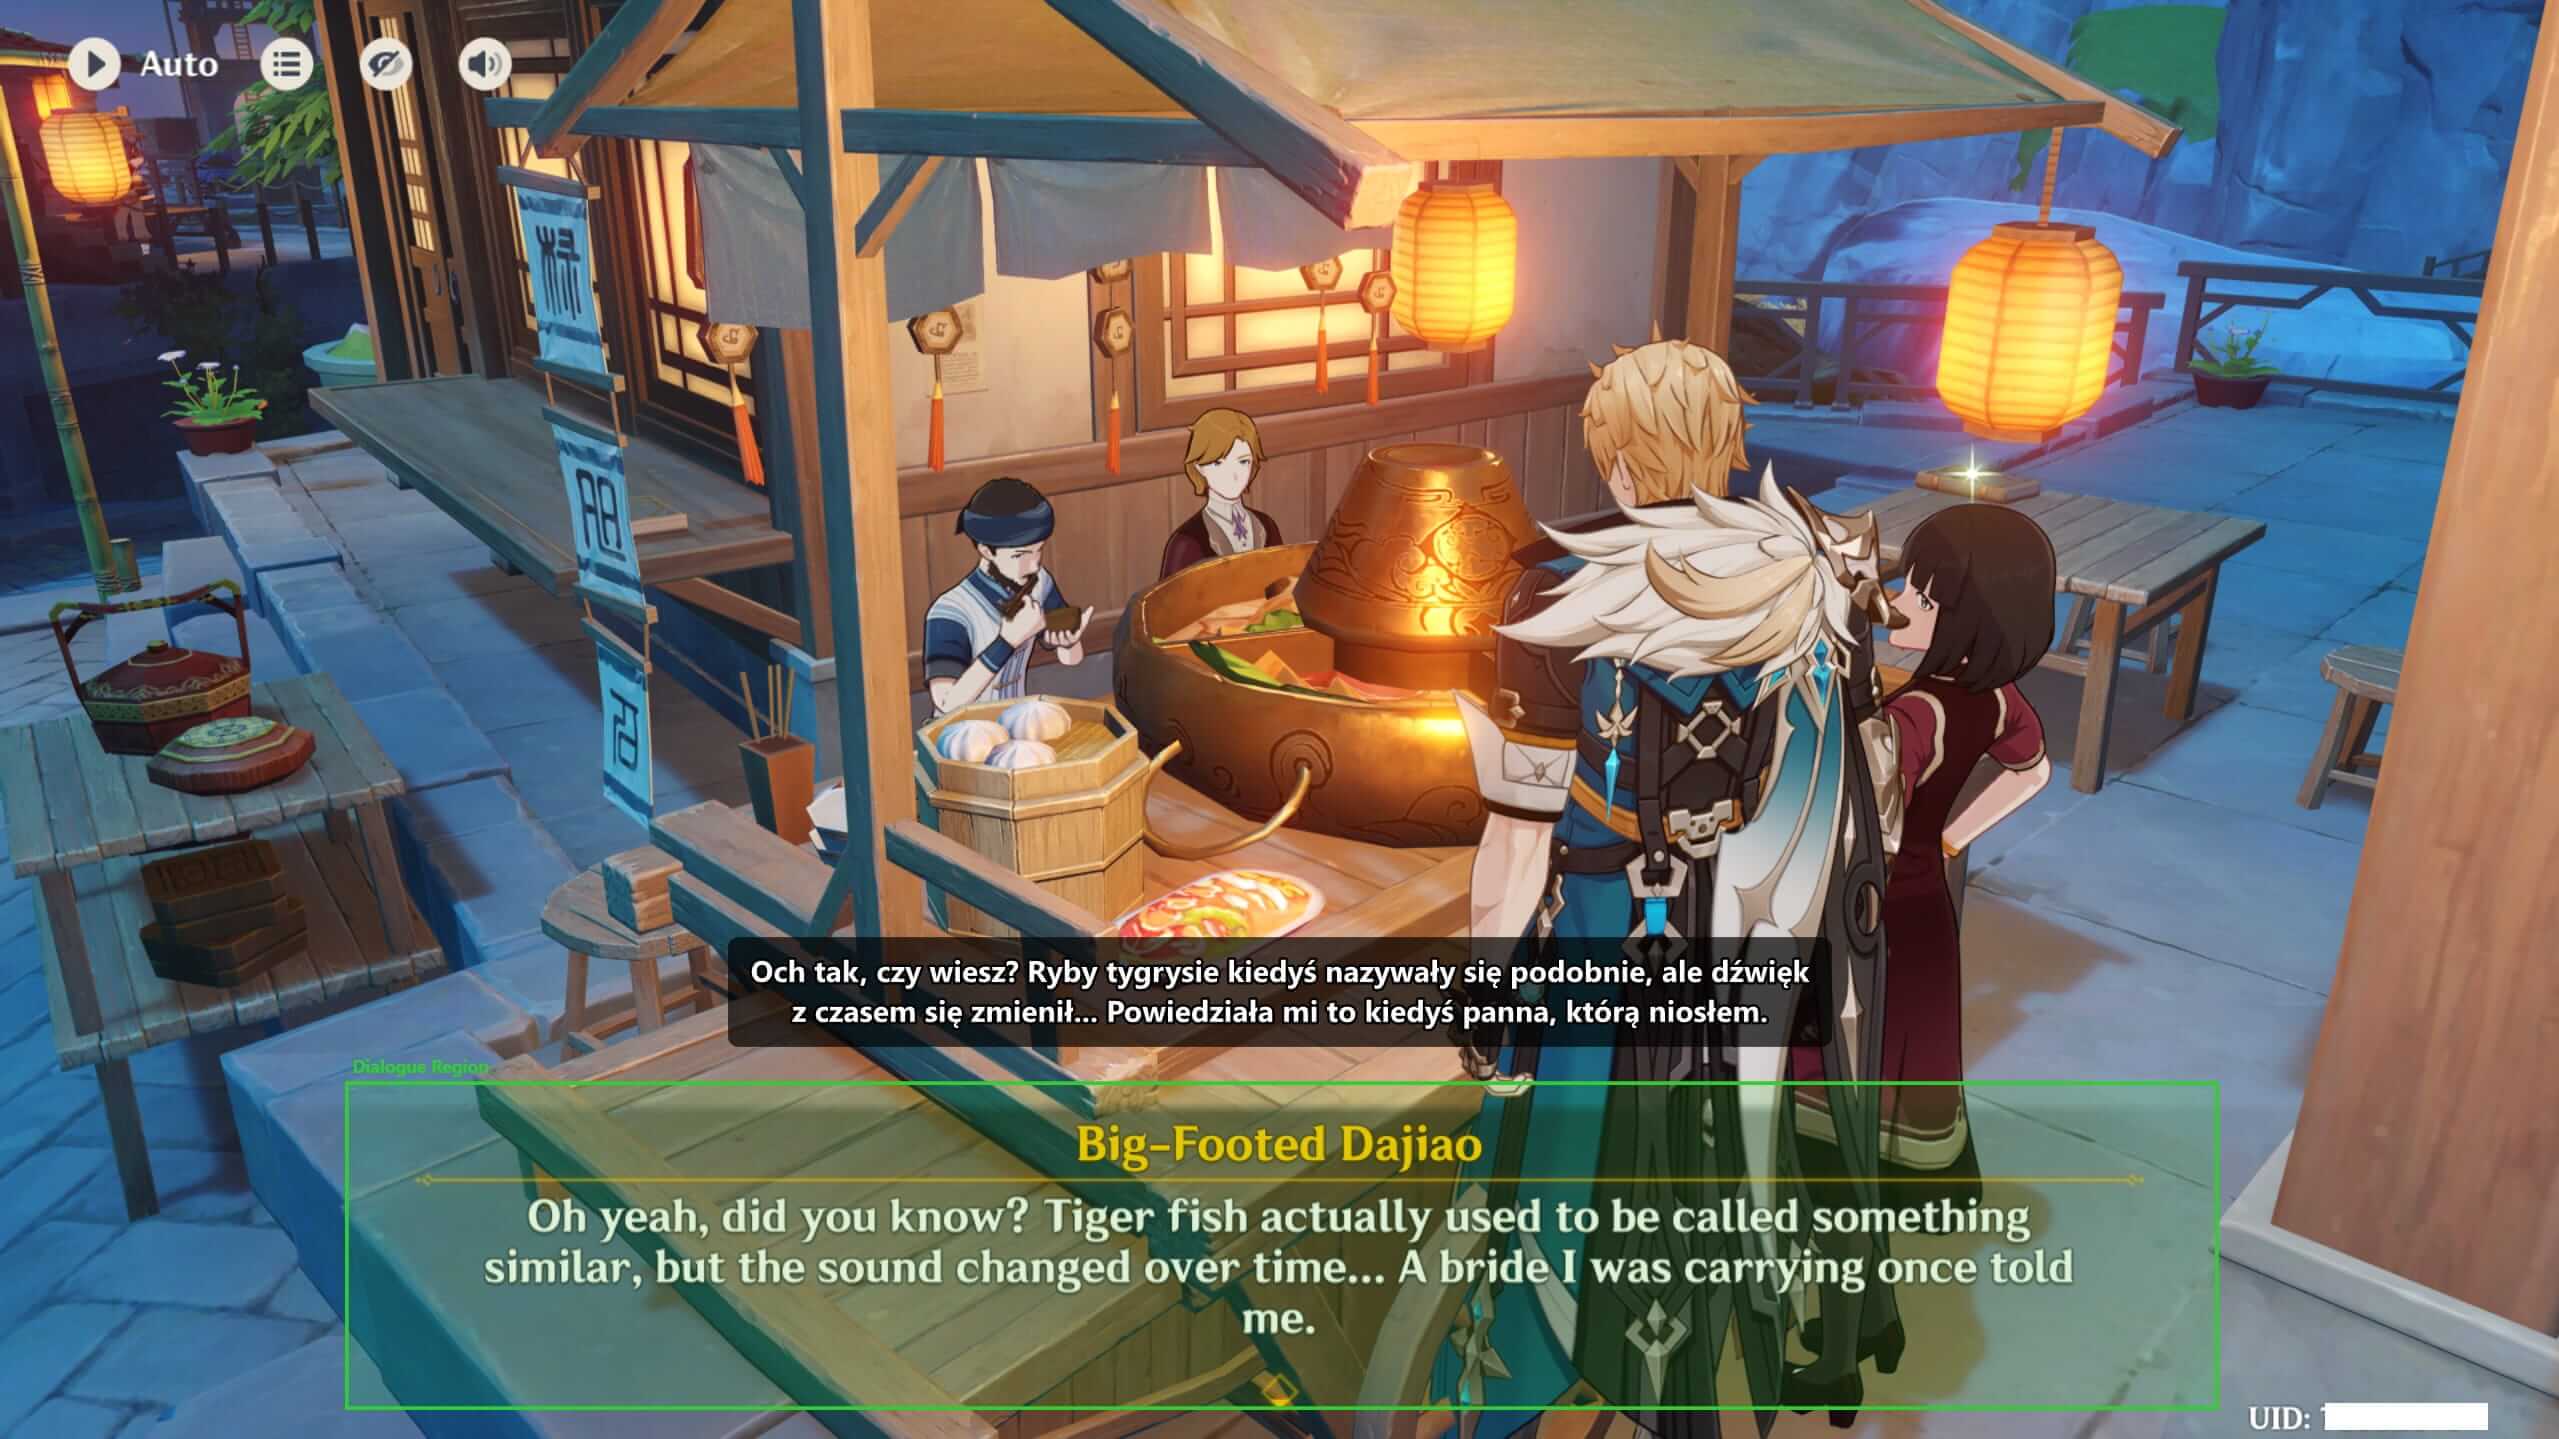
Good region
- Full width of the dialogue text
- Enough height for a 3-line sample
- Small vertical buffer, especially at the bottom
- One monitor only
Bad region
- Built around a one-liner
- Includes the speaker portrait or name strip
- Catches "Press SPACE" or other blinking UI hints
- Overlaps your translated subtitle overlay
Most OCR problems are overlay overlap
If OCR flickers, repeats, or turns into nonsense, check this before changing anything else.
How to fix it
- Press Ctrl + Shift + D to show your region. Green is fine; red means the overlay is inside it.
- Redraw with Ctrl + Shift + R. Cover only the game dialogue text.
- If the overlay keeps landing inside, open Settings → Display. Lower Max overlay height or increase vertical padding so the translated text sits farther away.
Kaption warns while you drag: the selection box turns red before you release the mouse. Use Reselect region from the warning dialog if it appears.
When translations still look wrong
The last line of a long dialogue is missing
The region is too short. Redraw it against a longer NPC line and add another 20 pixels below the text.
Translations flicker or keep repeating
The region is catching something that changes every frame, like a continue prompt, particles, or the translated overlay. Tighten the box around the dialogue text.
The speaker name appears in the translation
The top edge starts too high. Move it down so the region begins at the first line of dialogue, not at the name strip.
Still not sure? Screenshot the green box and ask in Discord. Someone can usually spot the problem from one image.
Ask on Discord