


















Guide
How the kit works
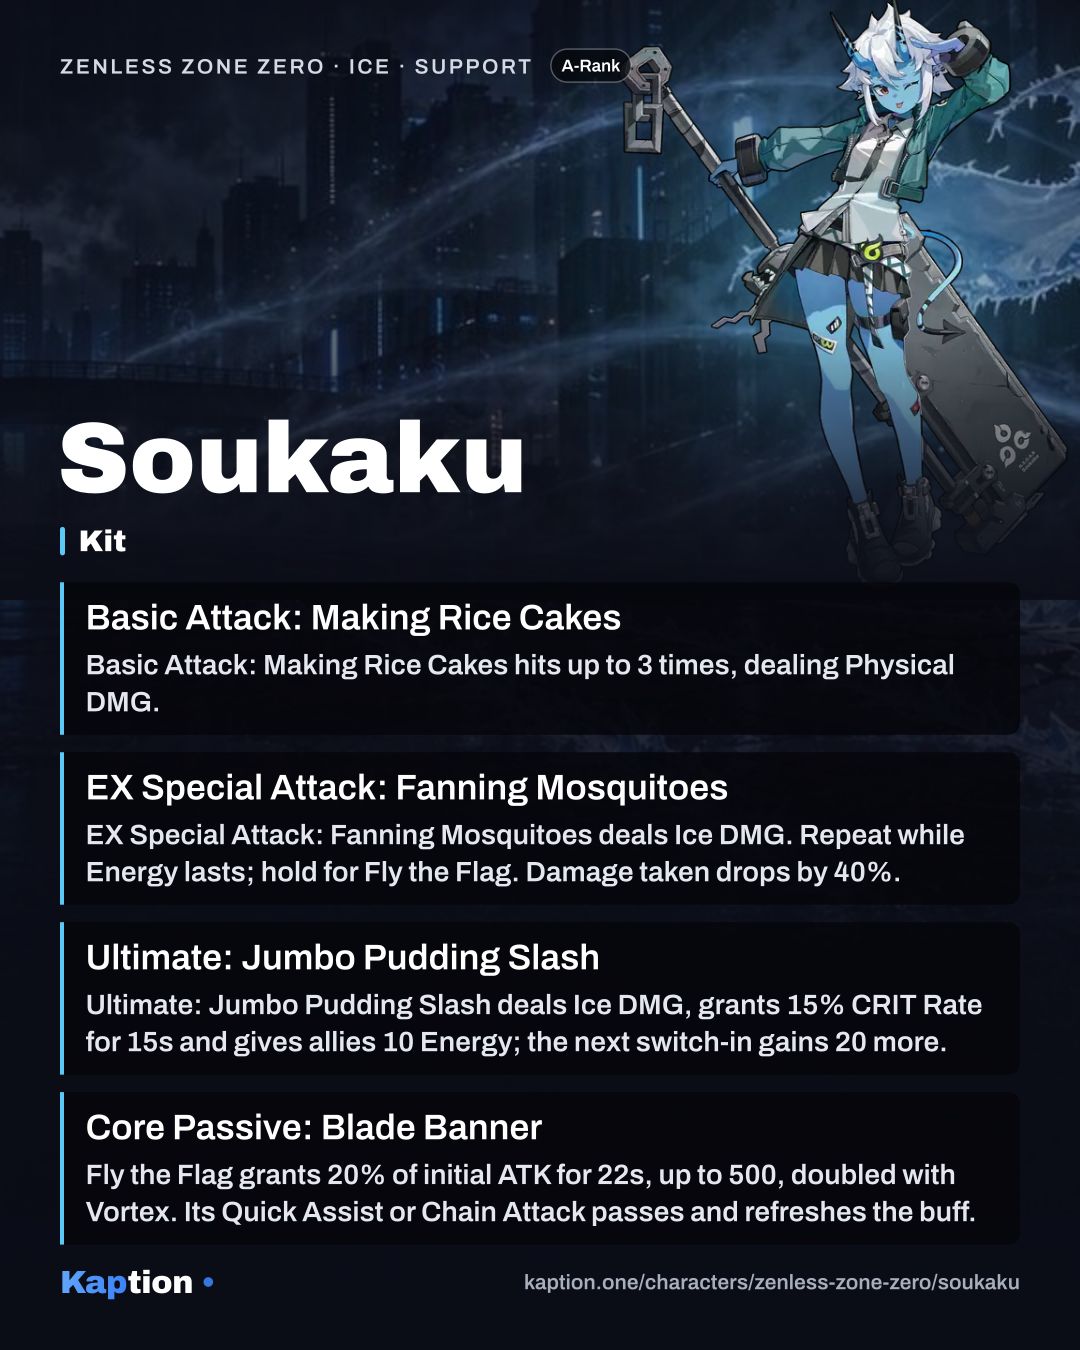
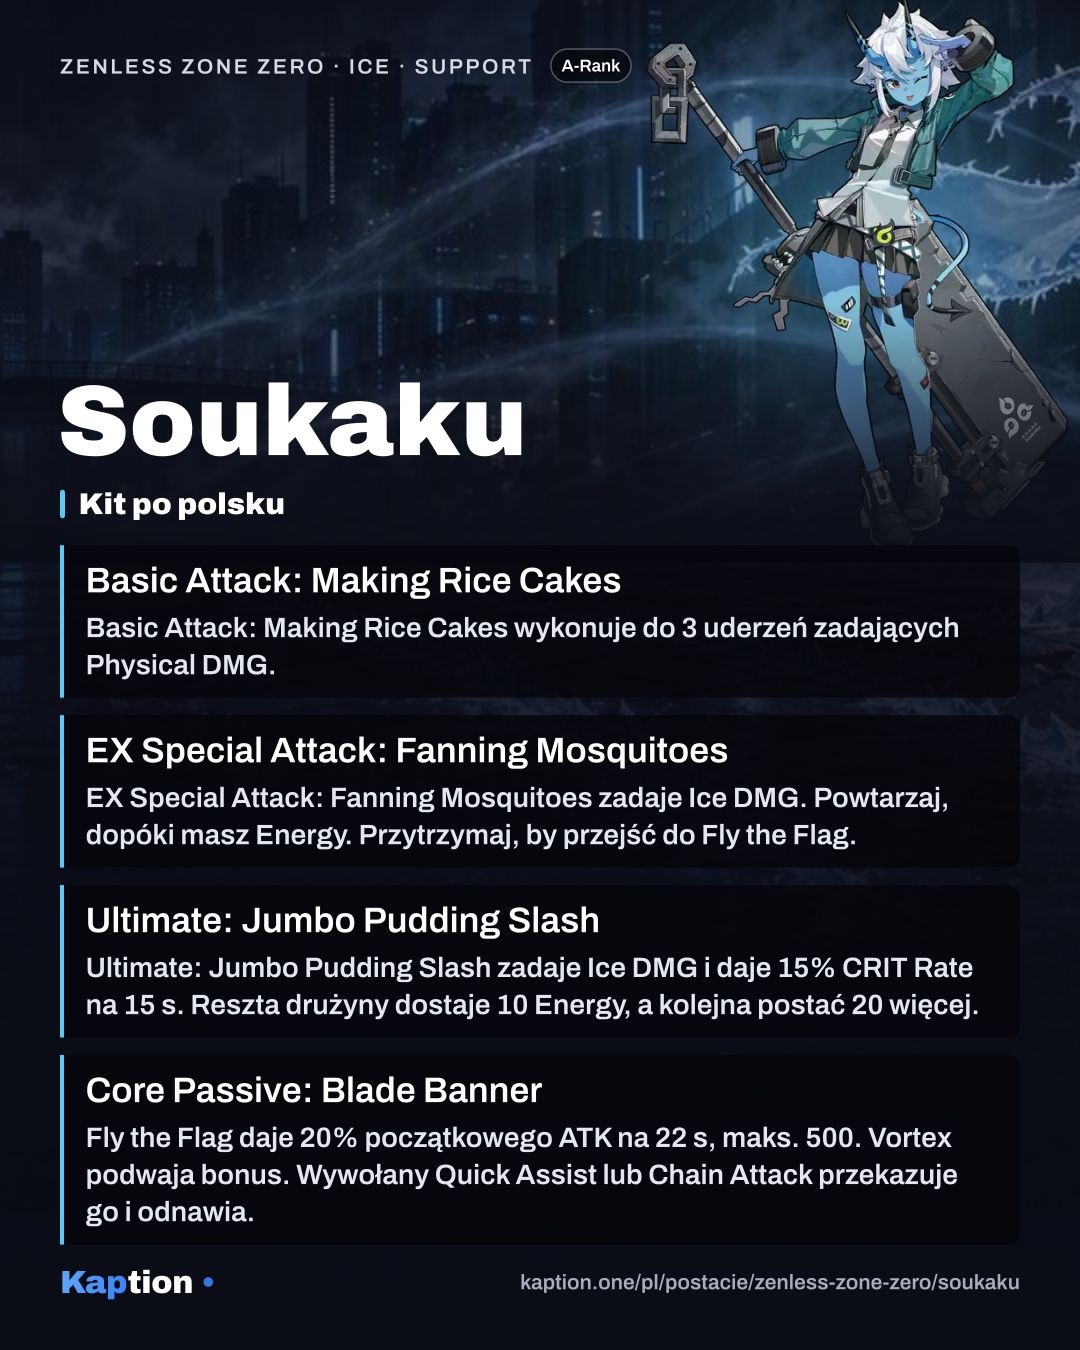
Start by building Vortex. EX Special Attack: Fanning Mosquitoes (Special) grants one stack each time it is launched, and you can press repeatedly while you have enough Energy. You can hold the input during the skill to transition quickly into Fly the Flag. Chain Attack: Pudding Slash grants one stack and follows its strikes with Fly the Flag.
With three stacks, use Special Attack: Rally! to launch Fly the Flag. It consumes the stacks and activates Frosted Banner, giving Soukaku up to six enhanced Basic or Dash Attacks for up to 45 seconds. Hitting an enemy with Fly the Flag triggers a Quick Assist.
Core Passive: Blade Banner gives Soukaku ATK equal to 20% of her initial ATK, capped at 500, for 22 seconds. Consuming Vortex doubles the increase and raises the cap to 1,000. Pass it to the incoming character through the Quick Assist or a Chain Attack triggered by Fly the Flag; the transfer refreshes its duration.
If another squad member shares her Attribute or faction, Additional Ability: Group Set Meal raises the squad's Ice DMG by 20% for 22 seconds when Fly the Flag consumes Vortex. Ultimate: Jumbo Pudding Slash grants three Vortex and follows up with Fly the Flag. It also gives the other squad members 10 Energy, with another 20 for the next character switched in.
Use Defensive Assist: Guarding Tactics to parry, then Assist Follow-Up: Sweeping Strike to attack. Holding during the follow-up transitions quickly into Fly the Flag.
Build and why
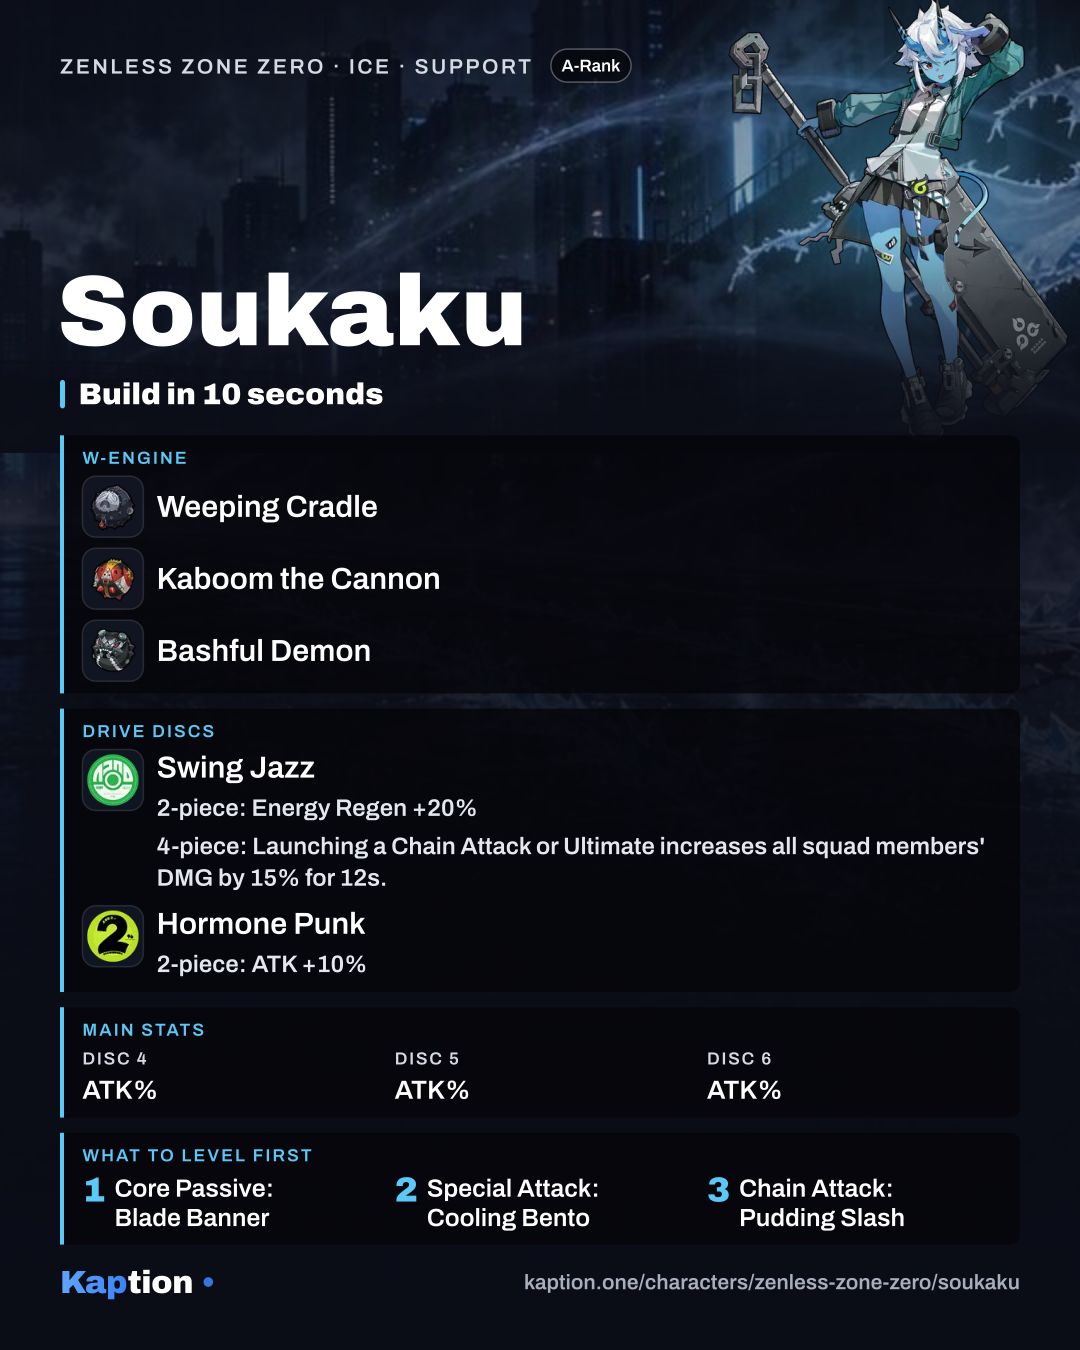
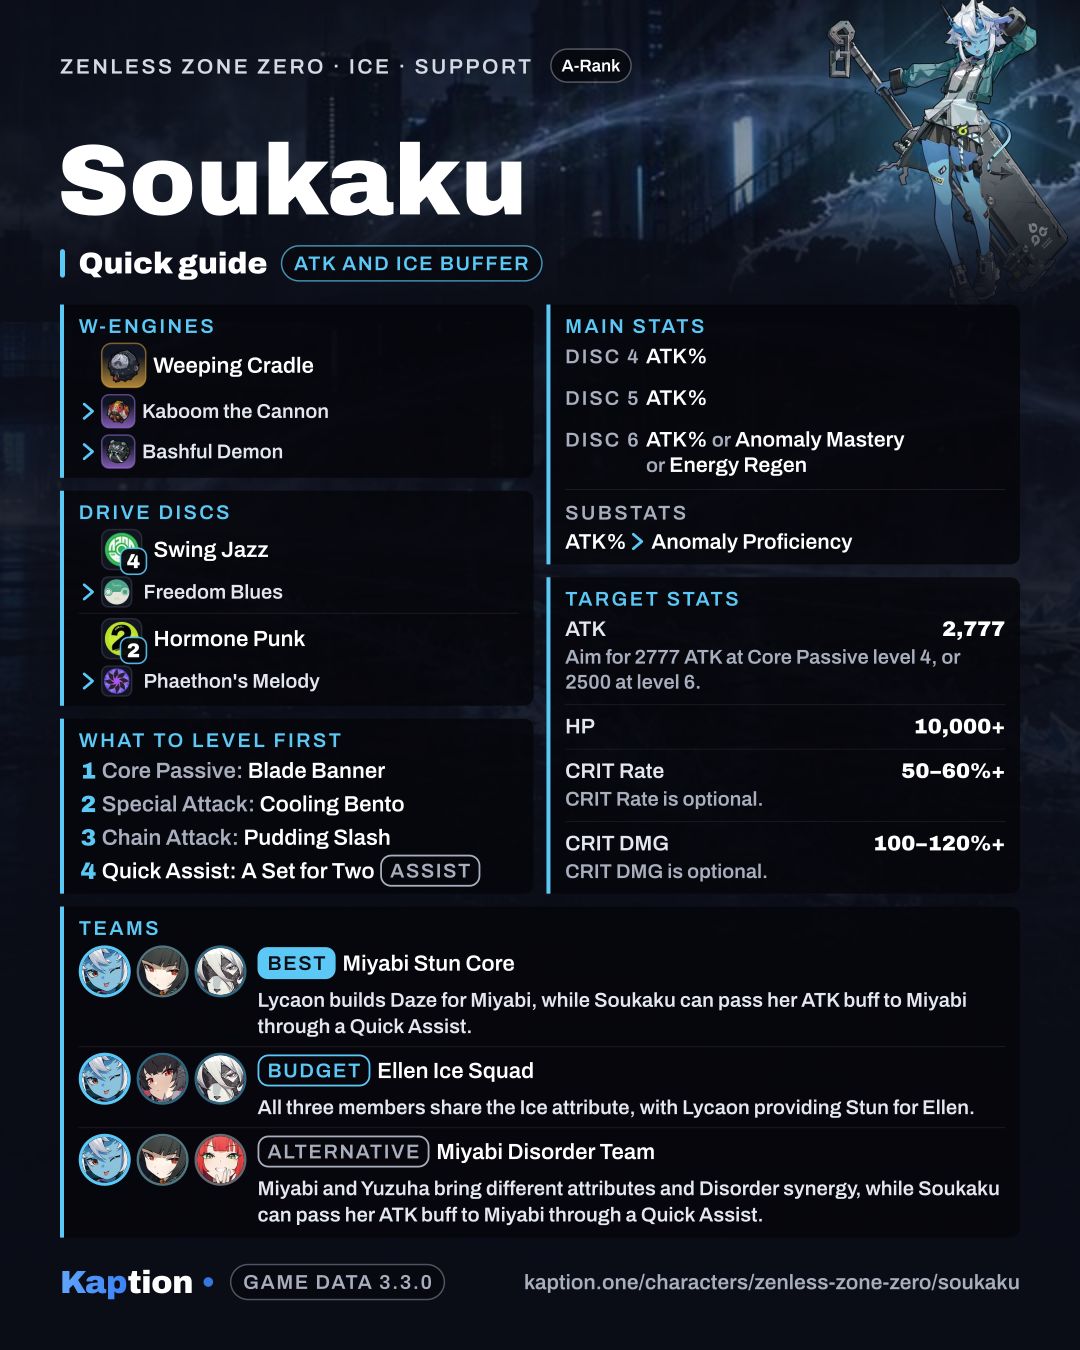
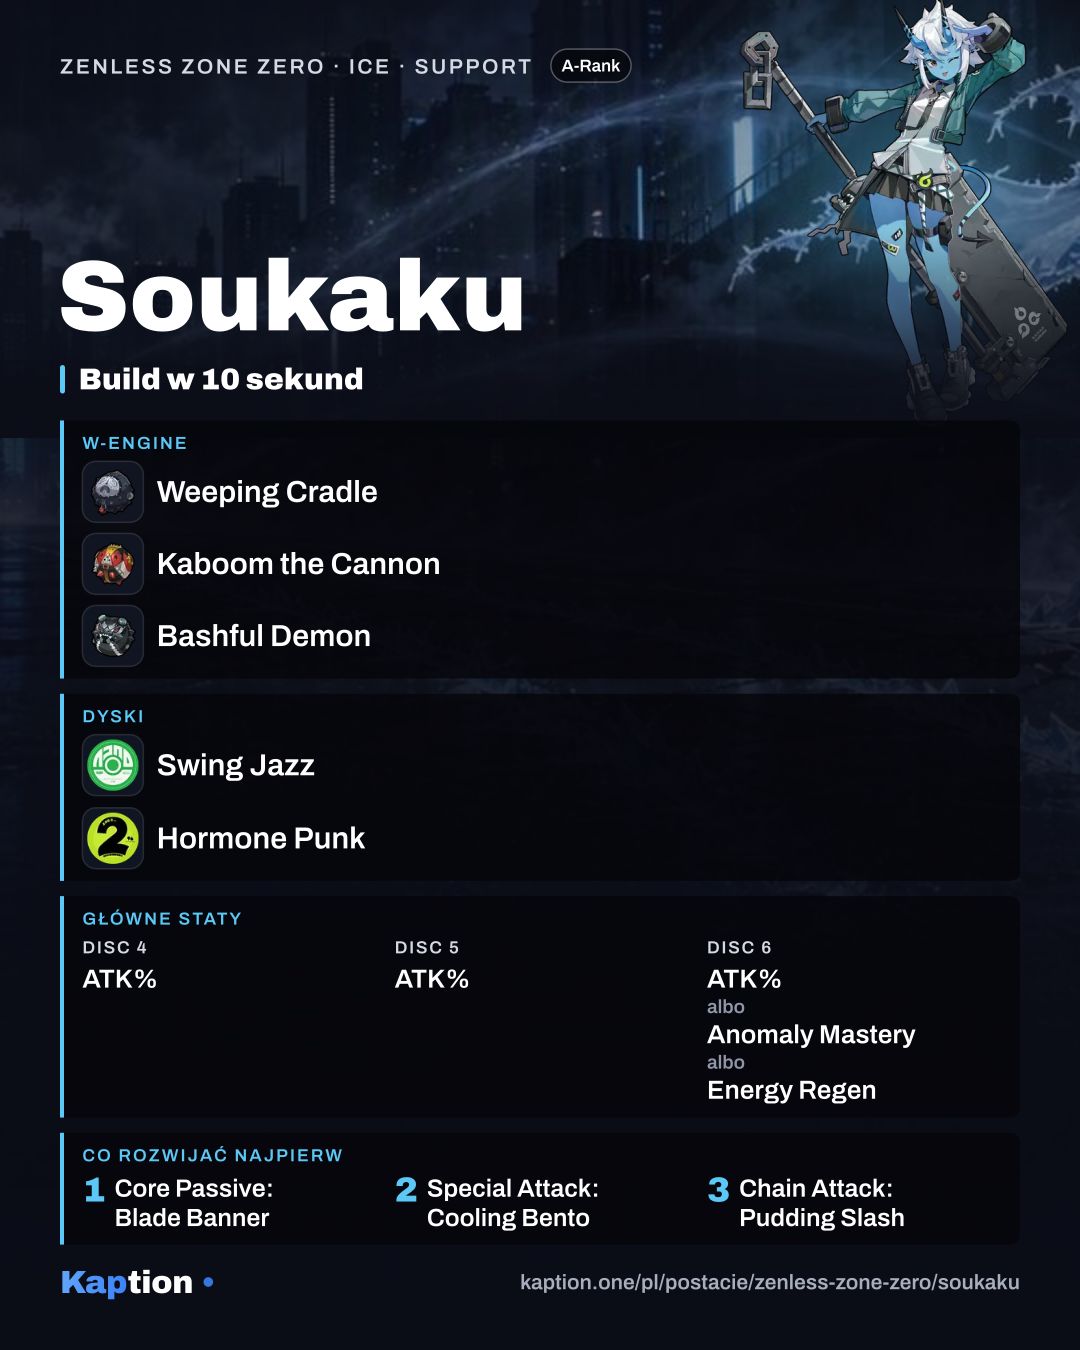
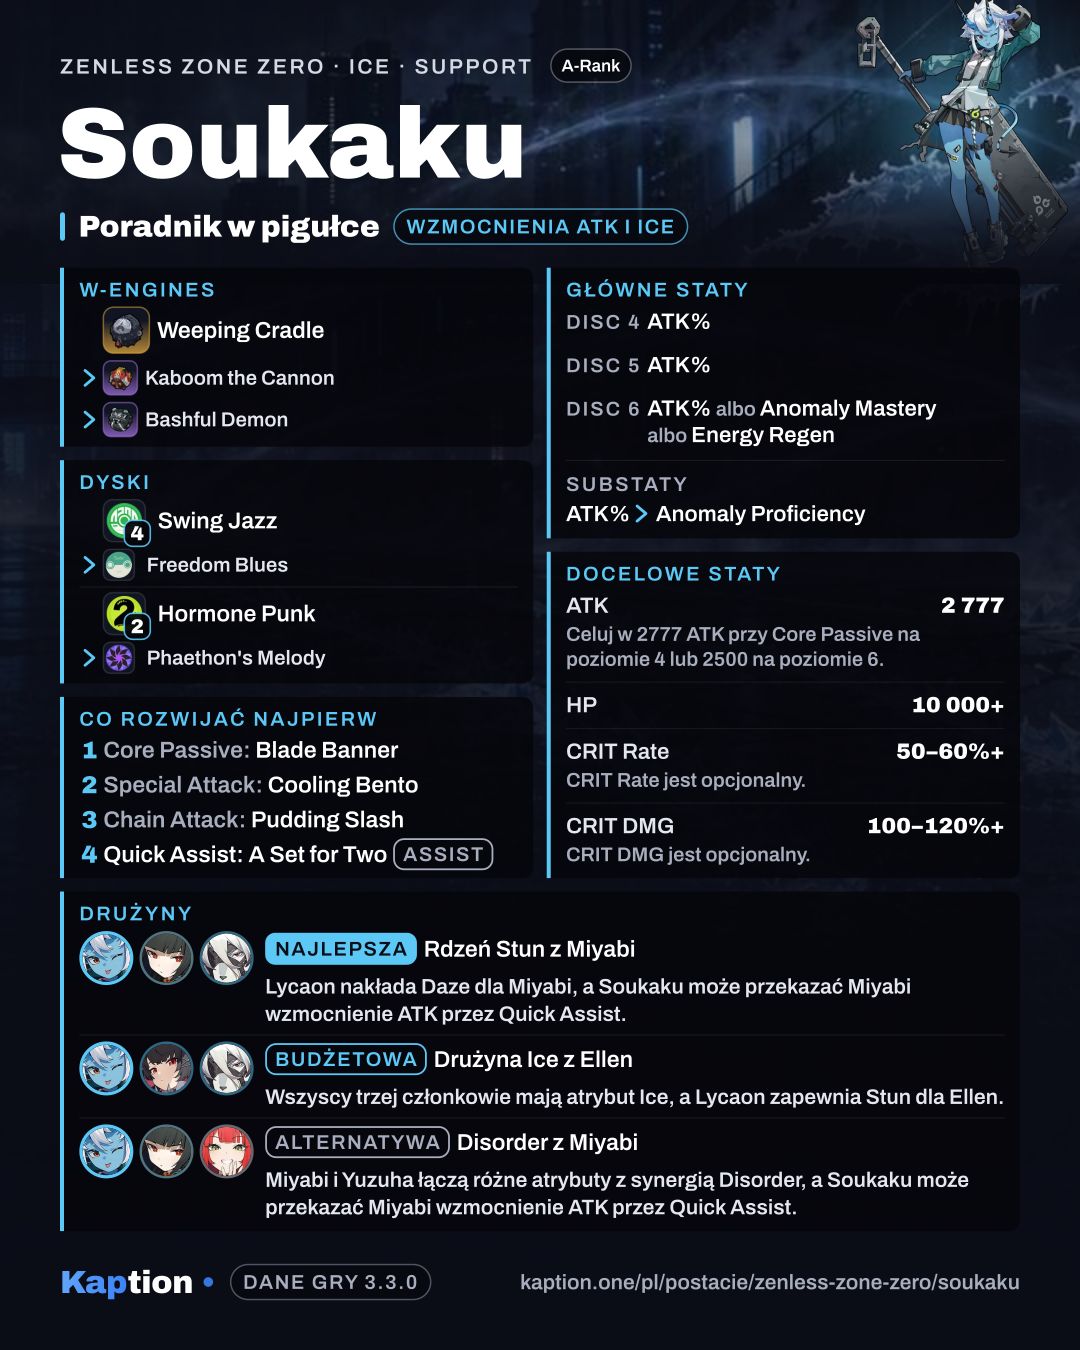
For a support build, use four pieces of Moonlight Lullaby and two of Hormone Punk. Moonlight Lullaby gives 20% Energy Regen; when Soukaku uses an EX Special Attack or Ultimate, its four-piece effect raises squad DMG by 18% for 25 seconds. Repeated triggers reset the duration. Hormone Punk adds 10% ATK, which suits her ATK-based buff.
Freedom Blues is an alternative four-piece set for an Ice Anomaly setup. Its EX Special Attack effect reduces the target's Ice Anomaly Buildup RES by 20% for 8 seconds. Its two-piece bonus gives 30 Anomaly Proficiency, rather than the Energy Regen of Moonlight Lullaby.
Choose Percent ATK on discs 4 and 5. Disc 6 can use Percent ATK, Energy Regen or Anomaly Mastery. Energy Regen helps when you want more access to the Energy-consuming EX Special Attack; Anomaly Mastery is an option for an Anomaly-focused build. For substats, prioritize Percent ATK, then Anomaly Proficiency.
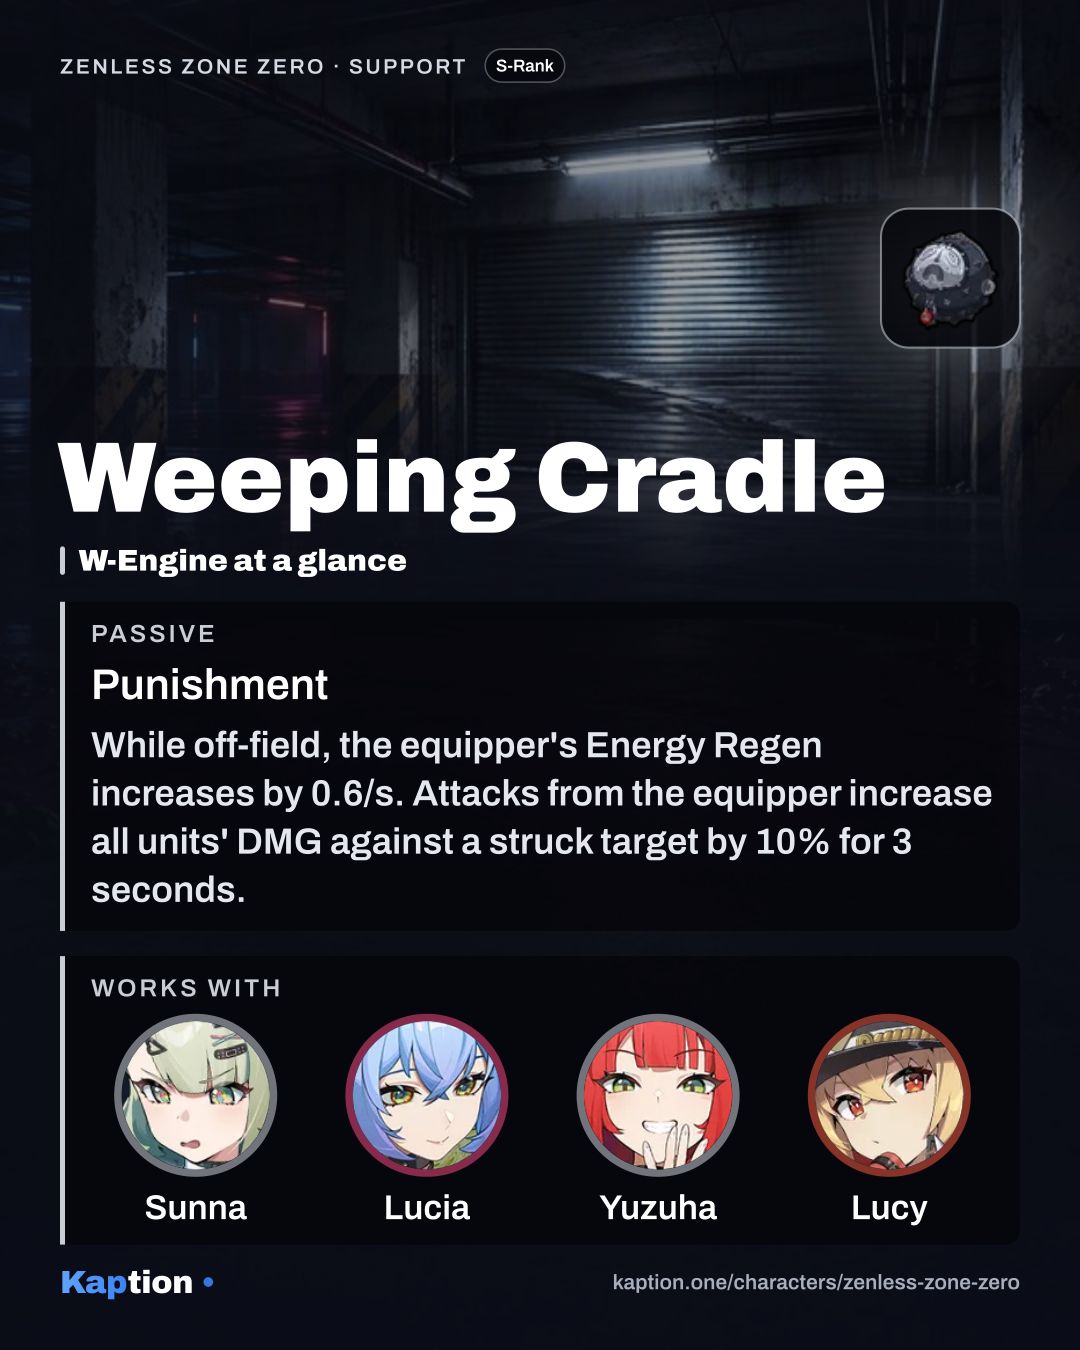
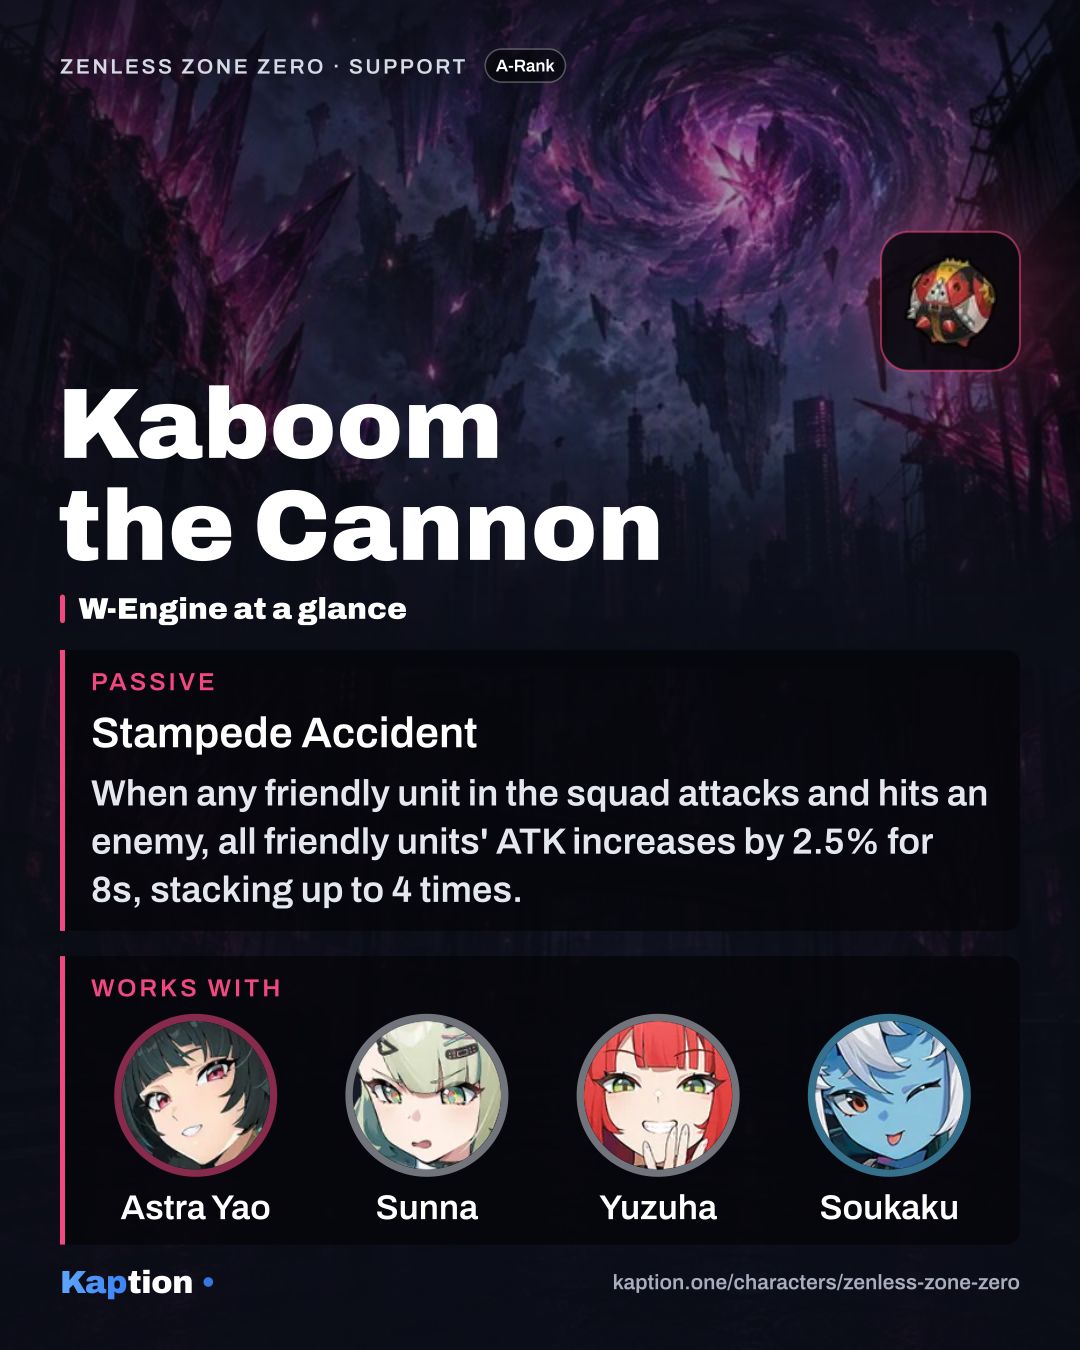
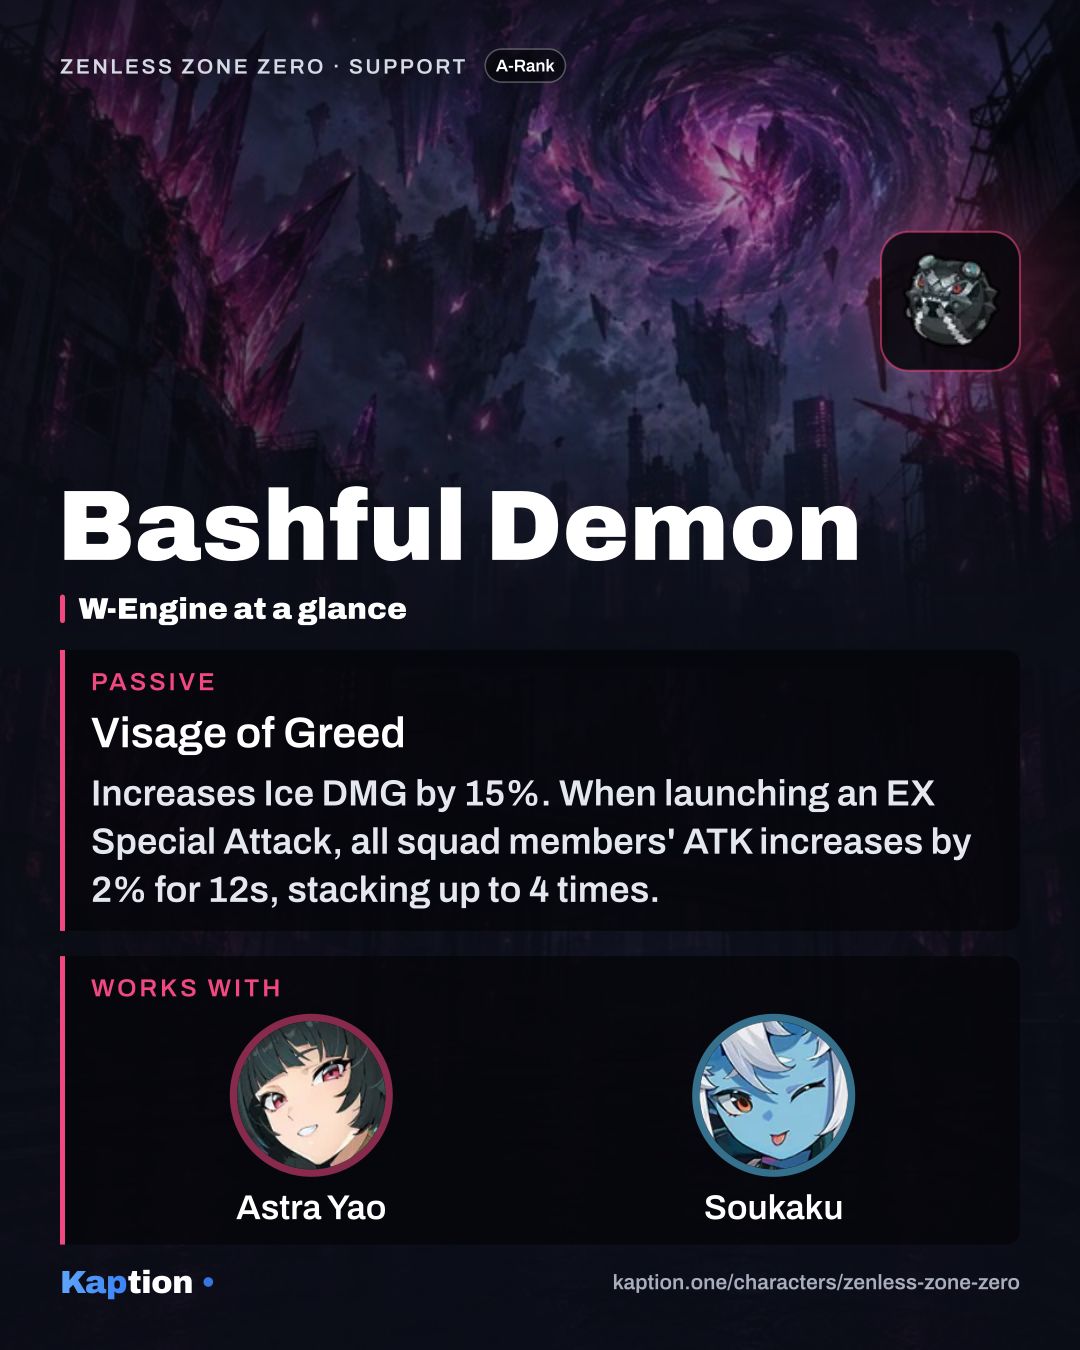
Bashful Demon is the first weapon choice. It gives 15% Ice DMG, and launching an EX Special Attack raises squad ATK by 2% for 12 seconds, up to four stacks. Weeping Cradle is another option: it gives the off-field wearer Energy Regen and makes targets hit by the wearer take increased squad DMG for 3 seconds. Kaboom the Cannon instead builds a squad ATK buff when friendly units land hits.
Leveling priority
Follow the game's order: level Core Passive: Blade Banner first, then the Special Attack group starting with Special Attack: Cooling Bento. Next come Chain Attack: Pudding Slash and the Assist group, represented by Quick Assist: A Set for Two. Leave Basic Attack: Making Rice Cakes and Dodge: Grab a Bite until last. This puts the buff and the attacks used in her support rotation ahead of her basic attacks and dodge.
For ascension, collect 800,000 Denny, 4 Basic Support Certification Seal, 32 Advanced Support Certification Seal and 30 Ruler Certification Seal. To raise all skills to the maximum, you need 2,905,000 Denny, 25 Basic Freeze Chip, 75 Advanced Freeze Chip, 250 Specialized Freeze Chip, 5 Hamster Cage Pass, 9 Finale Dance Shoes and 60 Higher Dimensional Data: Murderous Obituary.
Mindscapes worth it
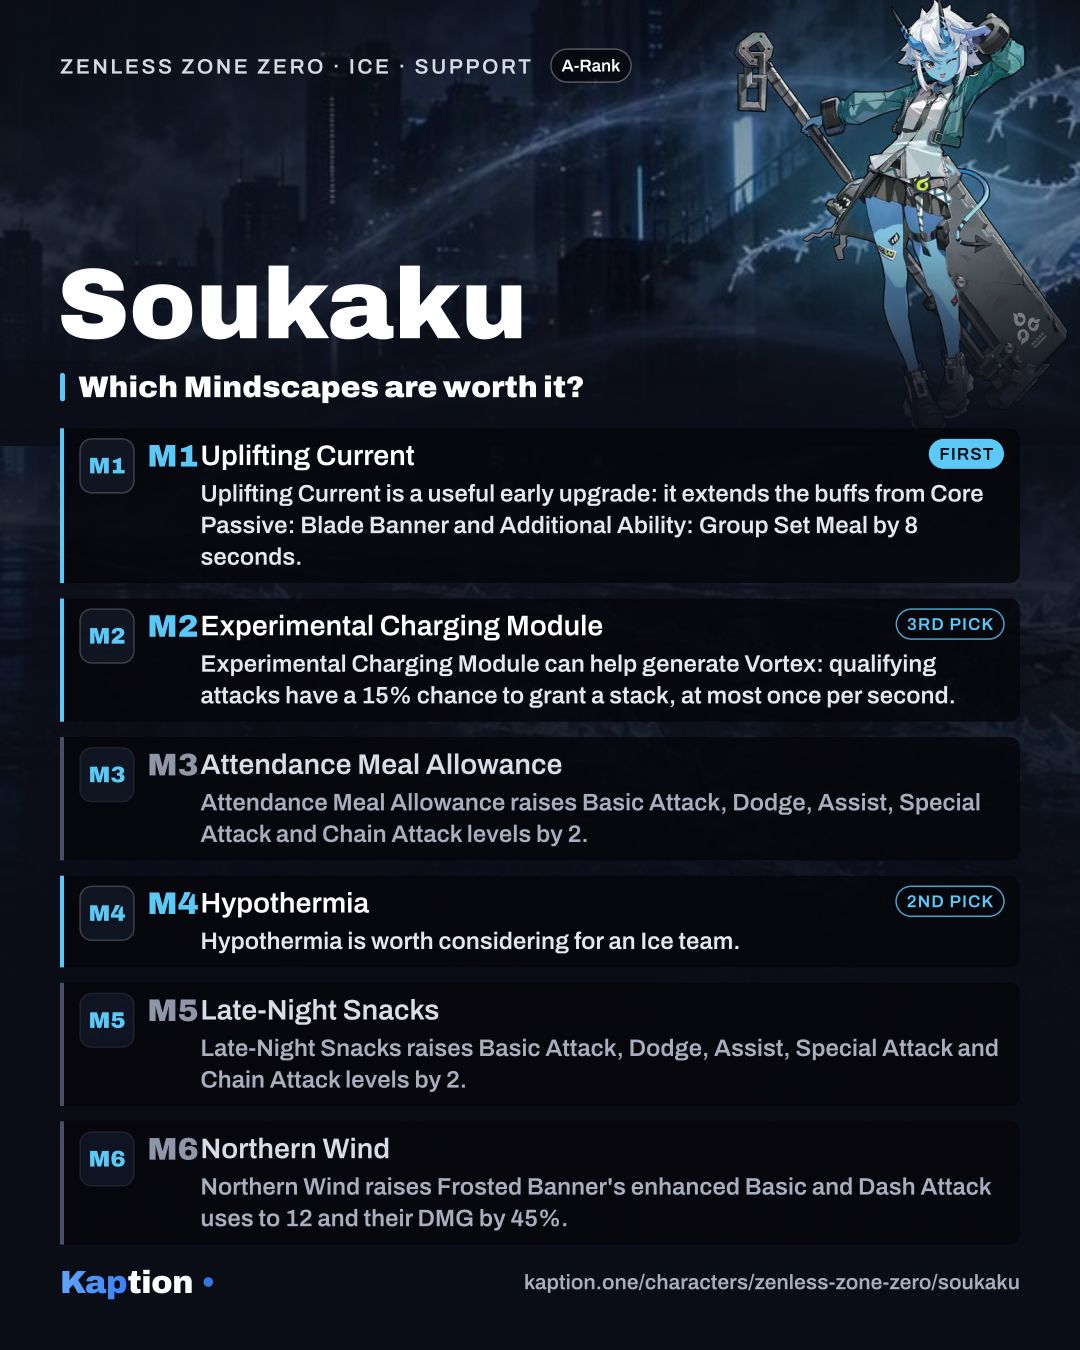
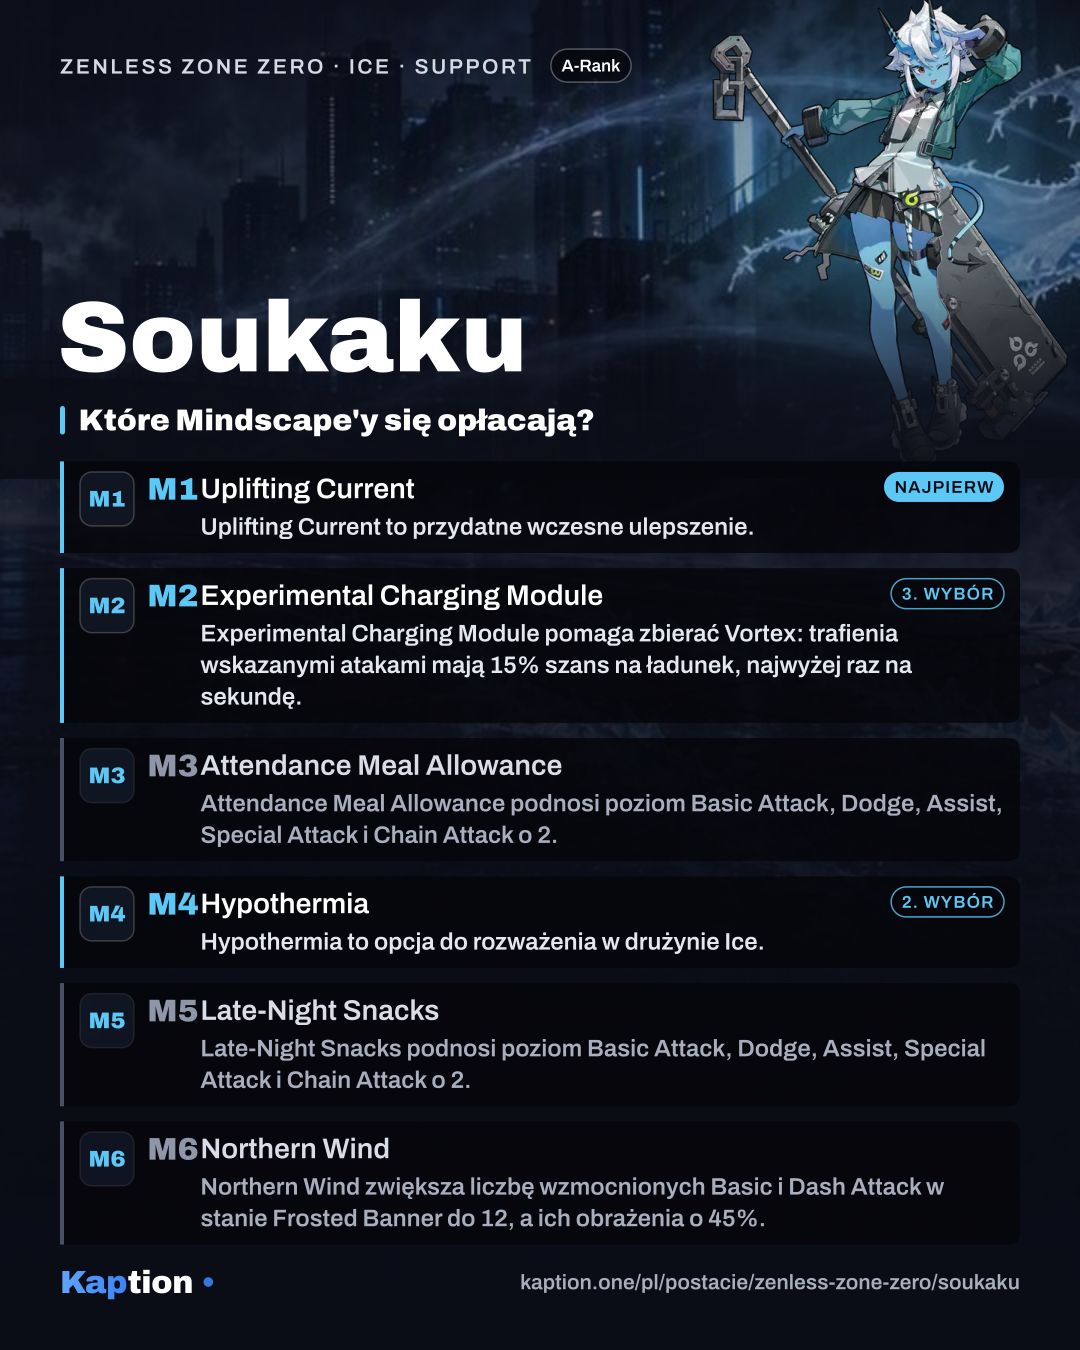
Uplifting Current is a useful early upgrade: it extends the buffs from Core Passive: Blade Banner and Additional Ability: Group Set Meal by 8 seconds. That gives you more time to use the buffs before refreshing them.
Hypothermia (M4) is worth considering for an Ice team. Fly the Flag reduces a hit target's Ice RES by 10% for 8 seconds, so pay attention to the shorter duration when switching to an Ice damage dealer. Experimental Charging Module can help generate Vortex: qualifying attacks have a 15% chance to grant a stack, at most once per second.
Northern Wind is an option if you spend time attacking with Soukaku in Frosted Banner. It raises the number of enhanced Basic and Dash Attacks to 12 and their DMG by 45%. Attendance Meal Allowance and Late-Night Snacks add skill levels, but you can treat them as lower priorities for a buff-focused build.
Teams
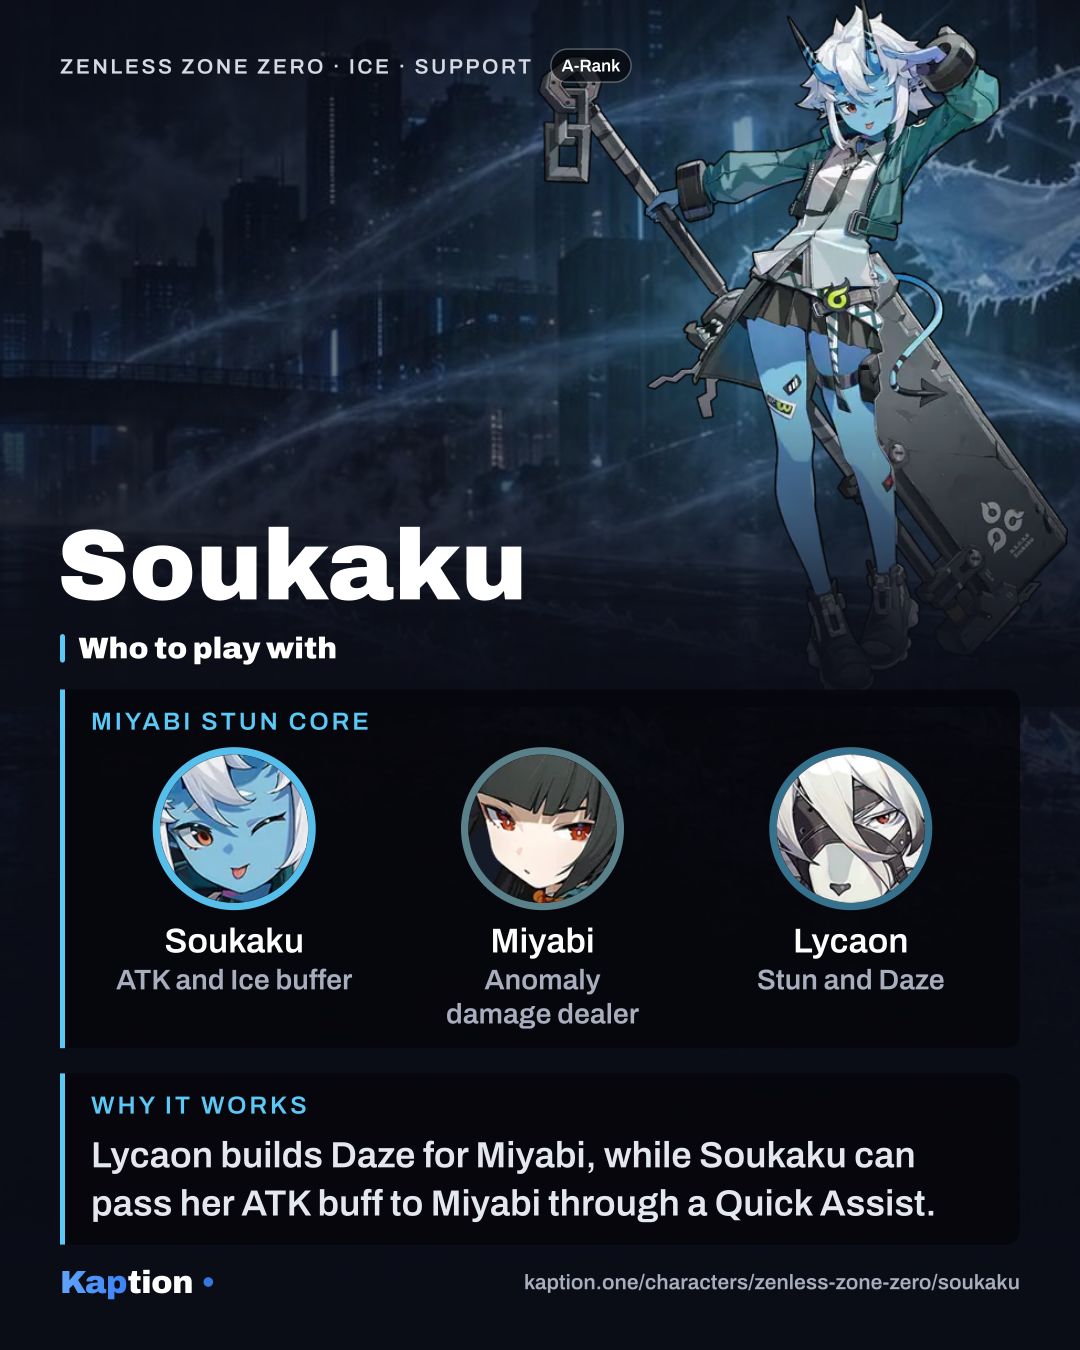
Ellen and Lycaon make a straightforward Ice pairing with Soukaku. Ellen is an Ice Attack character who can receive the ATK buff, while Lycaon brings the Stun specialty. Both share Soukaku's Attribute, enabling her additional ability, and both can benefit from its Ice DMG increase.
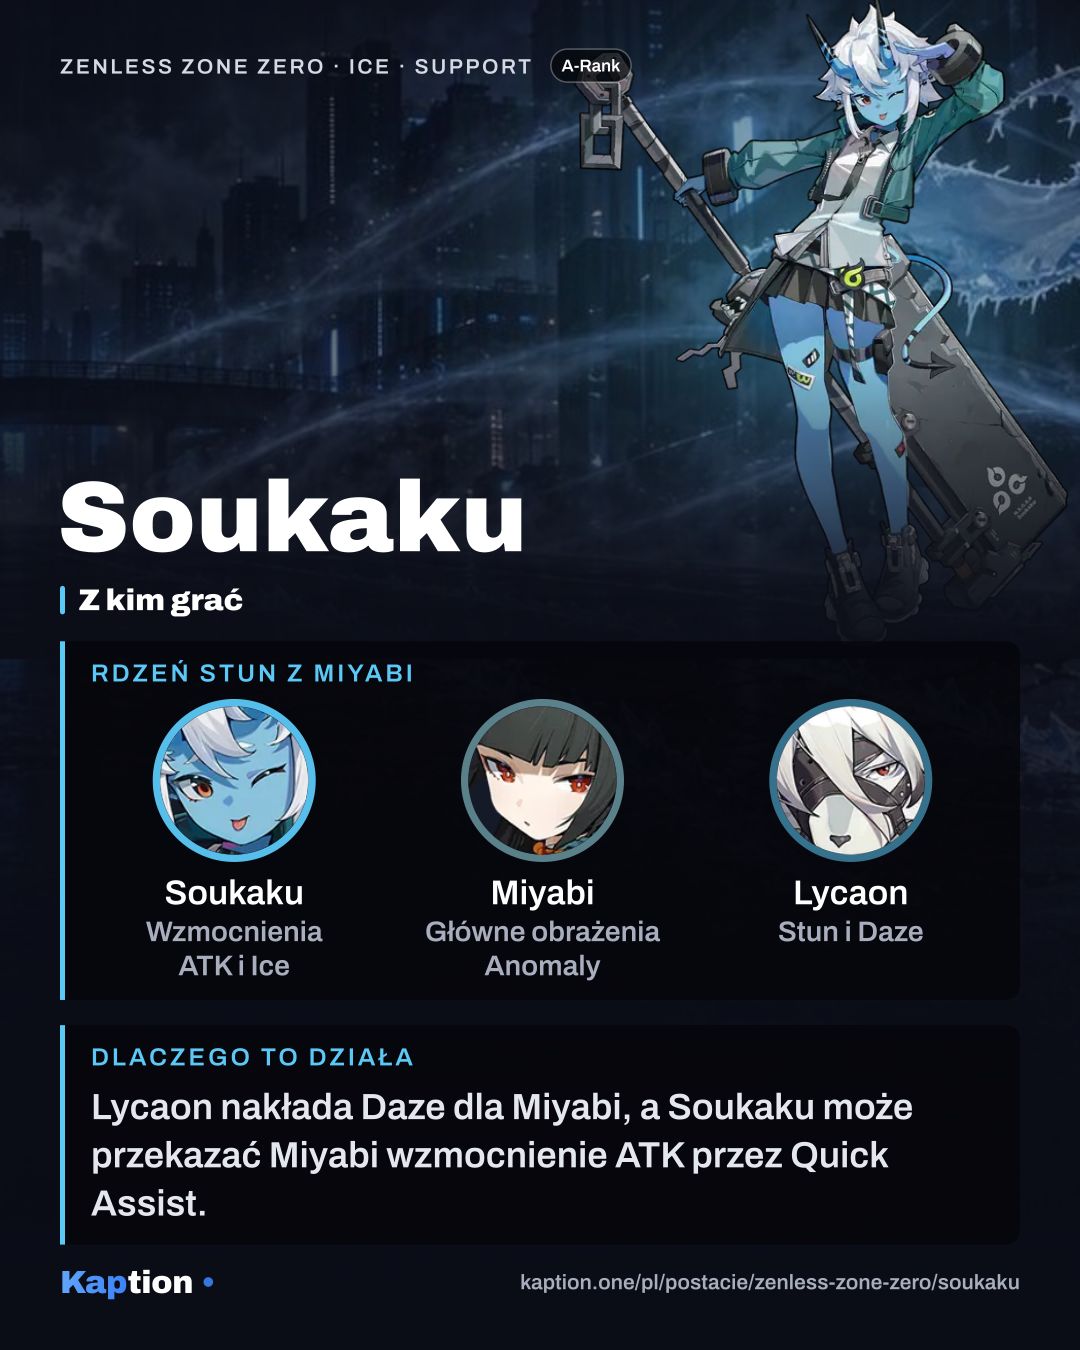
Miyabi and Lycaon are another option. Miyabi shares Soukaku's faction, while Lycaon shares her Ice Attribute. Miyabi's Attribute is Frost, so do not assume that Soukaku's Ice DMG bonus also boosts Frost DMG. The transferable ATK buff remains relevant when you switch into her.
In either team, aim Fly the Flag at an enemy so it triggers Quick Assist, then bring in the character you want to receive the ATK buff. Soukaku can also use her Defensive Assist to parry when a squadmate is about to be attacked.
Common mistakes
Do not switch out after Fly the Flag without checking who receives the Quick Assist. The incoming character gets the transferable ATK buff, so switching to the wrong teammate wastes part of its useful time.
Do not assume every flag consumes Vortex. You need all three stacks when you use Fly the Flag for the doubled ATK increase, Frosted Banner and the conditional Ice DMG buff. A Chain Attack follows with Fly the Flag, so keep its automatic follow-up in mind when counting stacks.
Avoid building only for Soukaku's personal Ice DMG if you want her to support the squad. Percent ATK and Energy Regen fit that job, while set effects such as Moonlight Lullaby reward using skills already in her rotation.