





























Guide
How the kit works
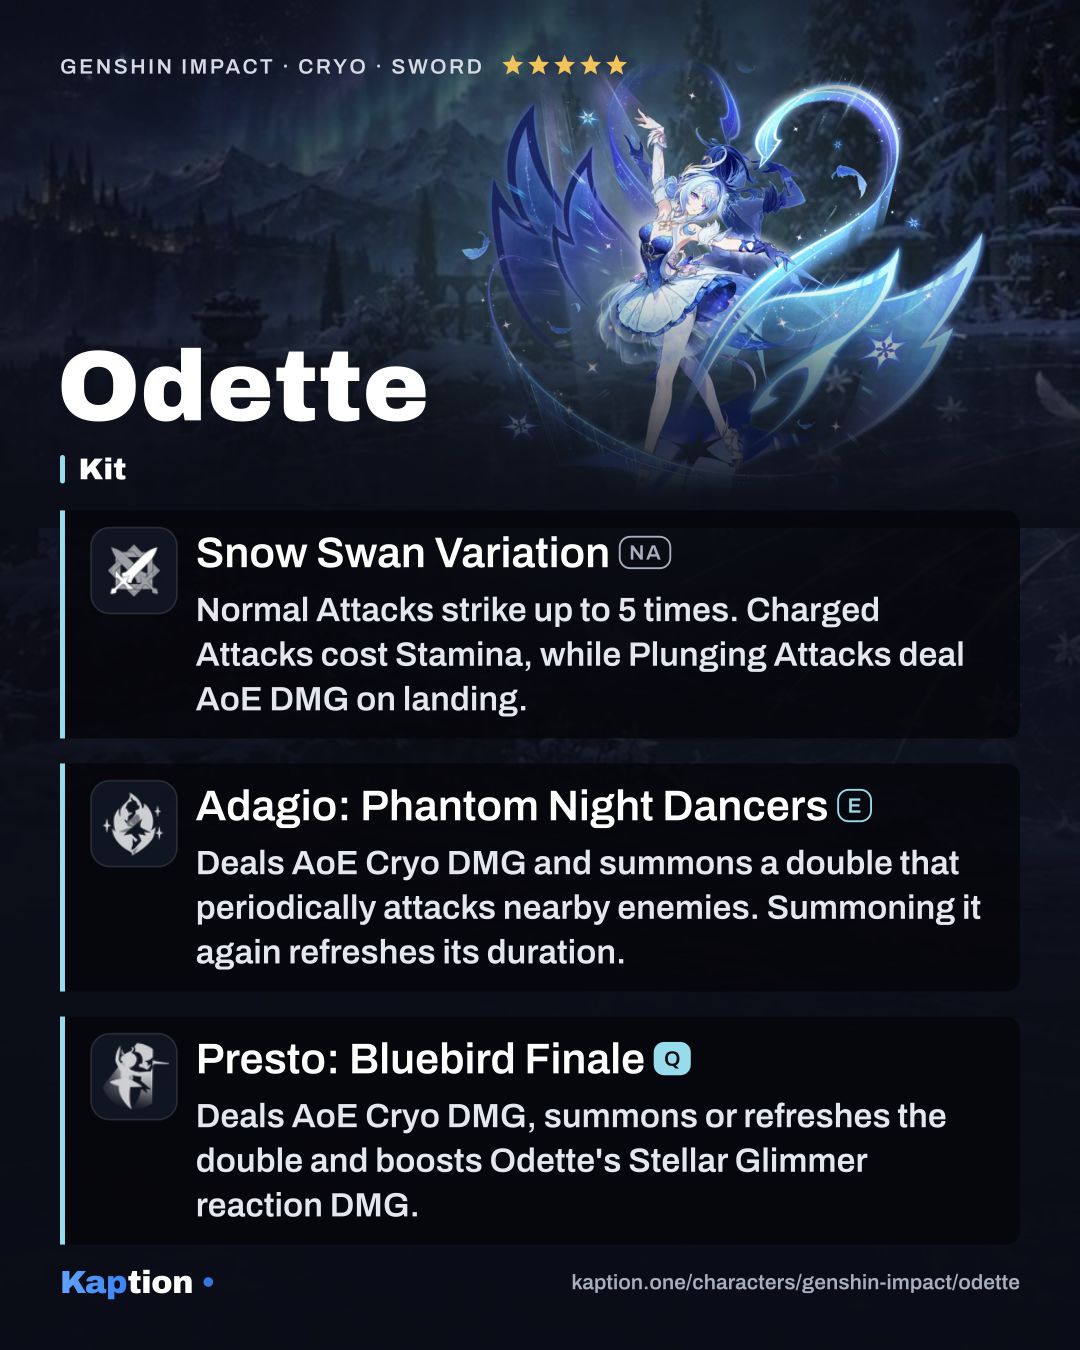
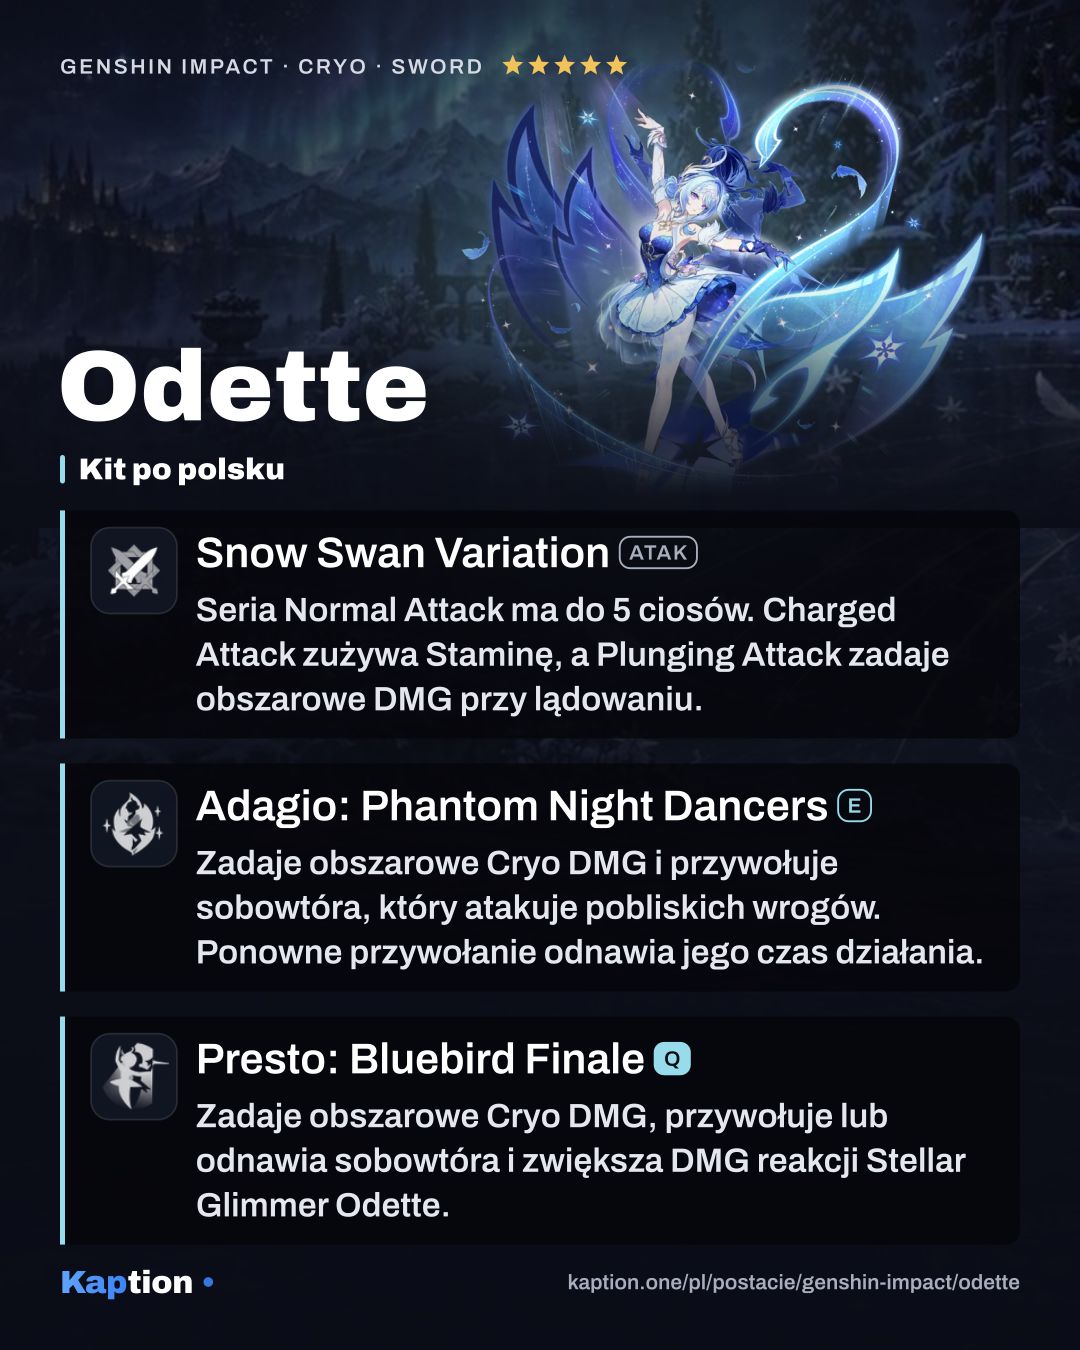
Start with Adagio: Phantom Night Dancers. It deals AoE Cryo DMG and summons a Solo Dance Double, which alternates between attacks against nearby opponents. If a Double is already present, the Skill summons it again and resets its duration. Summoning the Double also gives Odette 4 stacks of Marvelous Splendor.
For 6 seconds after the Skill, it changes into Adagio: Coda at Dawn's Tolling (E). Use the special Skill during that window for a duet that deals AoE Cryo DMG over time. At the end, it deals another instance of AoE Cryo DMG counted as Stellar-Conduct or Stellar Swirl damage.
Use Presto: Bluebird Finale for multiple instances of AoE Cryo DMG and Snow Swan's Dream. The Burst also summons the Double or brings an existing one to Odette and refreshes its duration. It opens another 6-second window for the special Skill, so you can use the duet after either the Skill or Burst.
Inside a Polestar Field, Odette enters Radiance: Stellar-Conduct. A nearby party member triggering Stellar Swirl puts her in Radiance: Stellar Swirl for 8 seconds. Her kit does not name a source for Polestar Field, so check your team setup rather than assuming she creates one.
Build and why
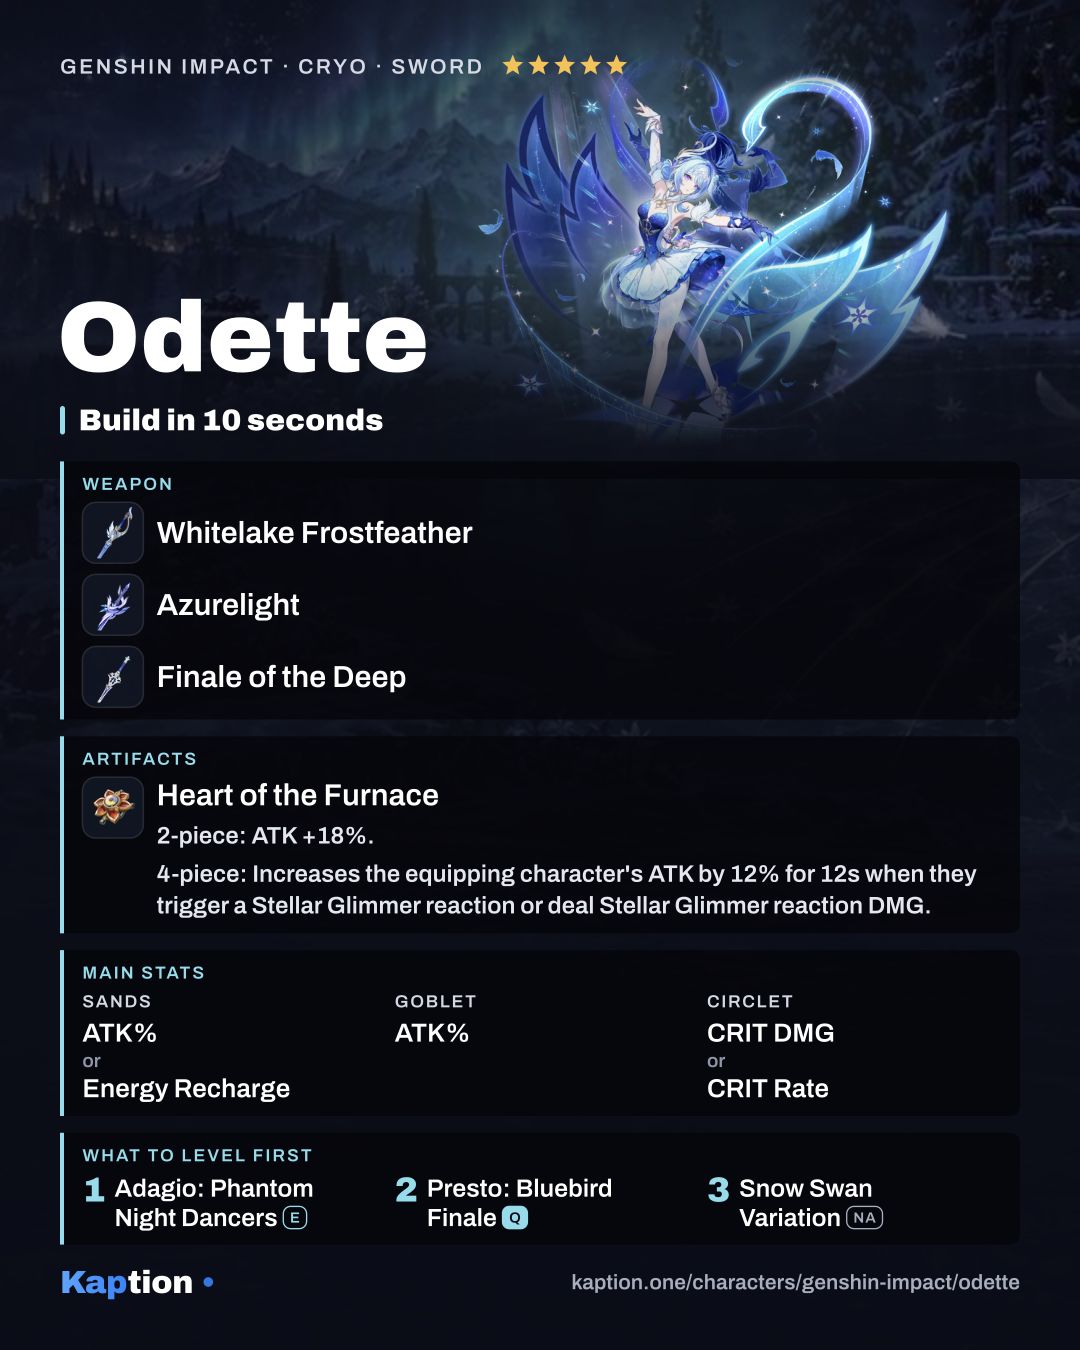
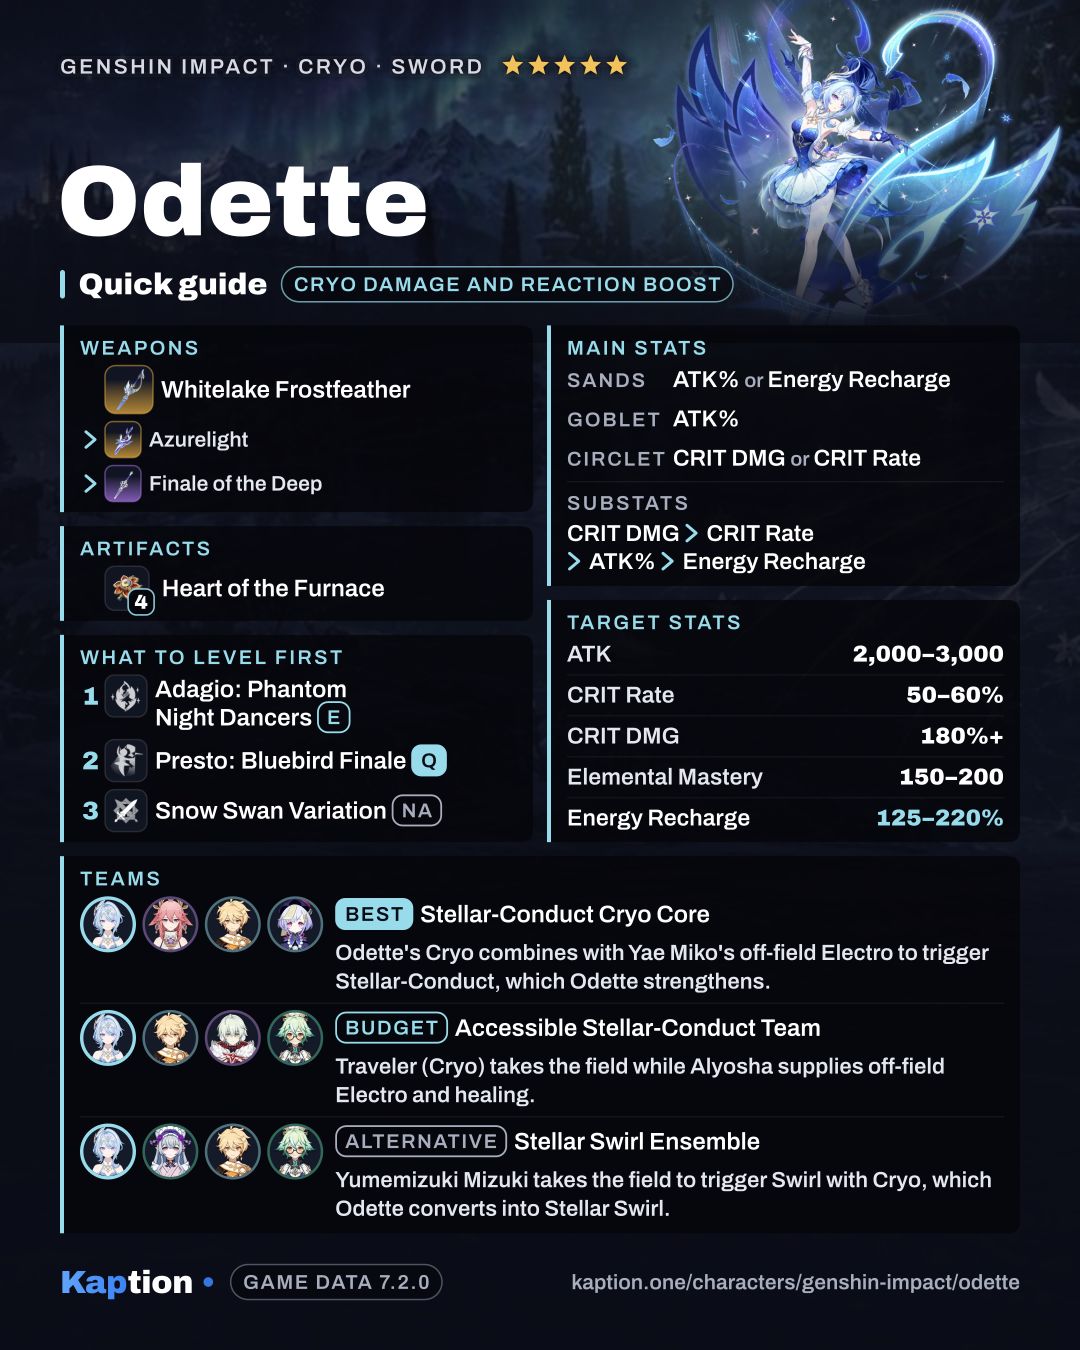
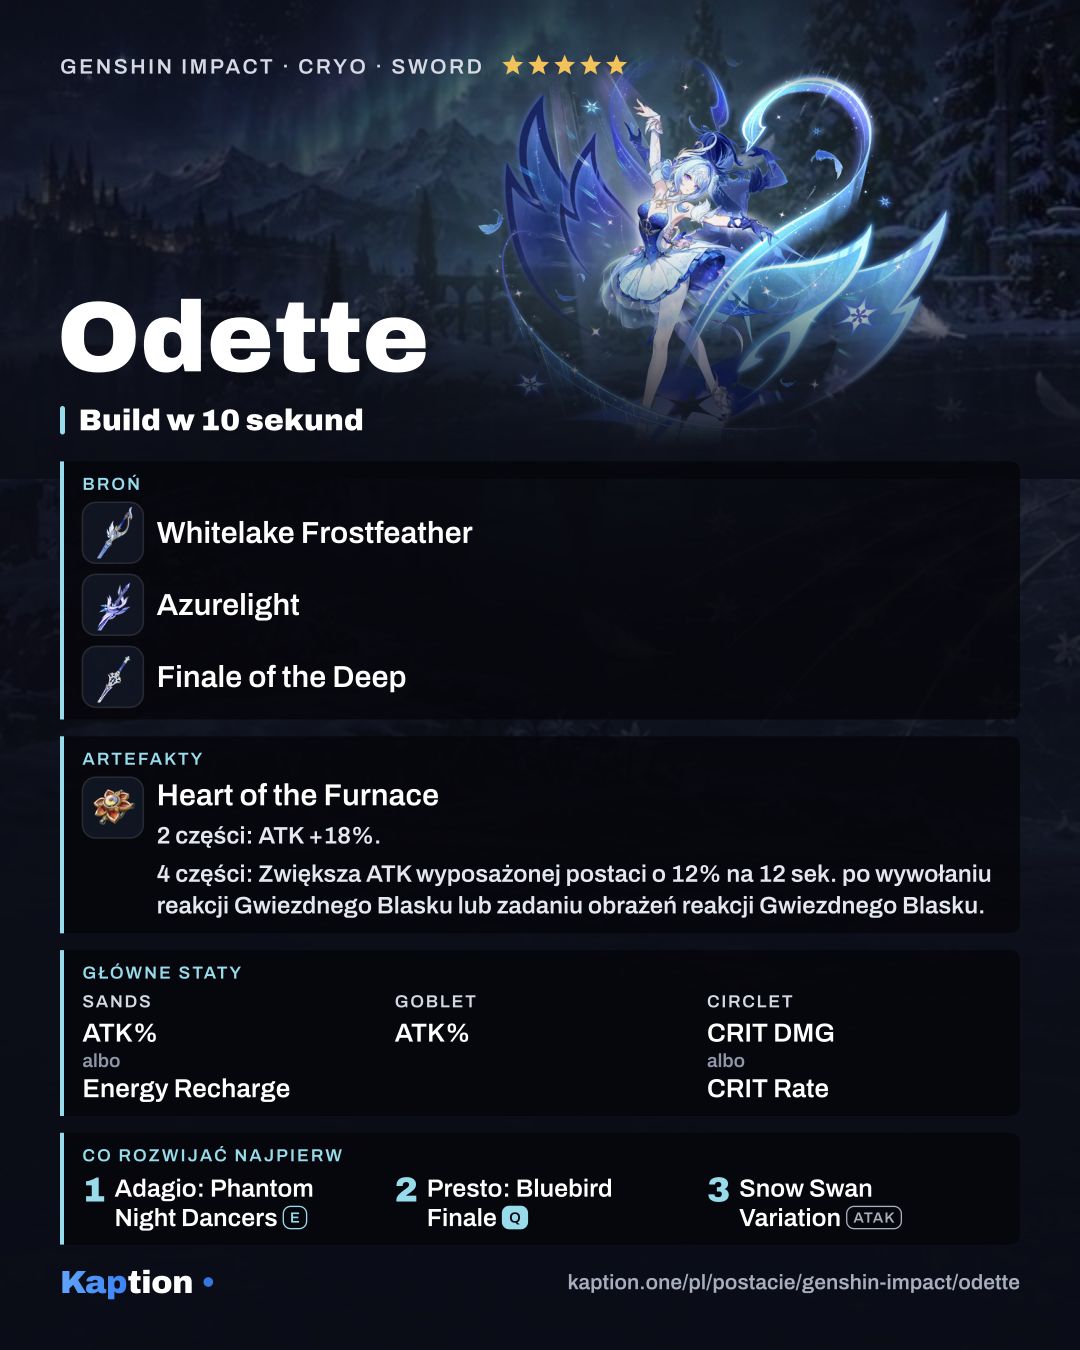
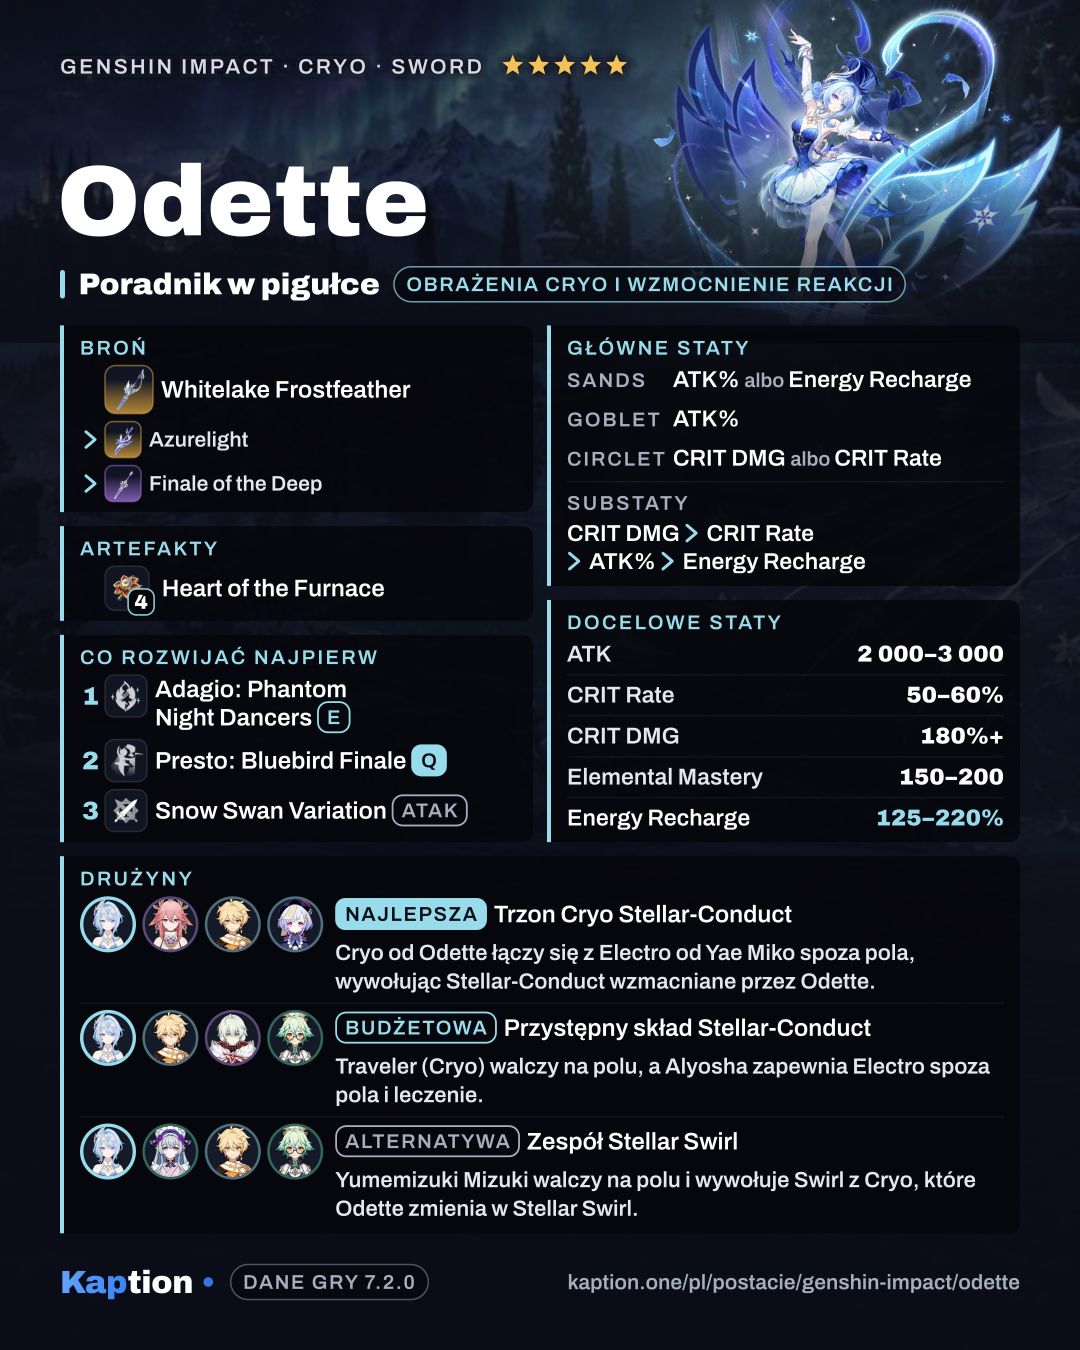
Use four pieces of Heart of the Furnace. Its two-piece effect gives 18% ATK; the four-piece effect gives the wearer 12% ATK for 12 seconds after they trigger or deal Stellar Glimmer reaction damage. It also increases nearby party members' Stellar Glimmer reaction damage by 50%. Its effects can trigger off-field, but the damage bonuses from multiple copies of the set do not stack.
For a Stellar-Conduct setup, four pieces of Disenchantment in Deep Shadow are an alternative: they increase Stellar-Conduct damage by 40% and give the wearer's attacks 16% CRIT Rate against opponents affected by Superconduct or Stellar-Conduct. A Day Carved From Rising Winds offers ATK after a hit and, if the wearer has completed Witch's Homework, another 20% CRIT Rate. For Stellar Swirl, consider Scarlet Proof instead.
Choose ATK Percentage or Energy Recharge on the sands, ATK Percentage on the goblet, and CRIT DMG or CRIT Rate on the circlet. For substats, look for CRIT DMG, CRIT Rate, ATK Percentage and Energy Recharge in that order. ATK helps both passive reaction bonuses, while Energy Recharge helps you use the Burst.
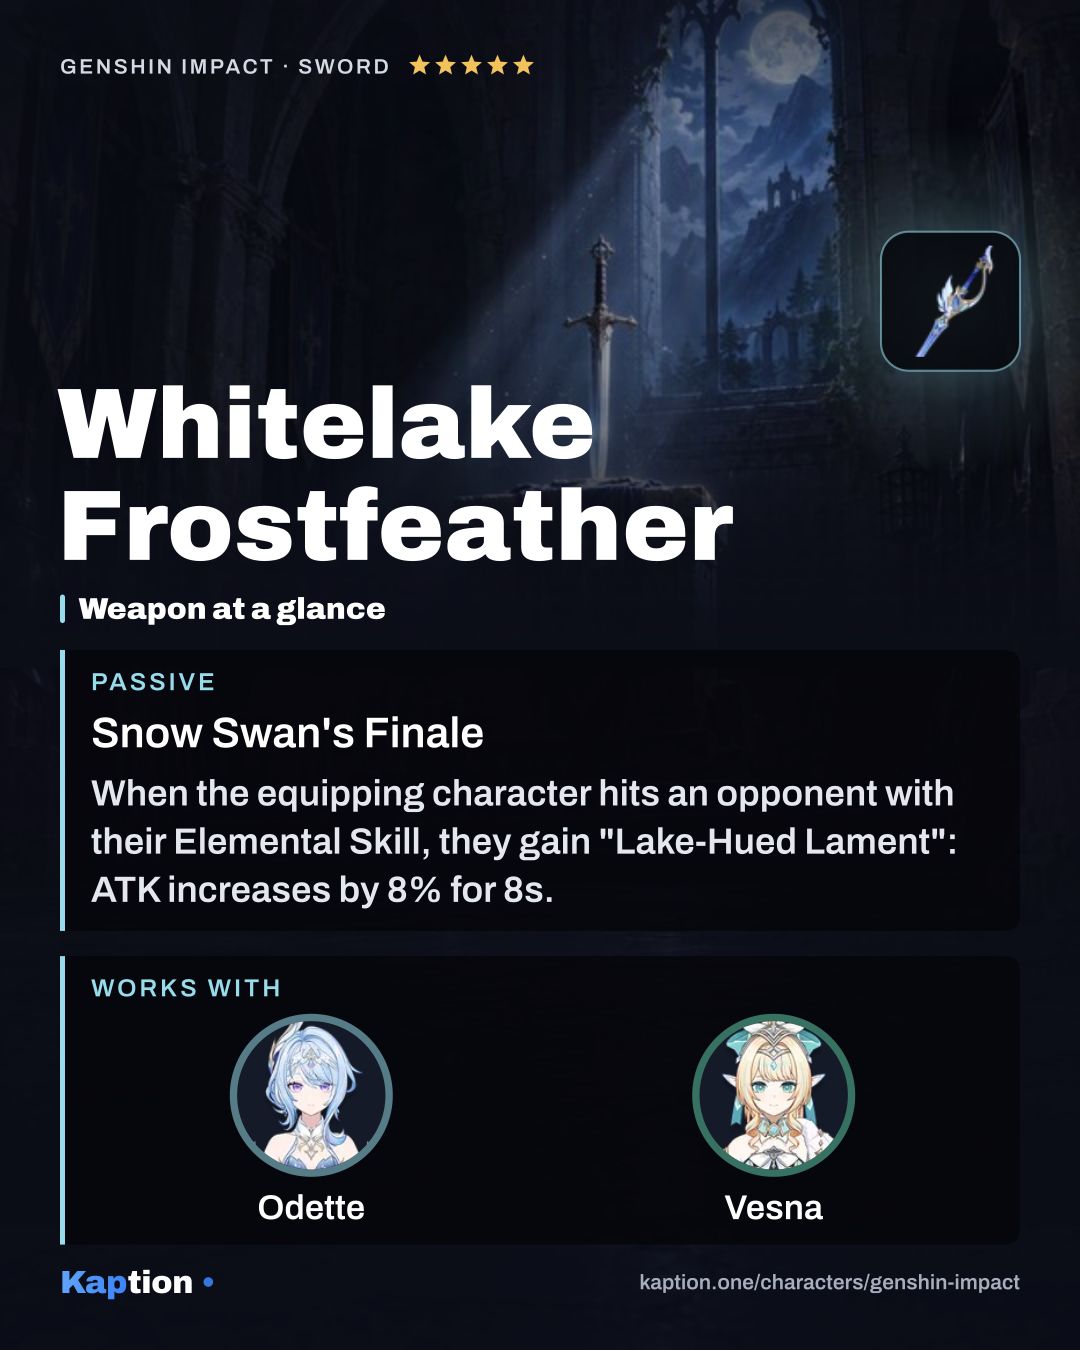
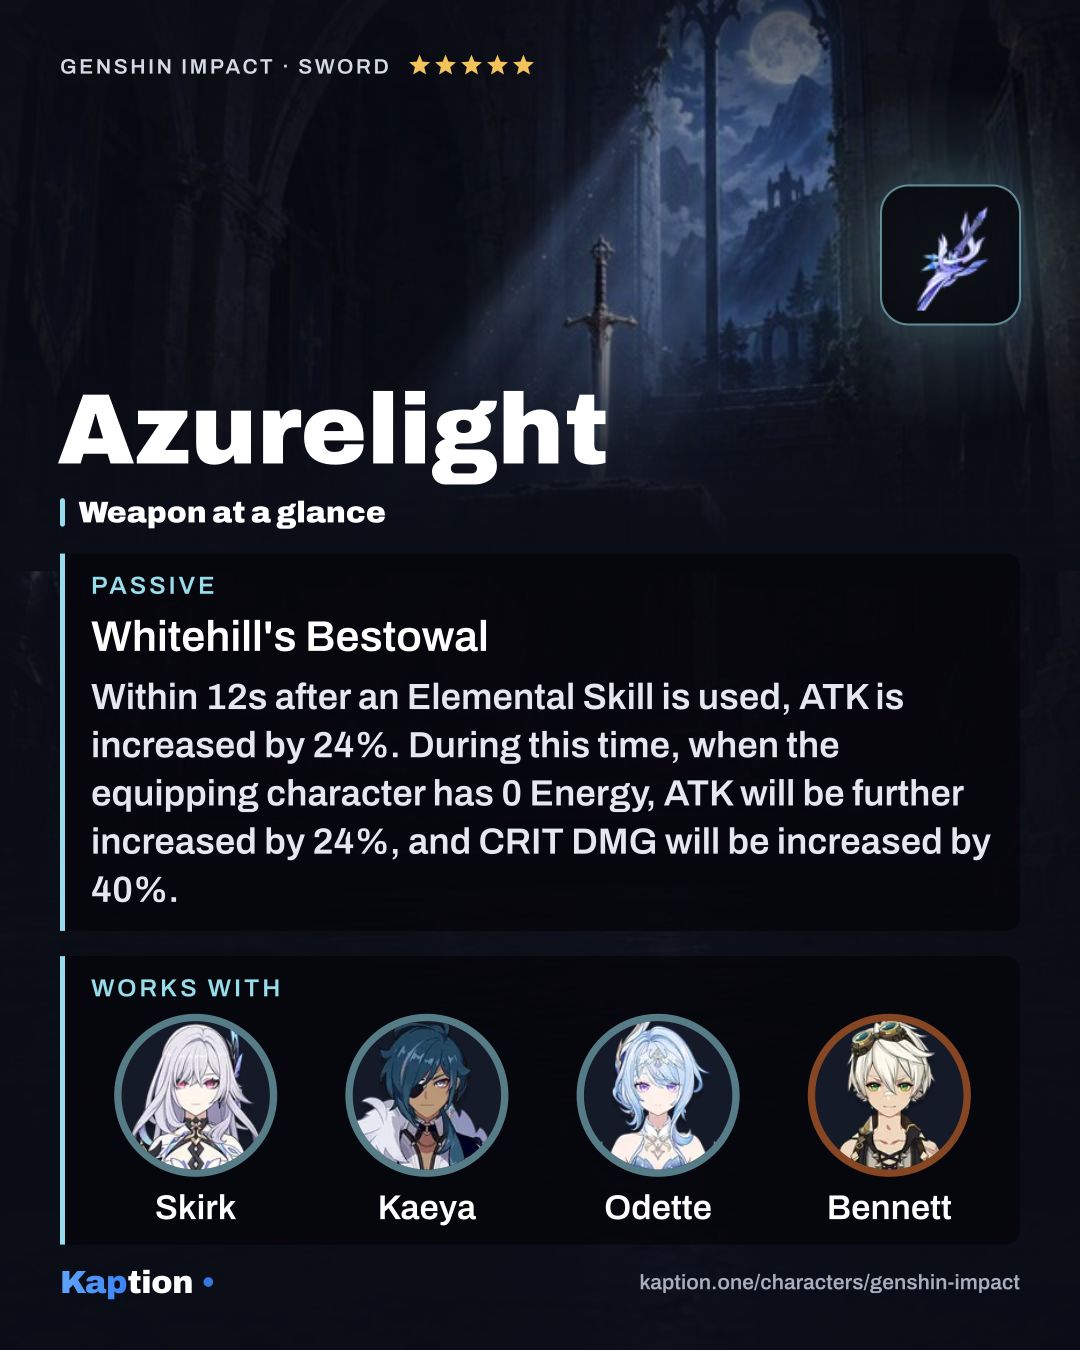
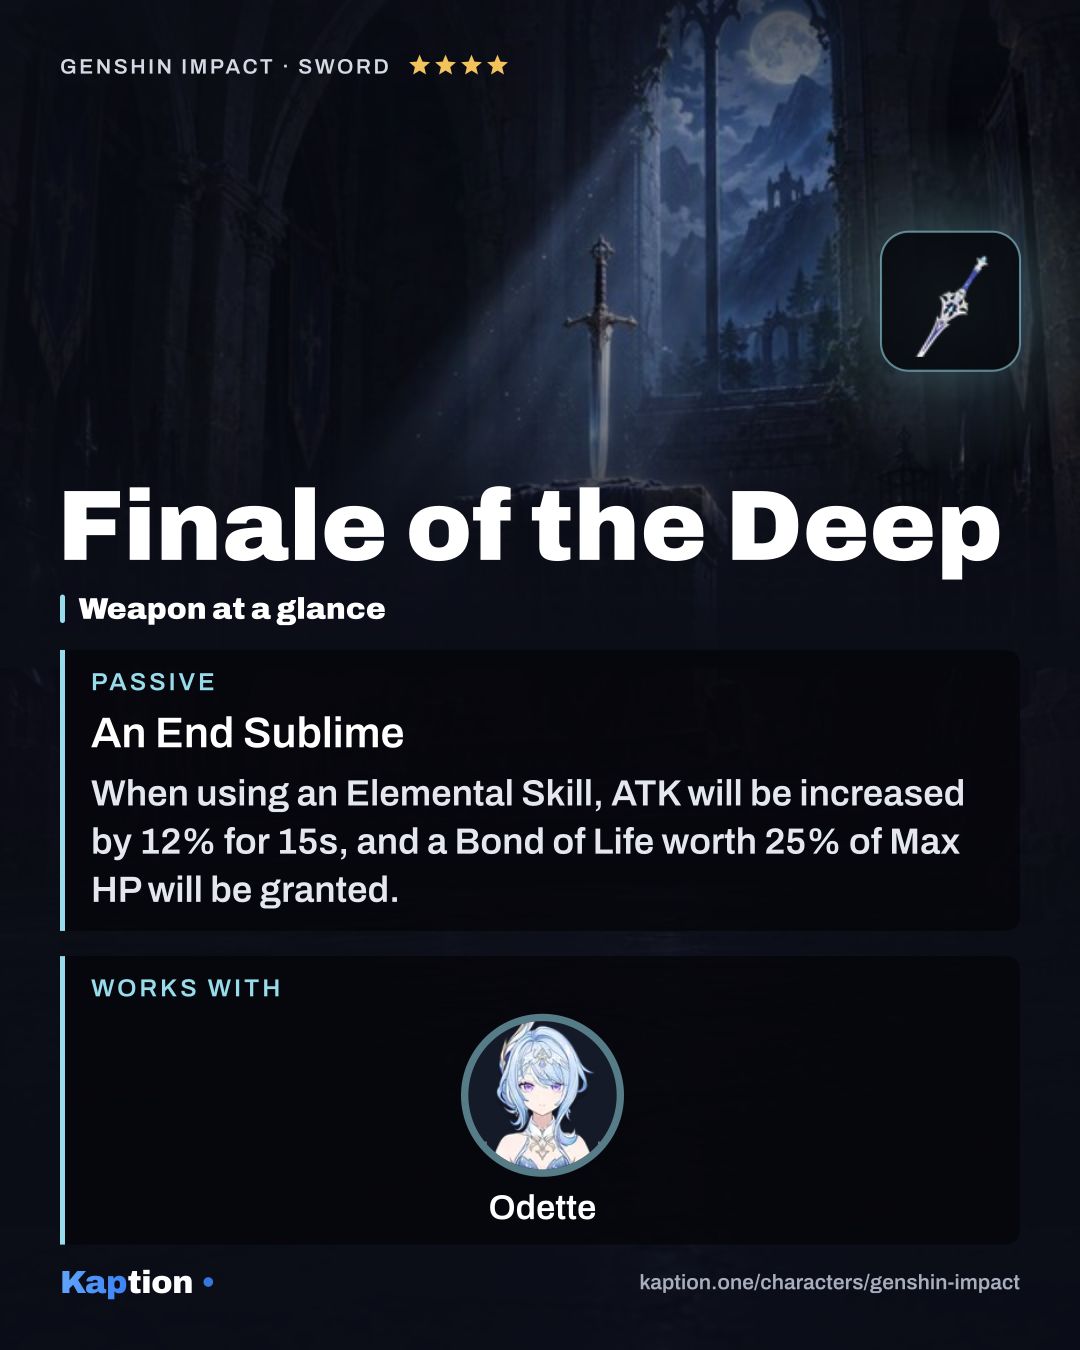
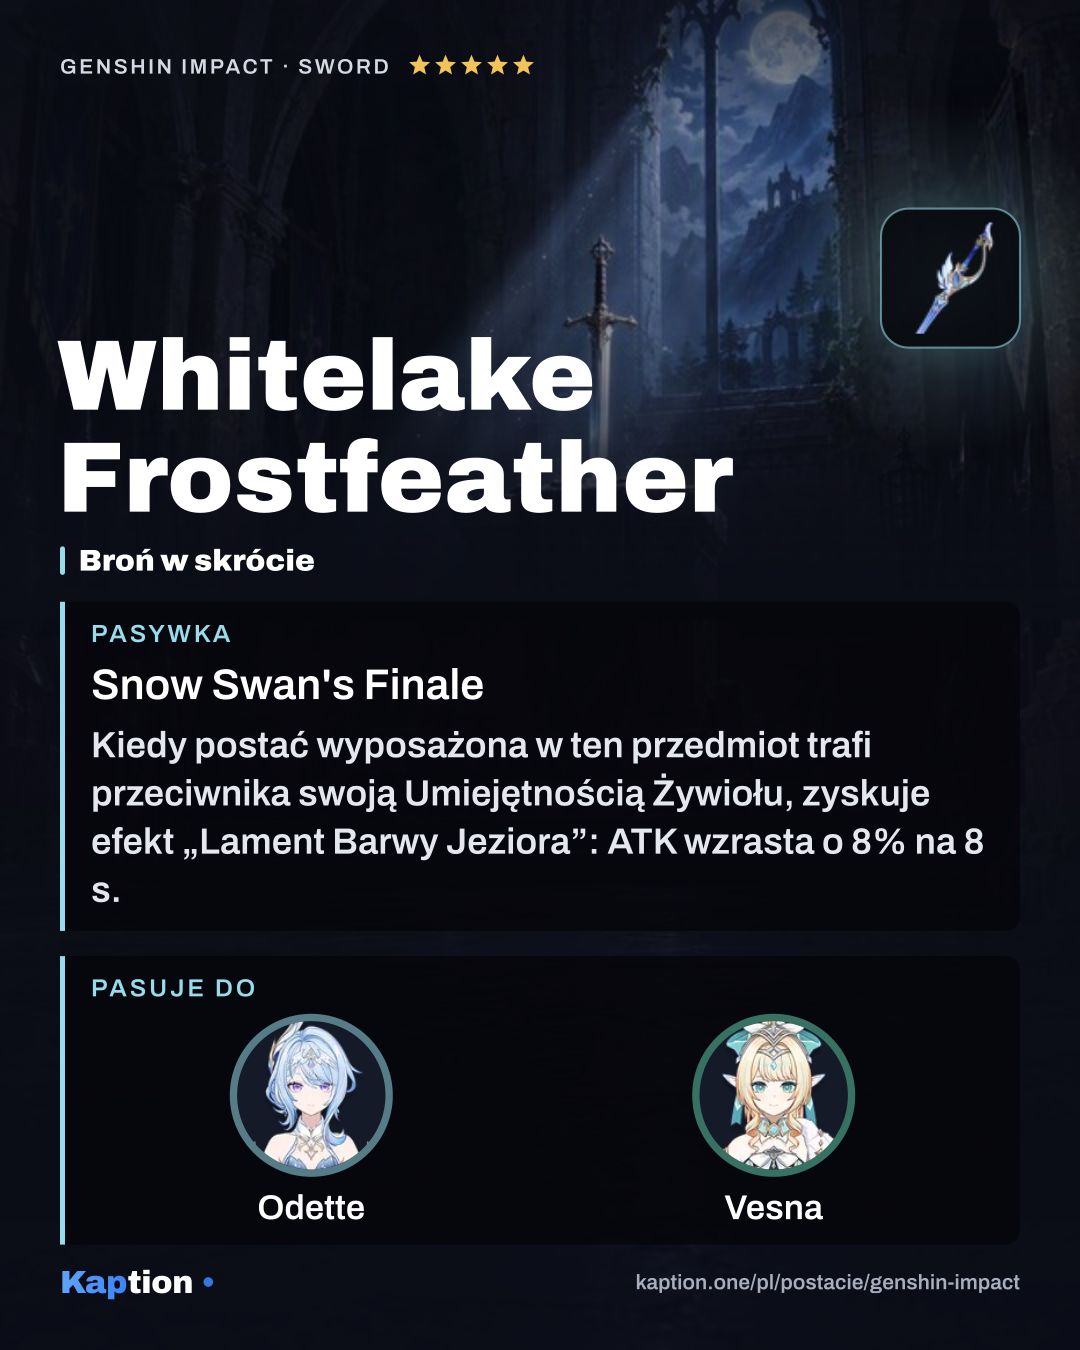
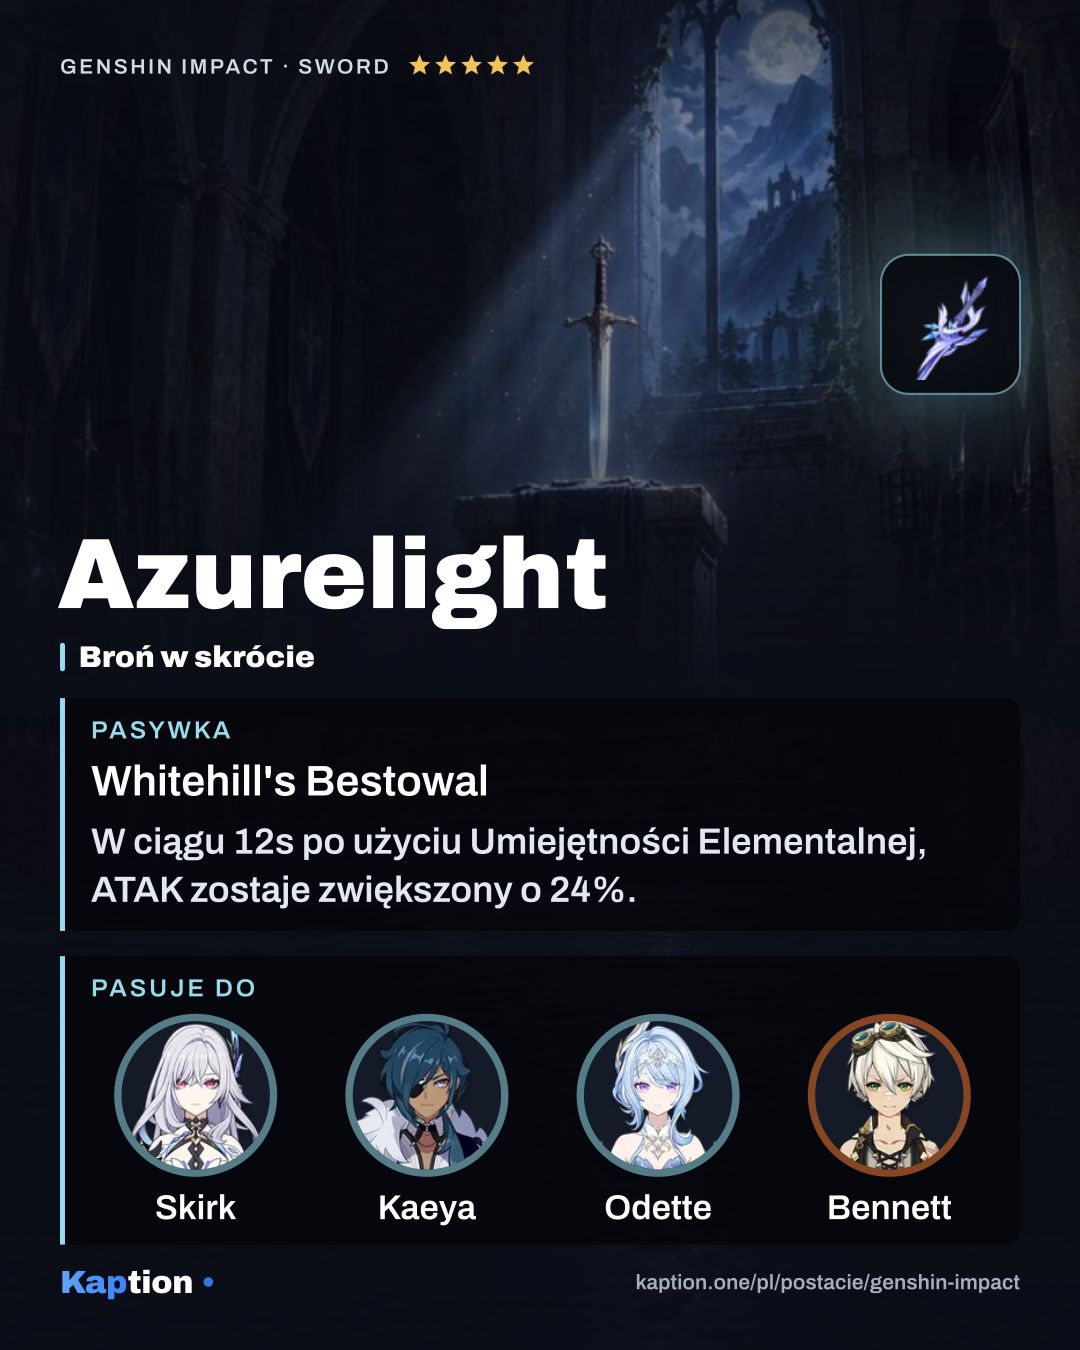
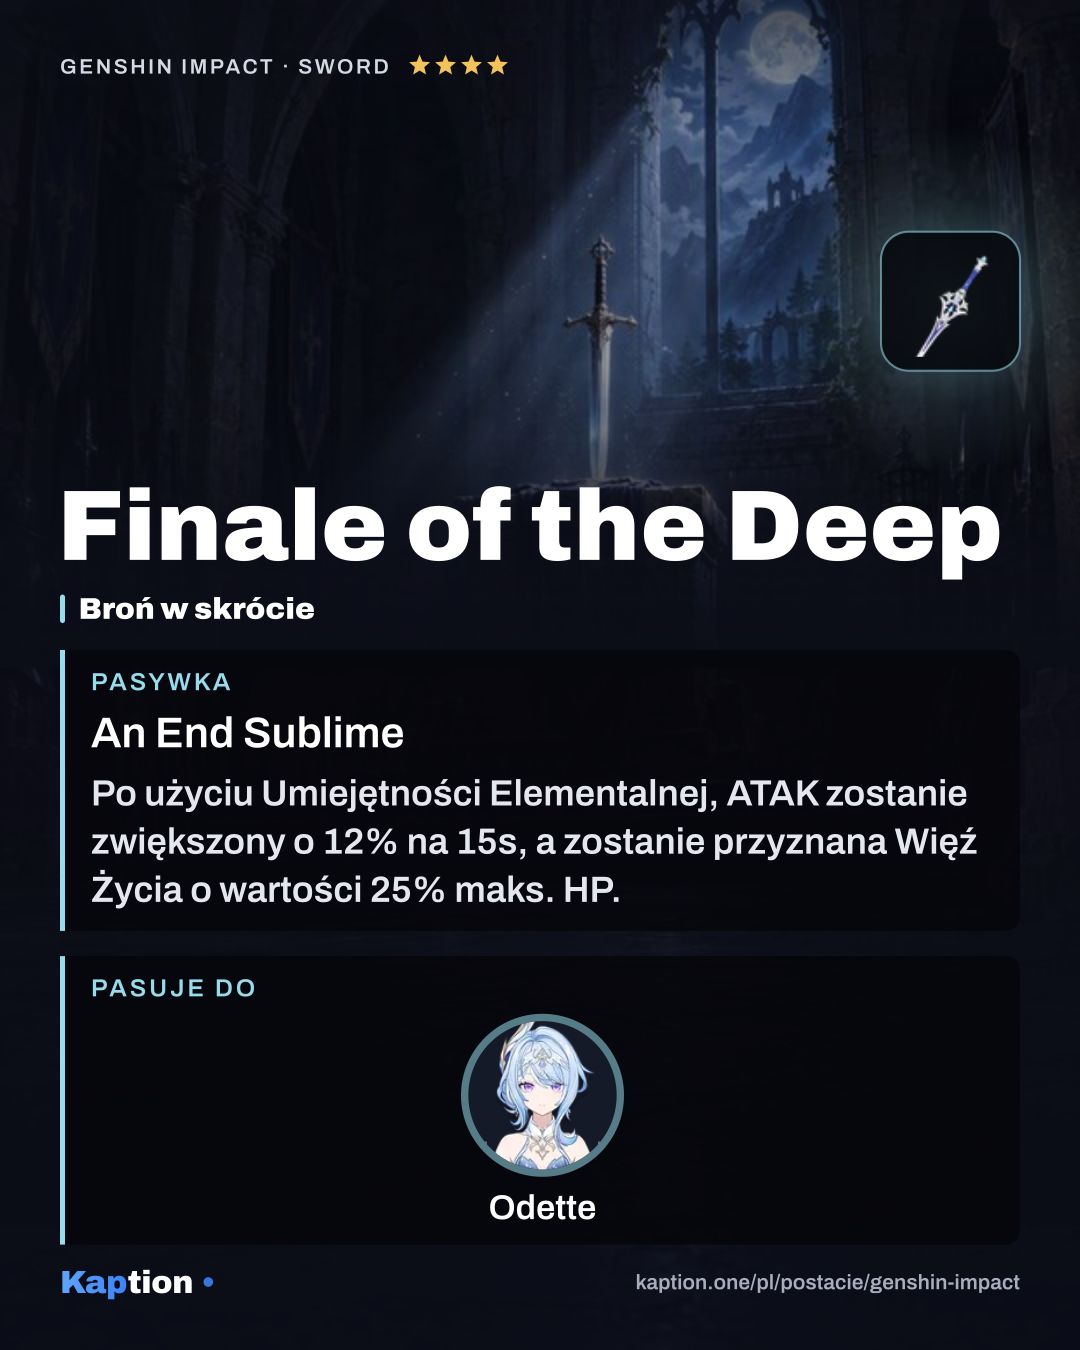
Whitelake Frostfeather is the first weapon choice. Skill hits build ATK stacks; at three stacks, it increases Odette's Stellar Glimmer reaction CRIT DMG by 50% and can restore Energy. Azurelight is next: using a Skill grants ATK, with more ATK and CRIT DMG while the wielder has 0 Energy. Finale of the Deep is another option, giving ATK after Skill use and more ATK when its Bond of Life is cleared.
Leveling priority
A suggested order is Adagio: Phantom Night Dancers, then Presto: Bluebird Finale, then Snow Swan Variation (NA). The Skill covers the Double and duet damage, while the Burst adds Cryo damage and supports Odette's Stellar Glimmer damage. Normal Attacks are less central to this setup.
For maximum ascension, gather 420,000 Mora, 168 Frostfairy Flower, 1 Shivada Jade Sliver, 9 Shivada Jade Fragment, 9 Shivada Jade Chunk, 6 Shivada Jade Gemstone, 18 Ethereal Glimmershard, 30 Ethereal Crystal, 36 Ethereal Crystalscale Stone and 46 Unscorched Blossom Branch.
To raise all three talents to the maximum, you need another 4,957,500 Mora, 3 Crown of Insight, 9 Teachings of Charity, 63 Guide to Charity, 114 Philosophies of Charity, 18 Ethereal Glimmershard, 66 Ethereal Crystal, 93 Ethereal Crystalscale Stone and 18 Twisted Withered Branch.
Constellations worth it
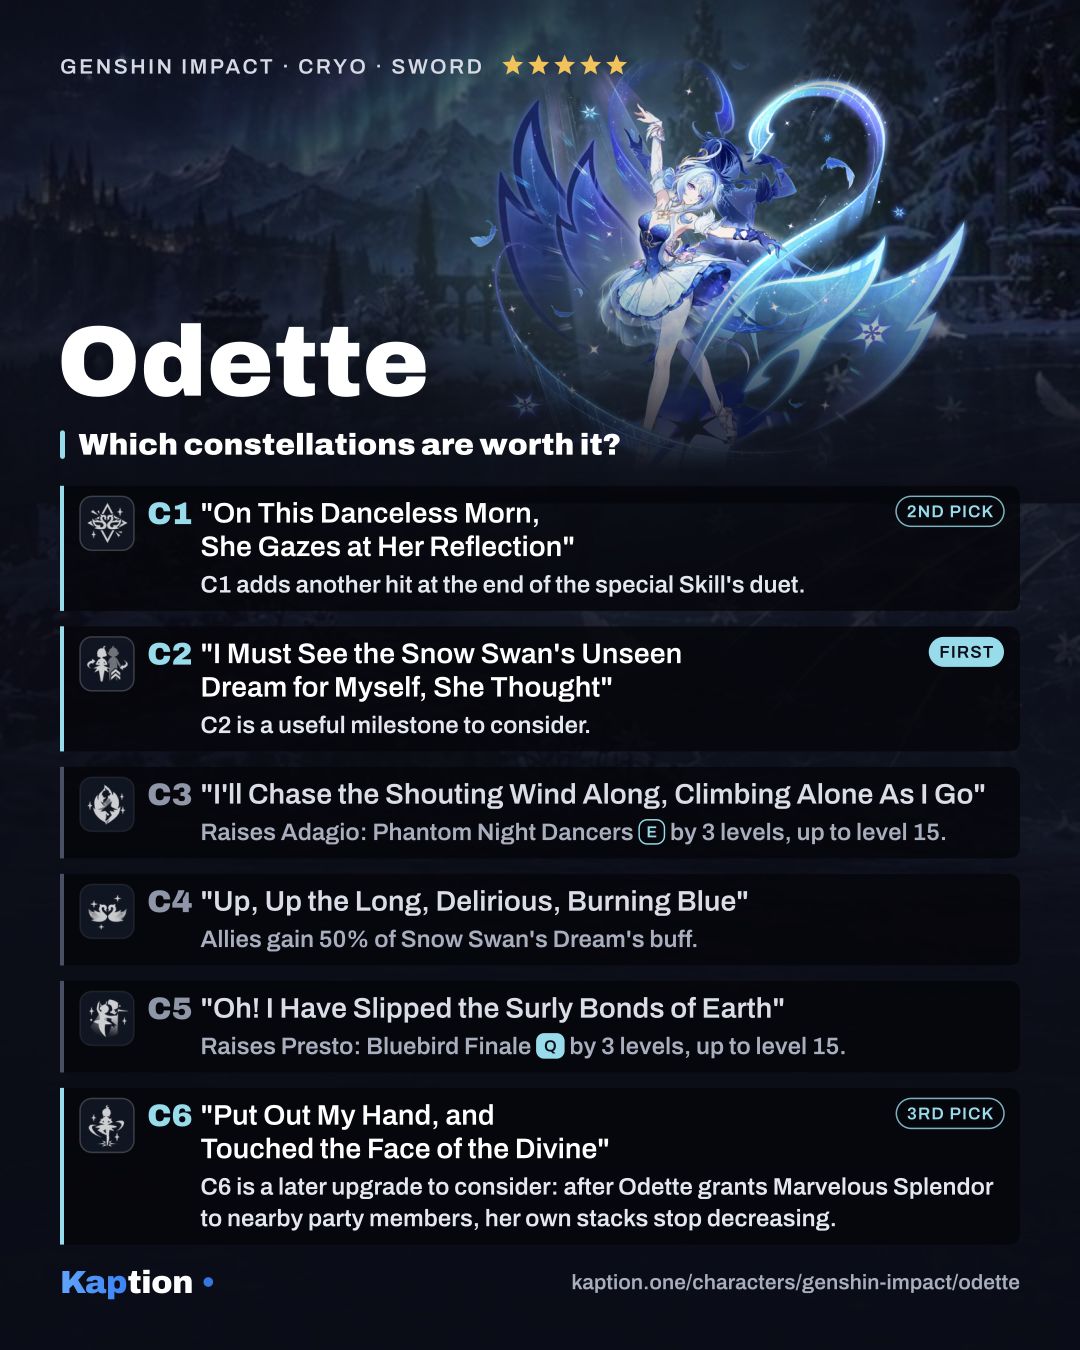
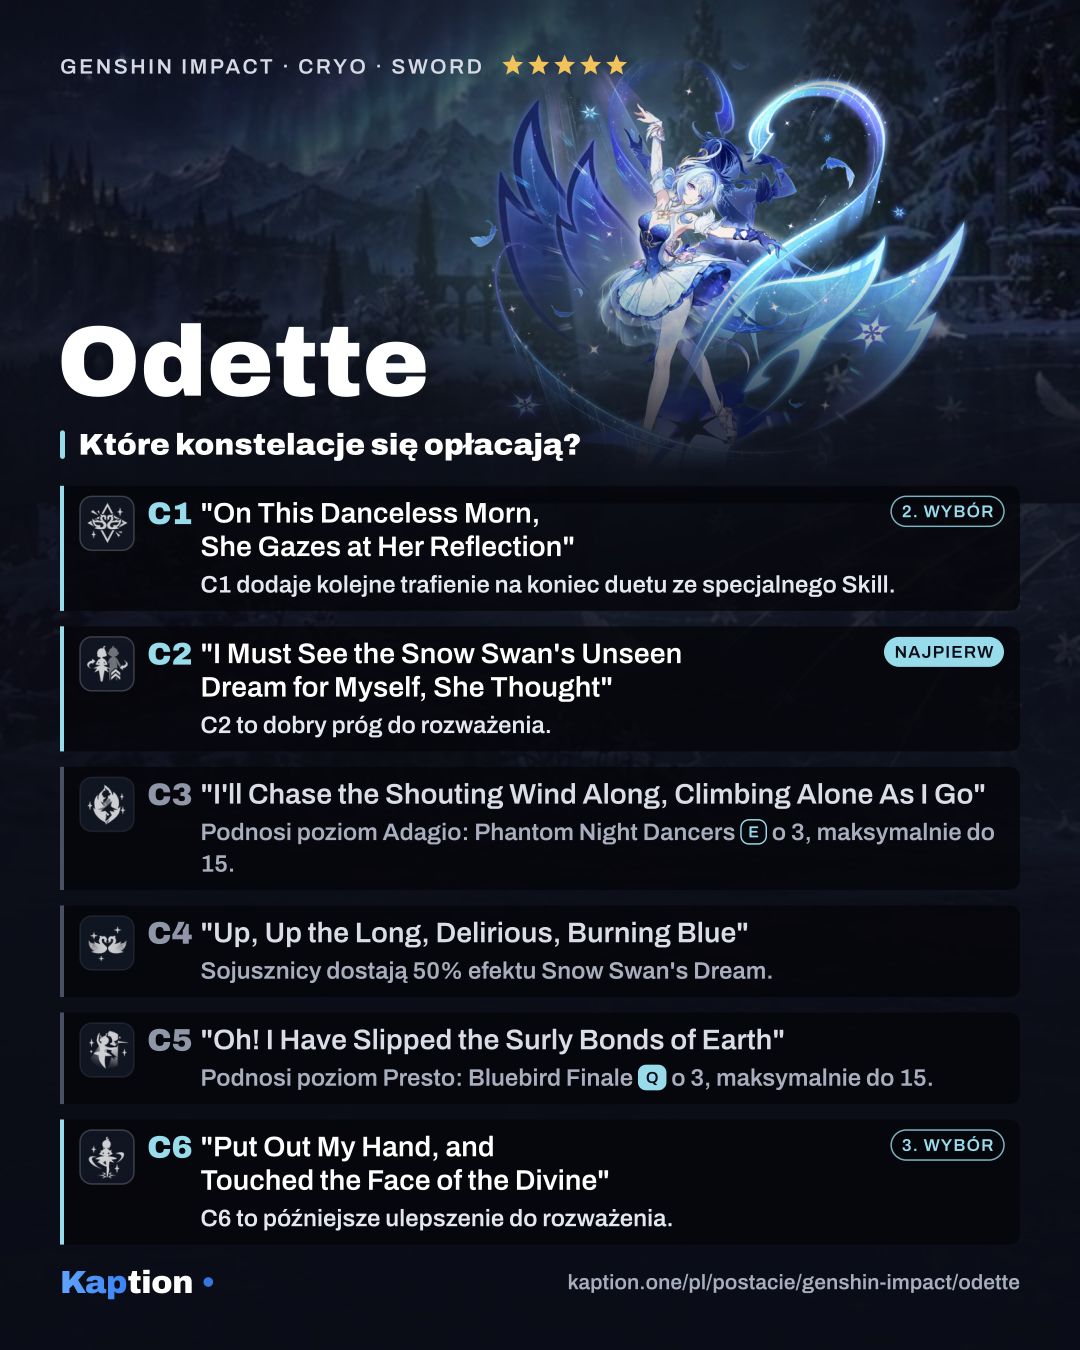
C2 is a useful milestone to consider. Each active Marvelous Splendor stack increases the character's ATK by 7%. With the Double on the field and Odette in the corresponding Radiance state, nearby opponents also lose 20% Cryo and Electro RES for Stellar-Conduct, or 20% Cryo and Anemo RES for Stellar Swirl.
C1 adds another hit at the end of the special Skill's duet. It counts as Stellar-Conduct damage at 300% of ATK in Radiance: Stellar-Conduct or without a Radiance state, and as Stellar Swirl damage at 450% of ATK in Radiance: Stellar Swirl. C1 also changes Marvelous Splendor: the summon grants 2 stacks, and stacks are removed at 2 per second while Odette is off-field.
C6 is a later upgrade to consider: after Odette grants Marvelous Splendor to nearby party members, her own stacks stop decreasing. Affected characters have their Stellar Glimmer damage elevated by 25%, with another 20% for Odette. C4 instead extends part of the Burst's effect to teammates and adds coordinated attacks. C3 and C5 are skill-level increases; you can stop before them if those increases are not your goal, though earlier constellations cannot be skipped on the way to later ones.
Teams
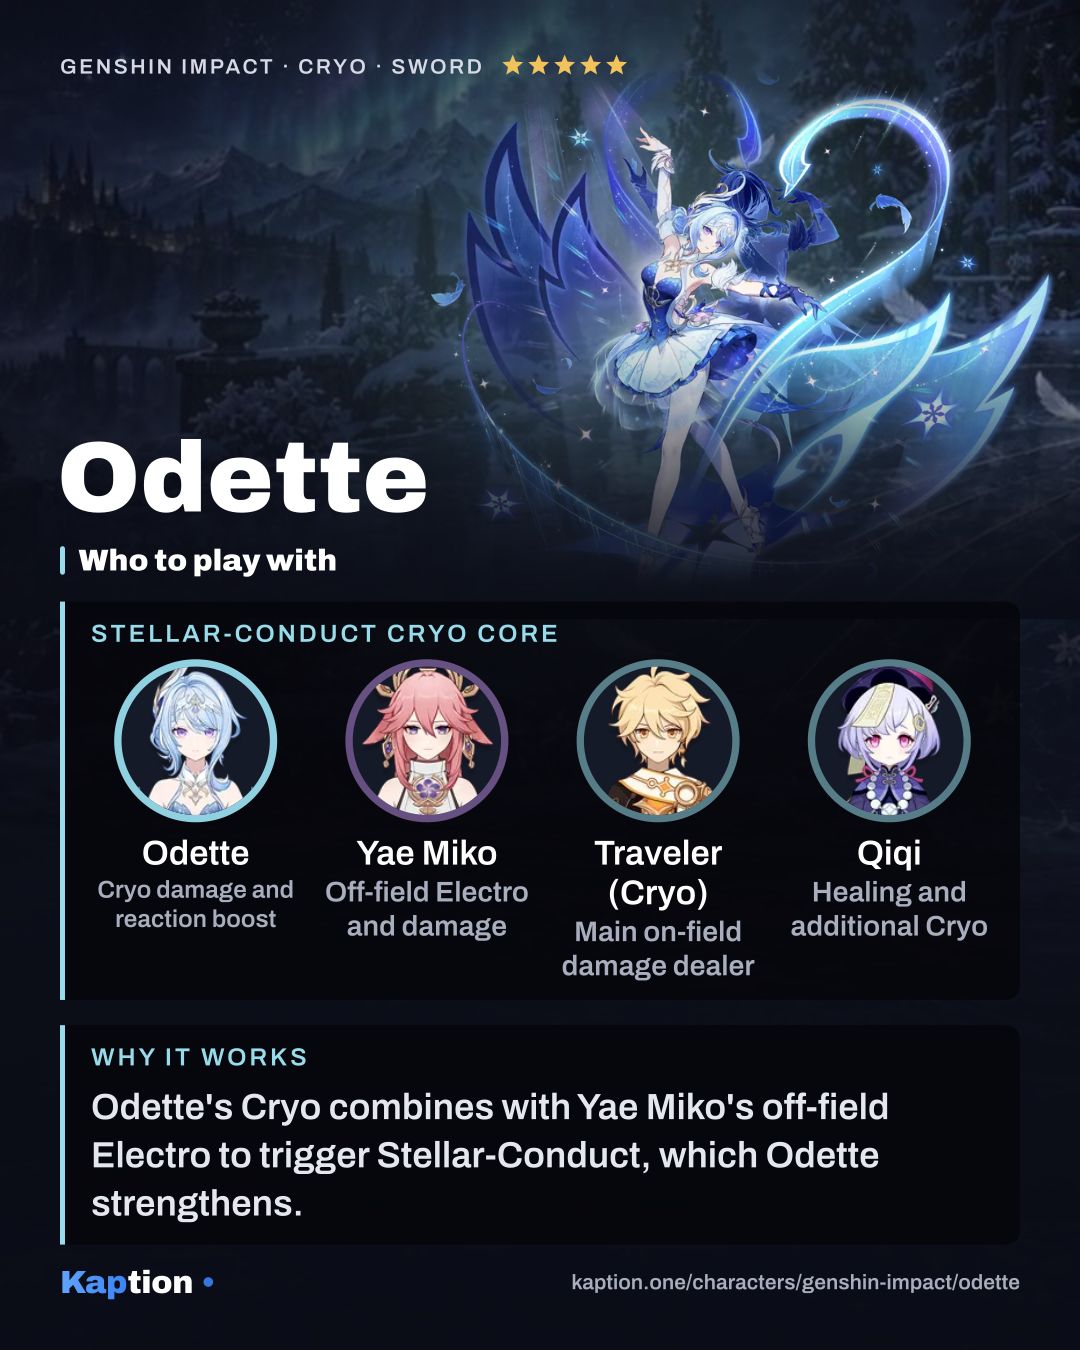
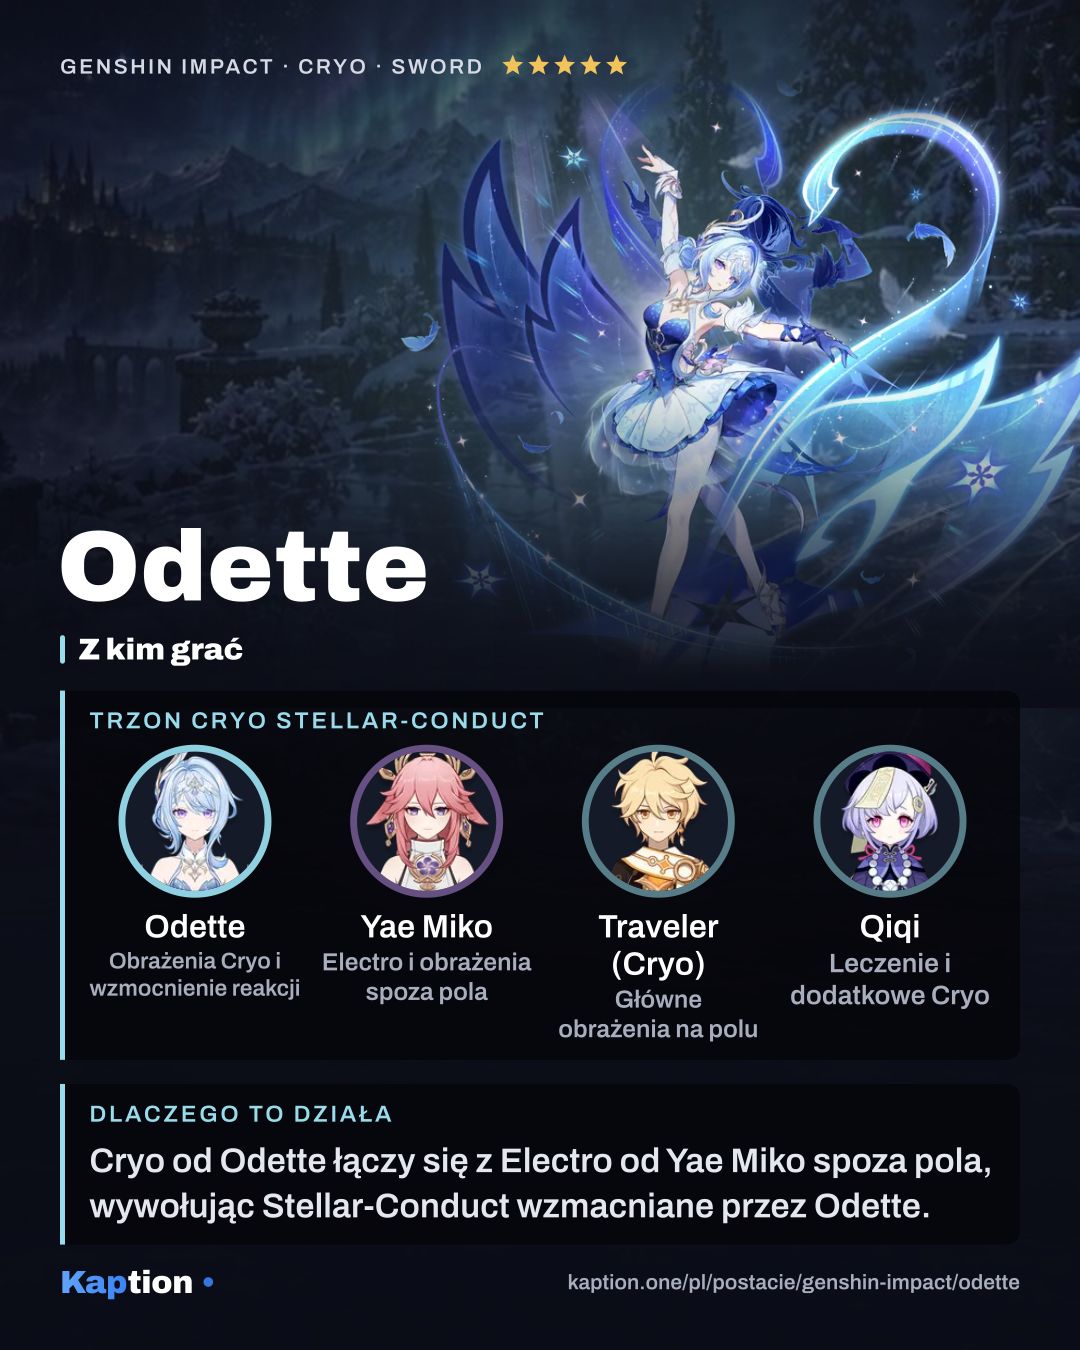
Odette contributes Cryo damage and converts the team's Superconduct and Cryo Swirl reactions. Her ATK raises their Base DMG by 0.7% per 100 ATK, up to 14%. Separately, each 100 ATK above 1,000 increases her own Stellar Glimmer damage by 1.5% of its original damage, up to 30%.
Common mistakes
Do not let the 6-second special Skill window pass unnoticed after a Skill or Burst. The duet ends with a reaction-counted hit, so missing it leaves out part of the kit. Remember that using the Skill or Burst with a Double already present refreshes it rather than keeping two separate Doubles.
Do not ignore ATK while chasing CRIT stats. Both reaction passives use ATK, though each has a maximum bonus. At the same time, choose enough Energy Recharge for your Burst rather than assuming every ATK sands will suit your team.
Do not equip several copies of Heart of the Furnace expecting its party damage bonus to stack. Also match your alternative set to the reaction: Disenchantment in Deep Shadow boosts Stellar-Conduct, while Scarlet Proof asks the wearer to trigger Stellar Swirl.