




















Guide
How the kit works
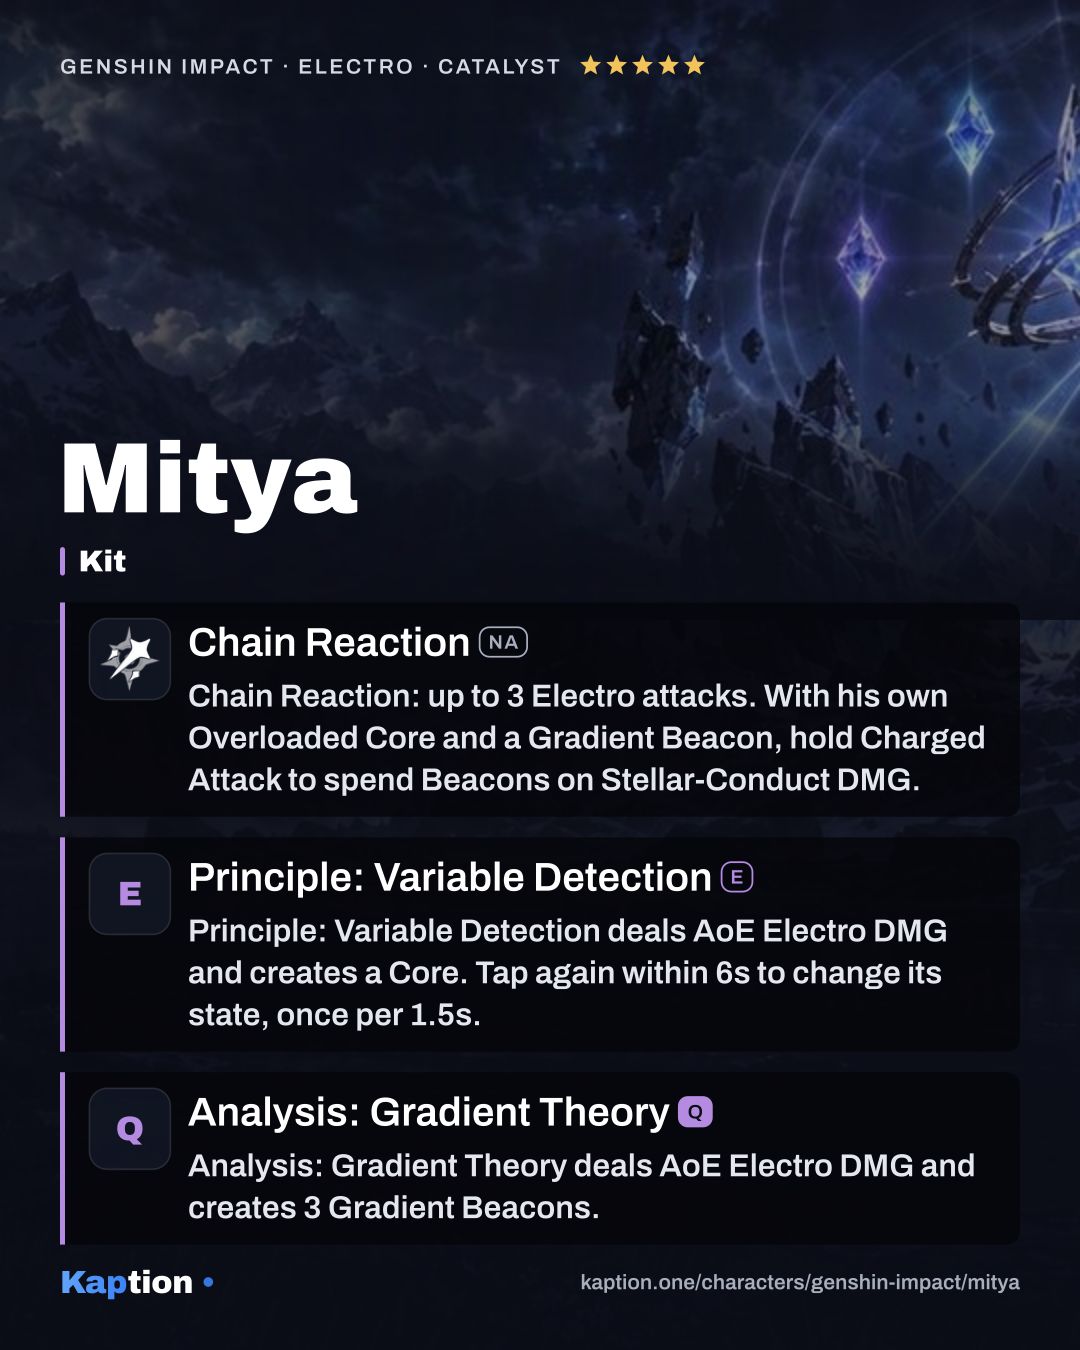
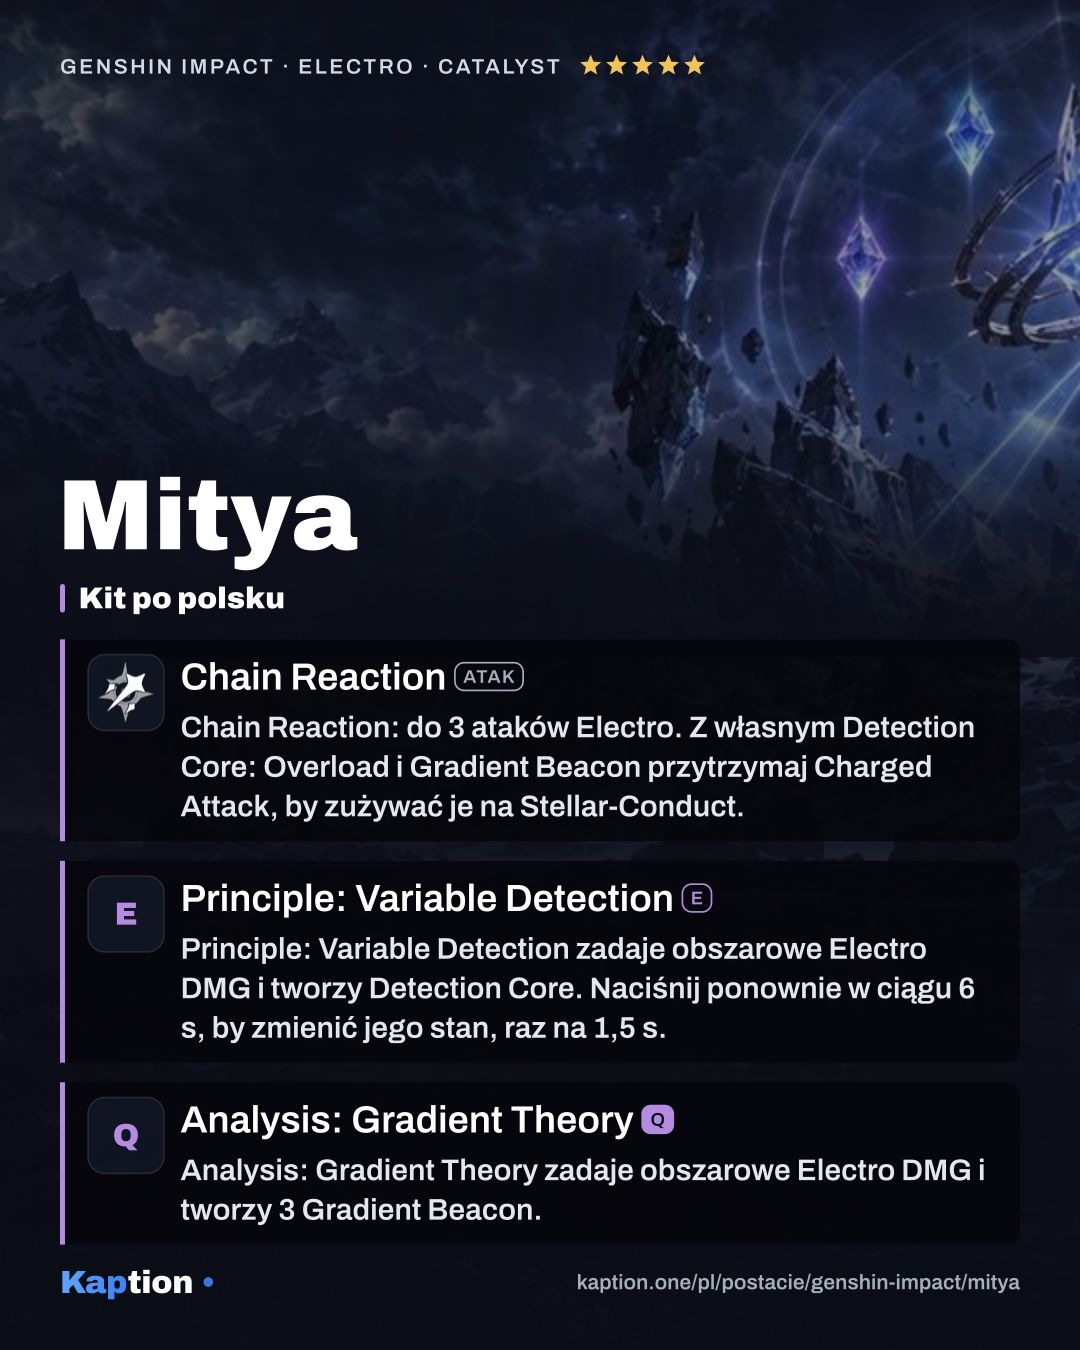
Start with Principle: Variable Detection to deal AoE Electro DMG and create a Detection Core. Tapping or holding the Skill creates it in different ways. You can tap the Skill again within 6 seconds to change the Core’s state, with 1.5 seconds between state changes.
In Steady State, Baseline Stress Test gives nearby party members 30 Elemental Mastery for each Gradient Beacon Mitya has. In Overloaded, nearby party members’ Stellar-Conduct reactions cause him to obtain one Beacon every 1.5 seconds for 6 seconds. Pick the state for the buff or Beacon generation you need.
Stellar Jubilee: Top-Secret Protocol changes the party’s Superconduct into Stellar-Conduct. The reaction creates a Beacon nearby every 1.5 seconds for 3 seconds instead of Starlight Prisms. Mitya can carry these Beacons, which expand the Polestar Field around them; another reaction refreshes the effects. His Elemental Mastery also increases nearby party members’ Base Stellar-Conduct DMG by 0.028% per point, up to 14%.
Use Analysis: Gradient Theory for AoE Electro DMG and three Beacons. With his own Overloaded Core on the field and at least one Beacon, holding the Charged Attack from Chain Reaction (NA) performs Gradient Detonation. It costs no Stamina, deals one AoE Electro hit and keeps consuming Beacons while held, dealing an additional AoE hit considered Stellar-Conduct DMG for each one.
Explosive Reagent: Safe Limits Exceeded sets Beacon duration to 10 seconds. Creating a Beacon also gives Mitya 5% CRIT Rate for 15 seconds, stacking up to four times. Watch those stacks when judging how much CRIT Rate to build.
Build and why
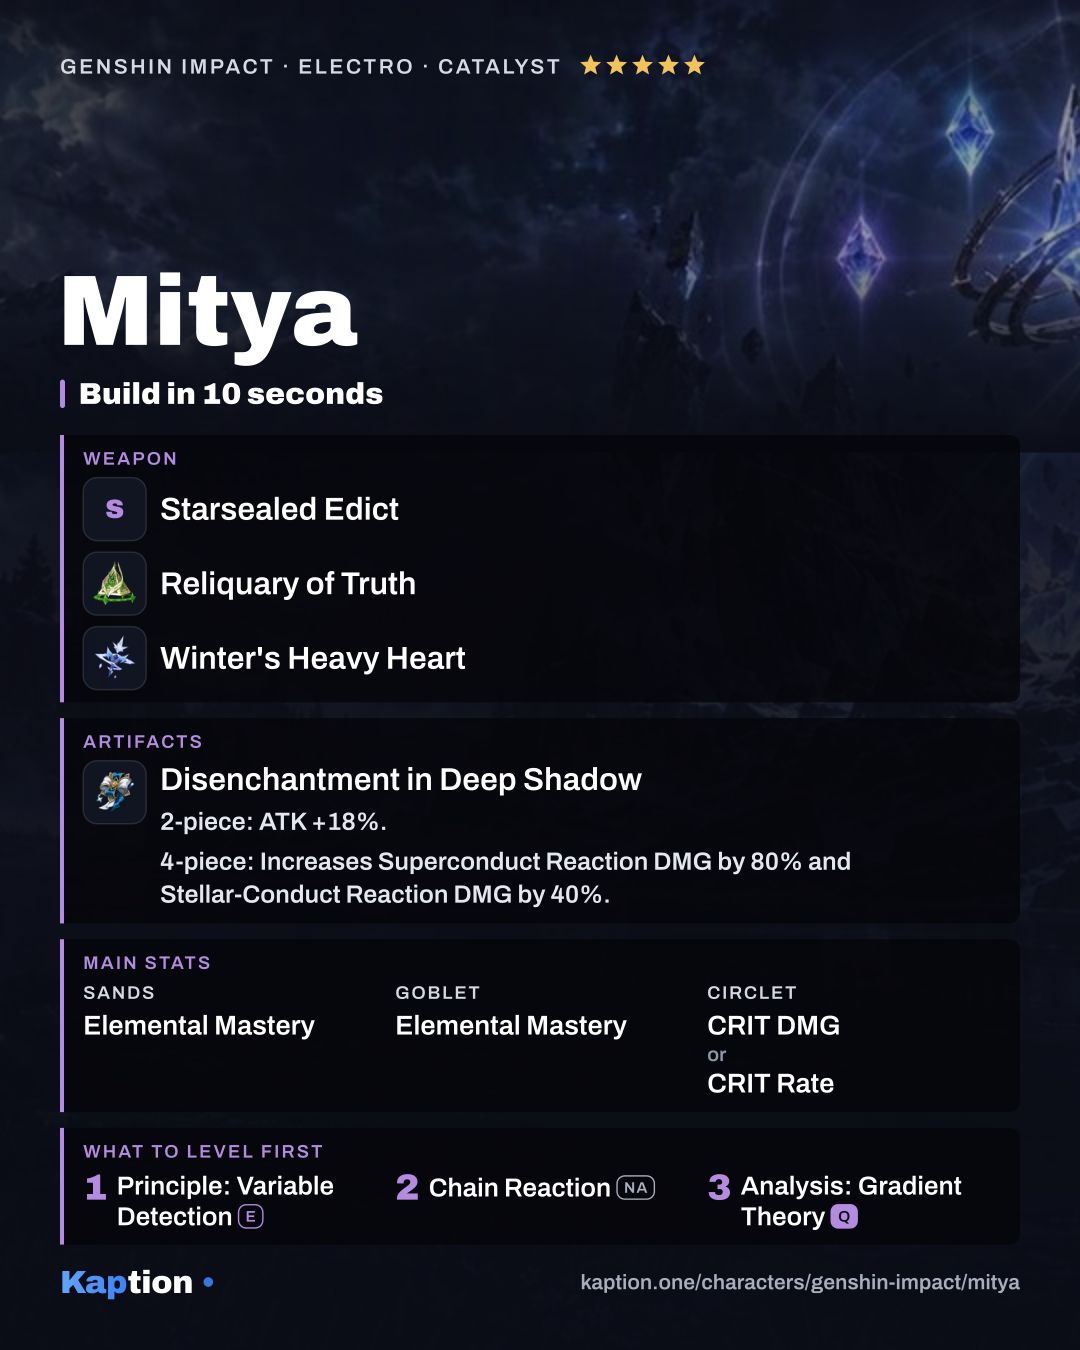
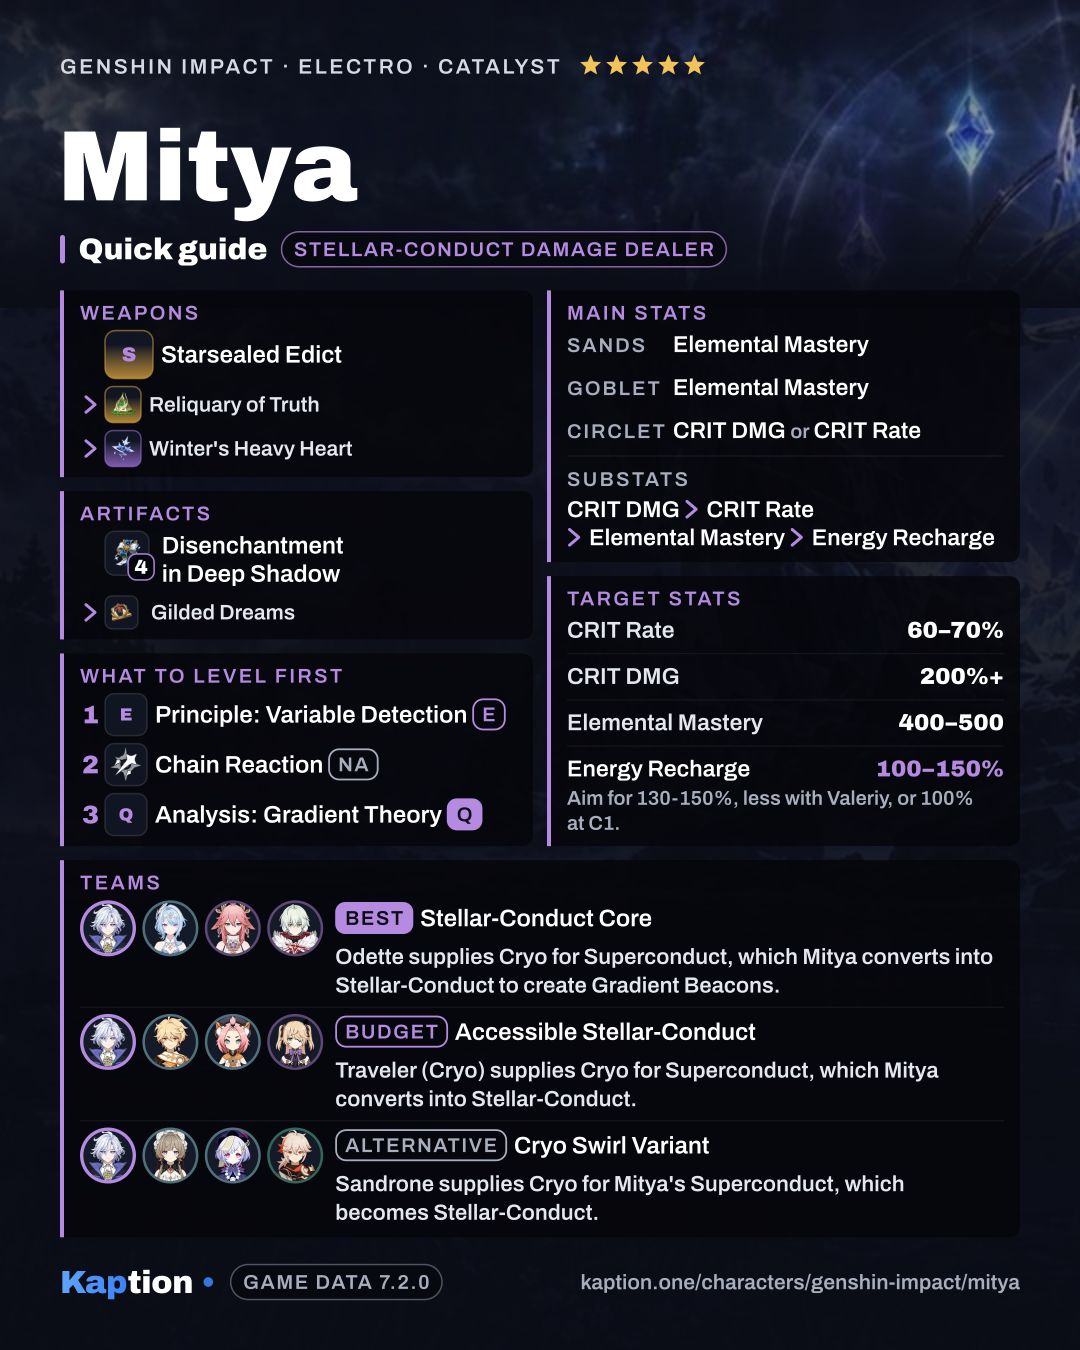
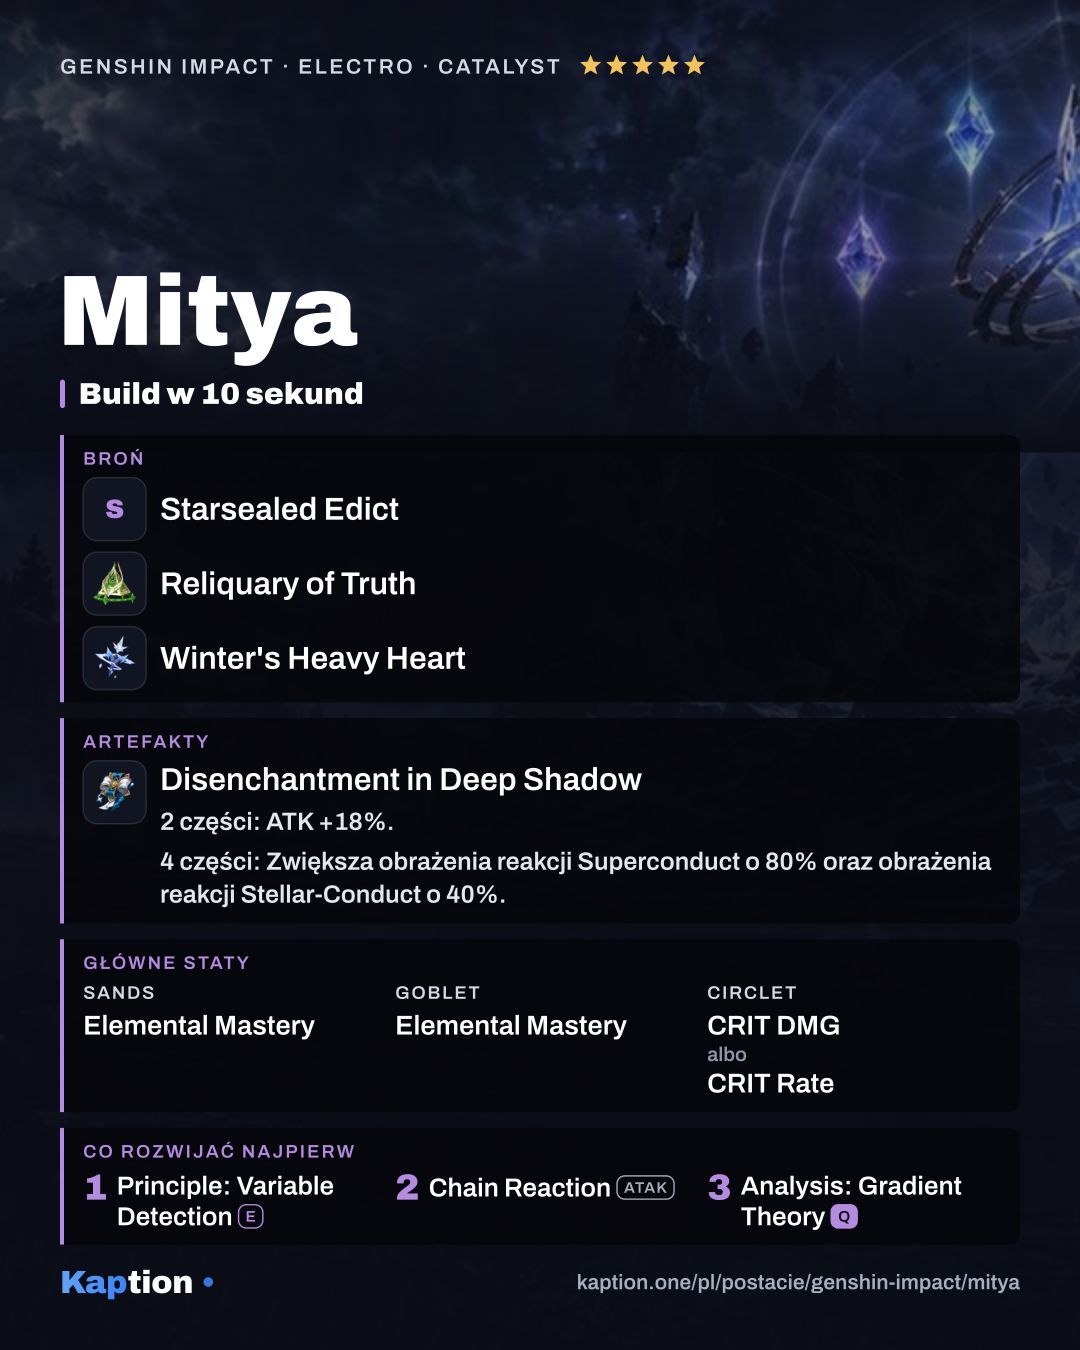
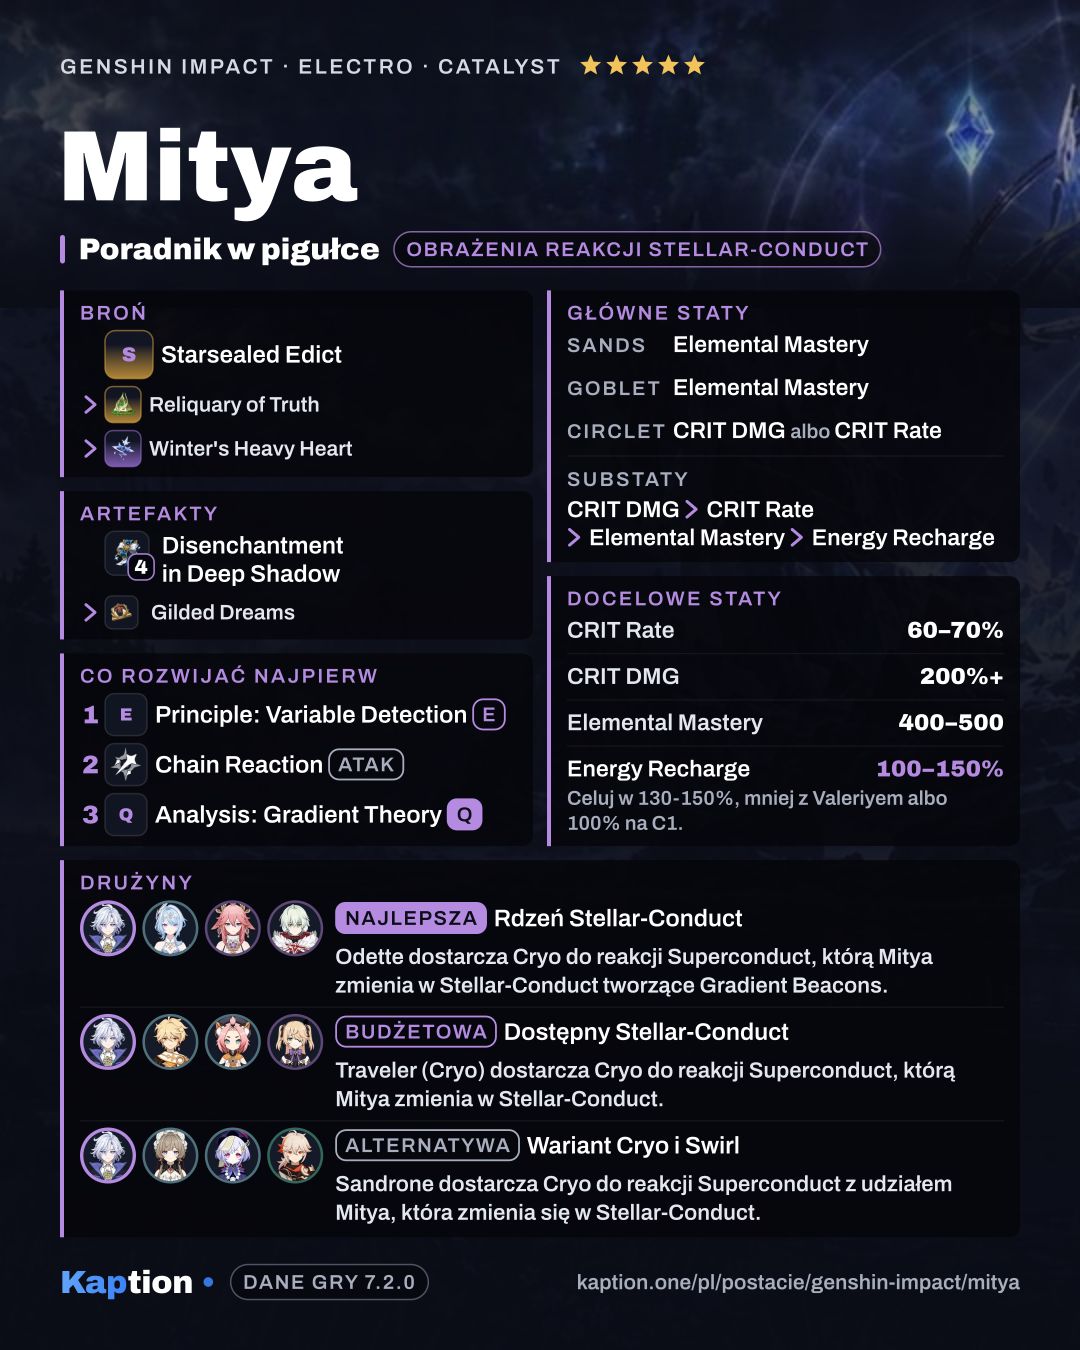
Start with four pieces of Gilded Dreams. Its two-piece bonus gives 80 Elemental Mastery. After an Elemental Reaction, the four-piece bonus gives ATK for teammates of Mitya’s element and Elemental Mastery for teammates of different elements. That Mastery supports his party-wide Stellar-Conduct bonus.
For a team-focused option, consider four pieces of Tenacity of the Millelith: an Elemental Skill hit gives nearby party members 20% ATK and 30% Shield Strength for 3 seconds. The game’s build also offers four pieces of Disenchantment in Deep Shadow. It increases Stellar-Conduct DMG by 40% and gives attacks against opponents affected by that reaction 16% CRIT Rate.
Use Elemental Mastery on the sands and goblet, with CRIT DMG or CRIT Rate on the circlet. The build’s substat order is CRIT DMG, CRIT Rate, Elemental Mastery, then Energy Recharge. Mitya’s passive increases the party’s Base Stellar-Conduct DMG based on his Elemental Mastery, up to a 14% bonus.
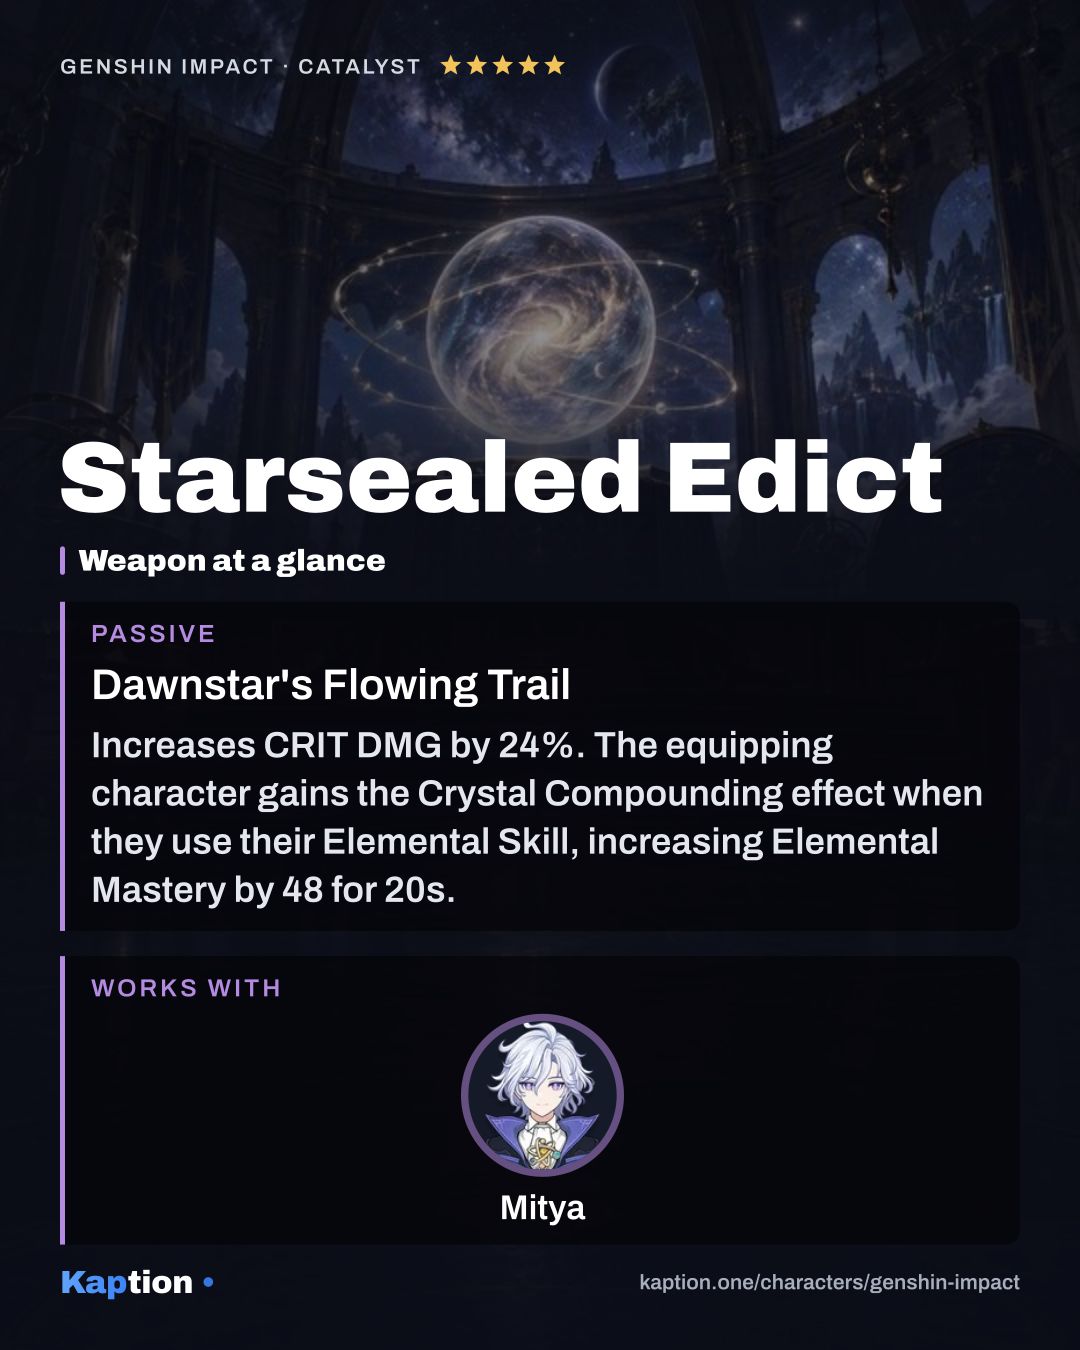
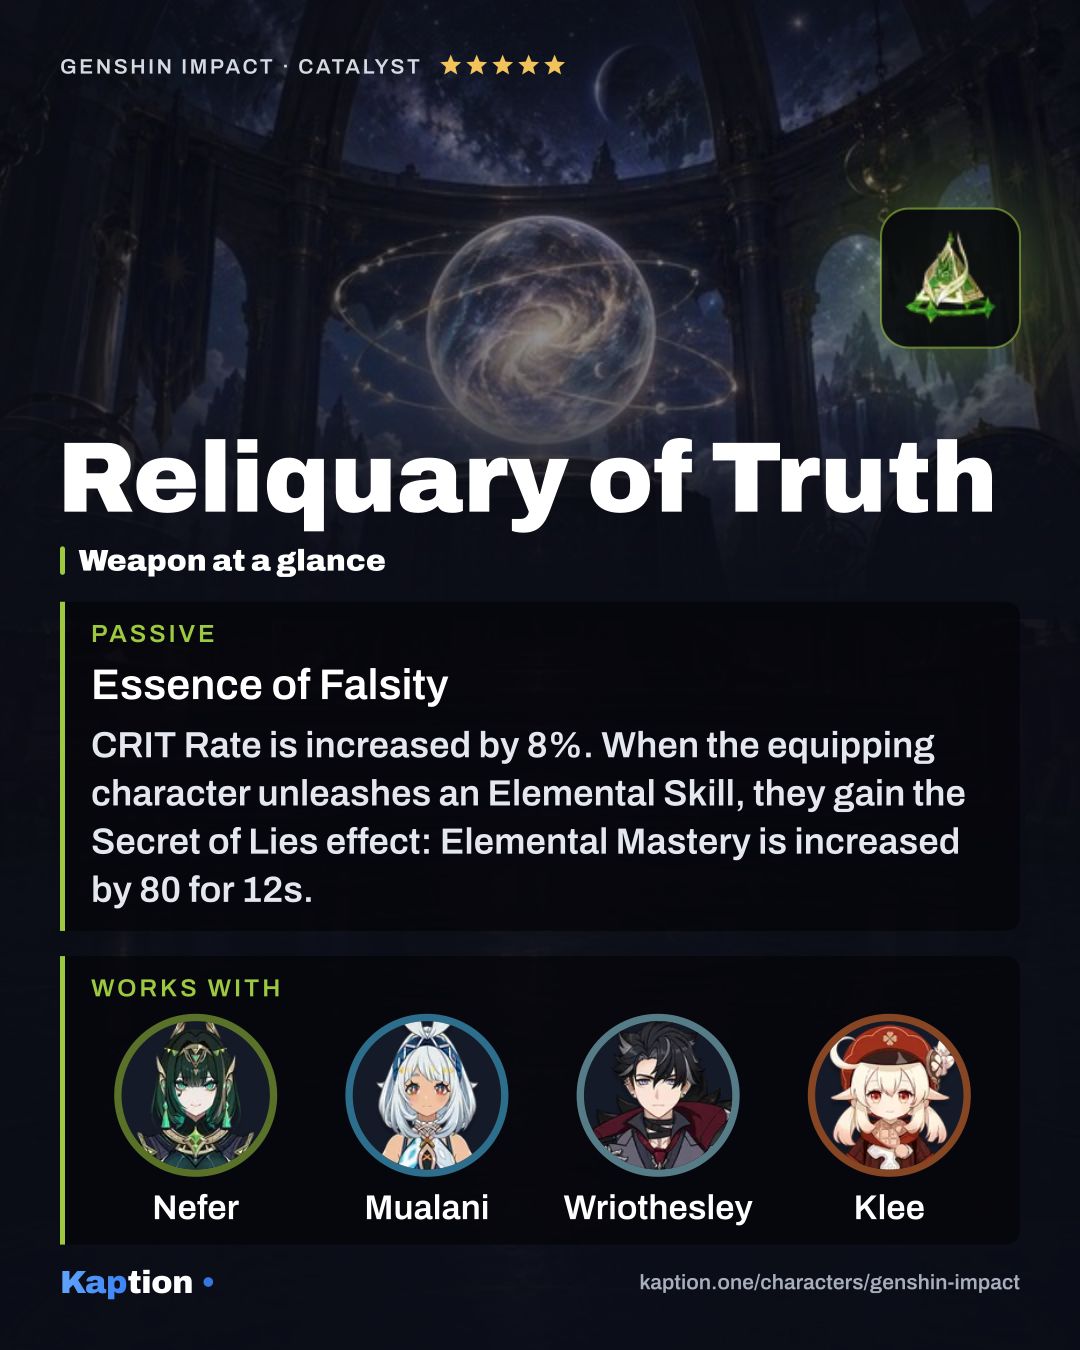
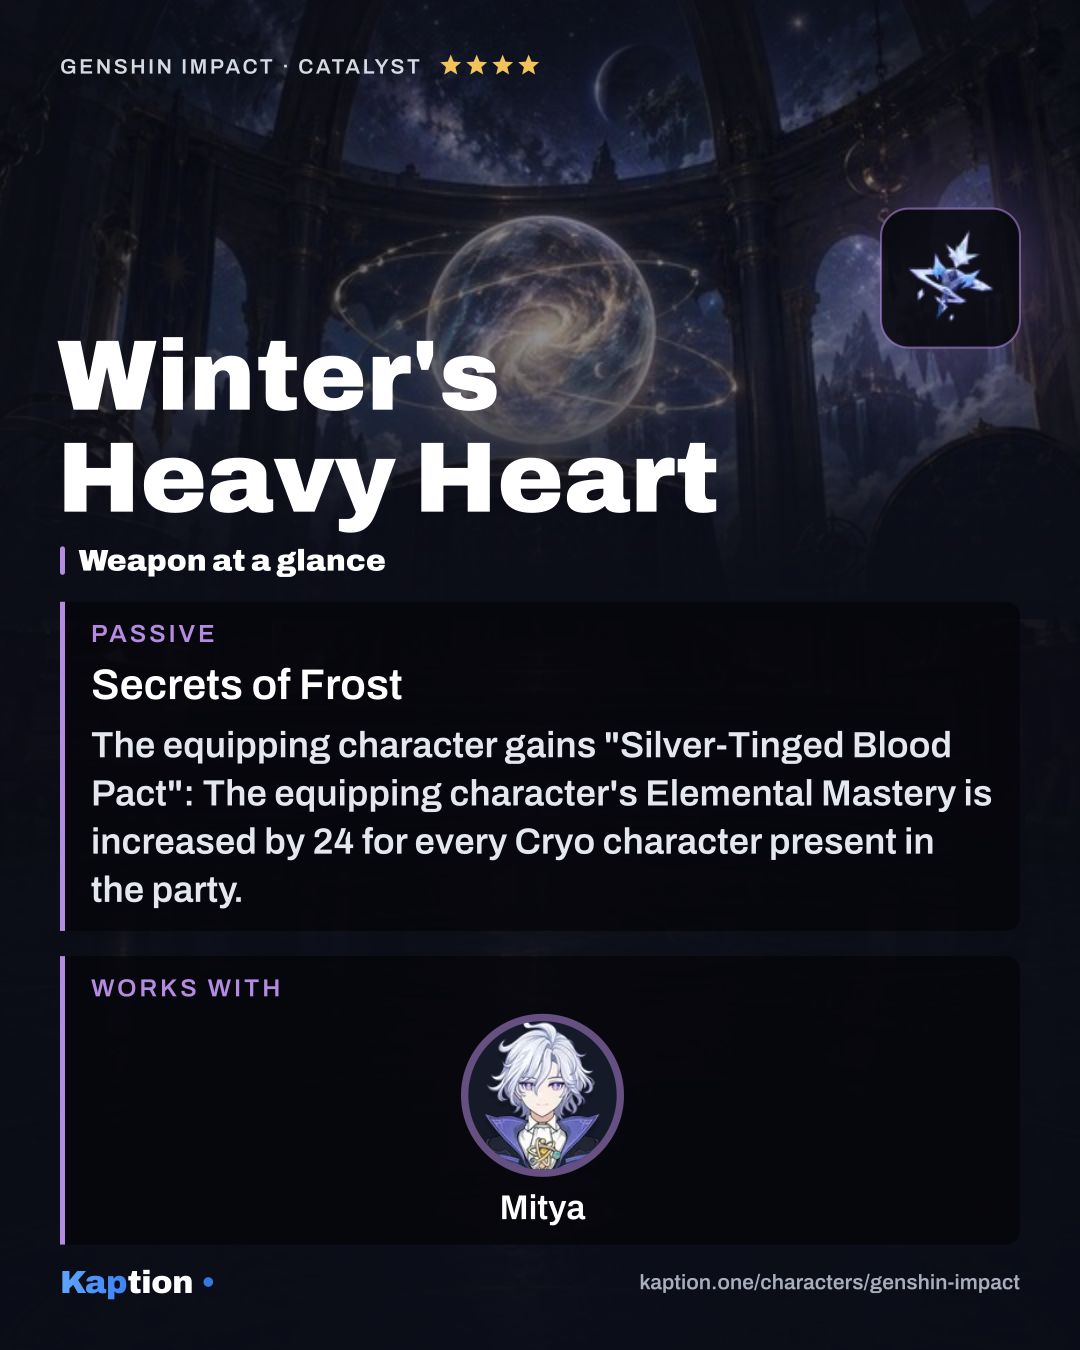
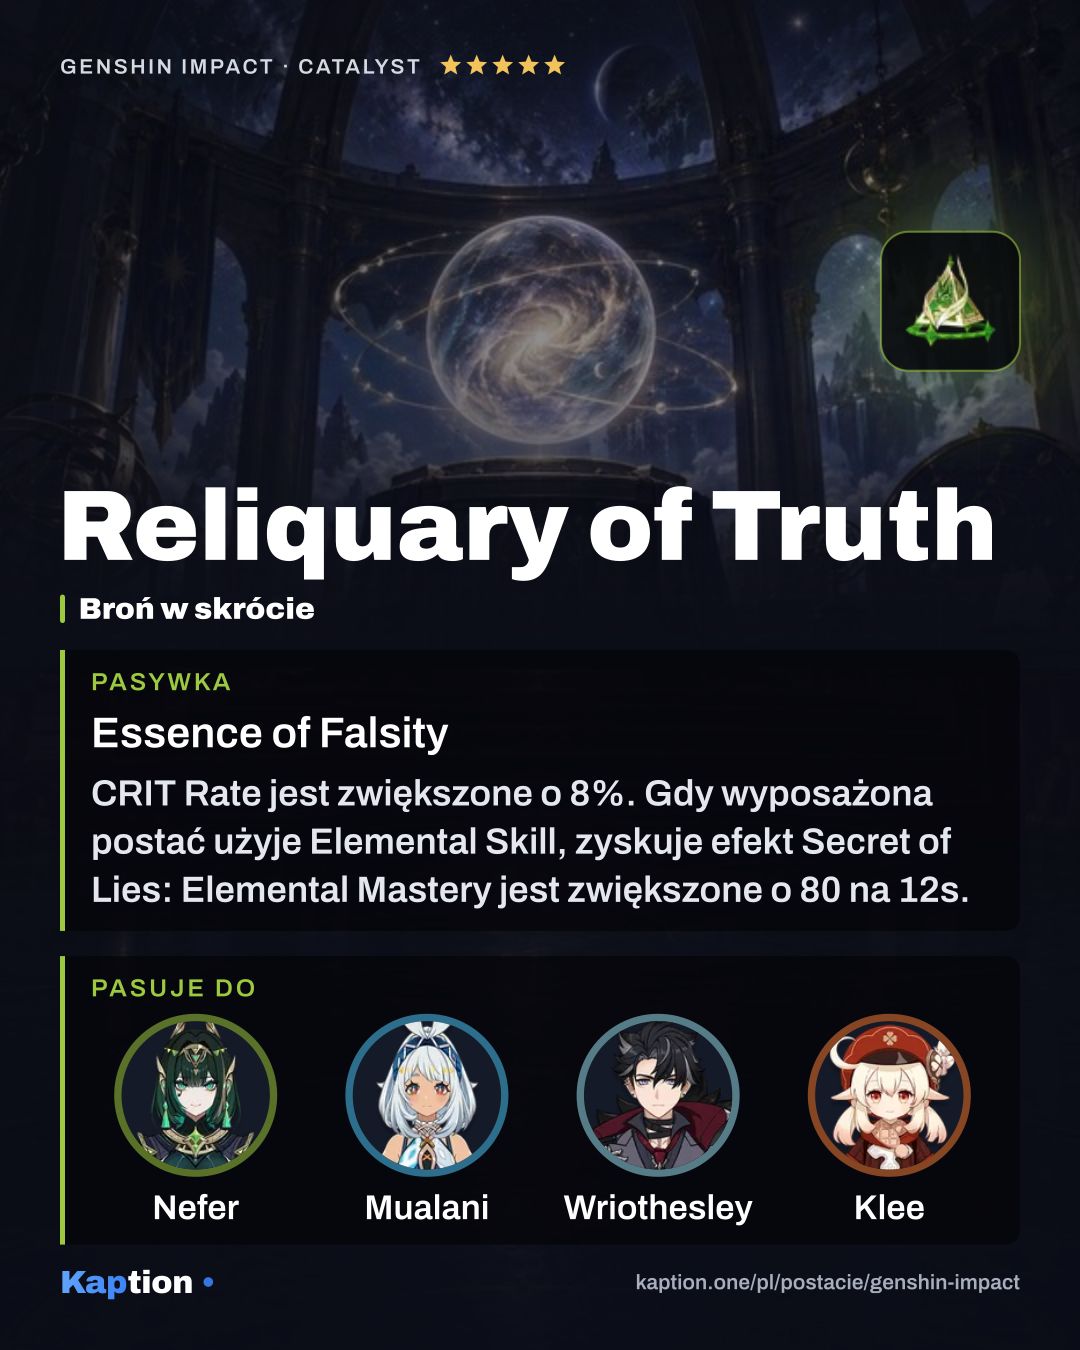
Starsealed Edict is the first weapon choice. Its visible effects give 24% CRIT DMG and Elemental Mastery after using the Skill, with more Mastery from nearby party reactions. Reliquary of Truth gives 8% CRIT Rate and 80 Elemental Mastery after a Skill. Winter's Heavy Heart is a four-star option that gives Elemental Mastery for Cryo characters and ATK for Electro characters in the party. Dawning Frost is another option with Mastery after Charged Attack and Skill hits.
Leveling priority
A reasonable talent order is Principle: Variable Detection first, Chain Reaction (NA) second and Analysis: Gradient Theory last. The Core is central to both states of the kit, while the Normal Attack talent includes the Charged Attack. The Burst deals AoE damage and creates three Beacons. The supplied data does not say how talent levels change the reaction damage, so treat this order as a suggestion.
For maximum ascension, gather 420,000 Mora, 168 Kristallfold and 46 Shattered Stability Anchor. You also need one Vajrada Amethyst Sliver, nine Vajrada Amethyst Fragment, nine Vajrada Amethyst Chunk and six Vajrada Amethyst Gemstone, plus 18 Chimeric Core, 30 Symbiotic Chimeric Nucleus and 36 Prime Chimeric Nexus.
For all talents, the total is 4,957,500 Mora and three Crown of Insight. Gather nine Teachings of Charity, 63 Guide to Charity and 114 Philosophies of Charity, along with 18 Chimeric Core, 66 Symbiotic Chimeric Nucleus, 93 Prime Chimeric Nexus and 18 Mask of the Virtuous Doctor.
Constellations worth it
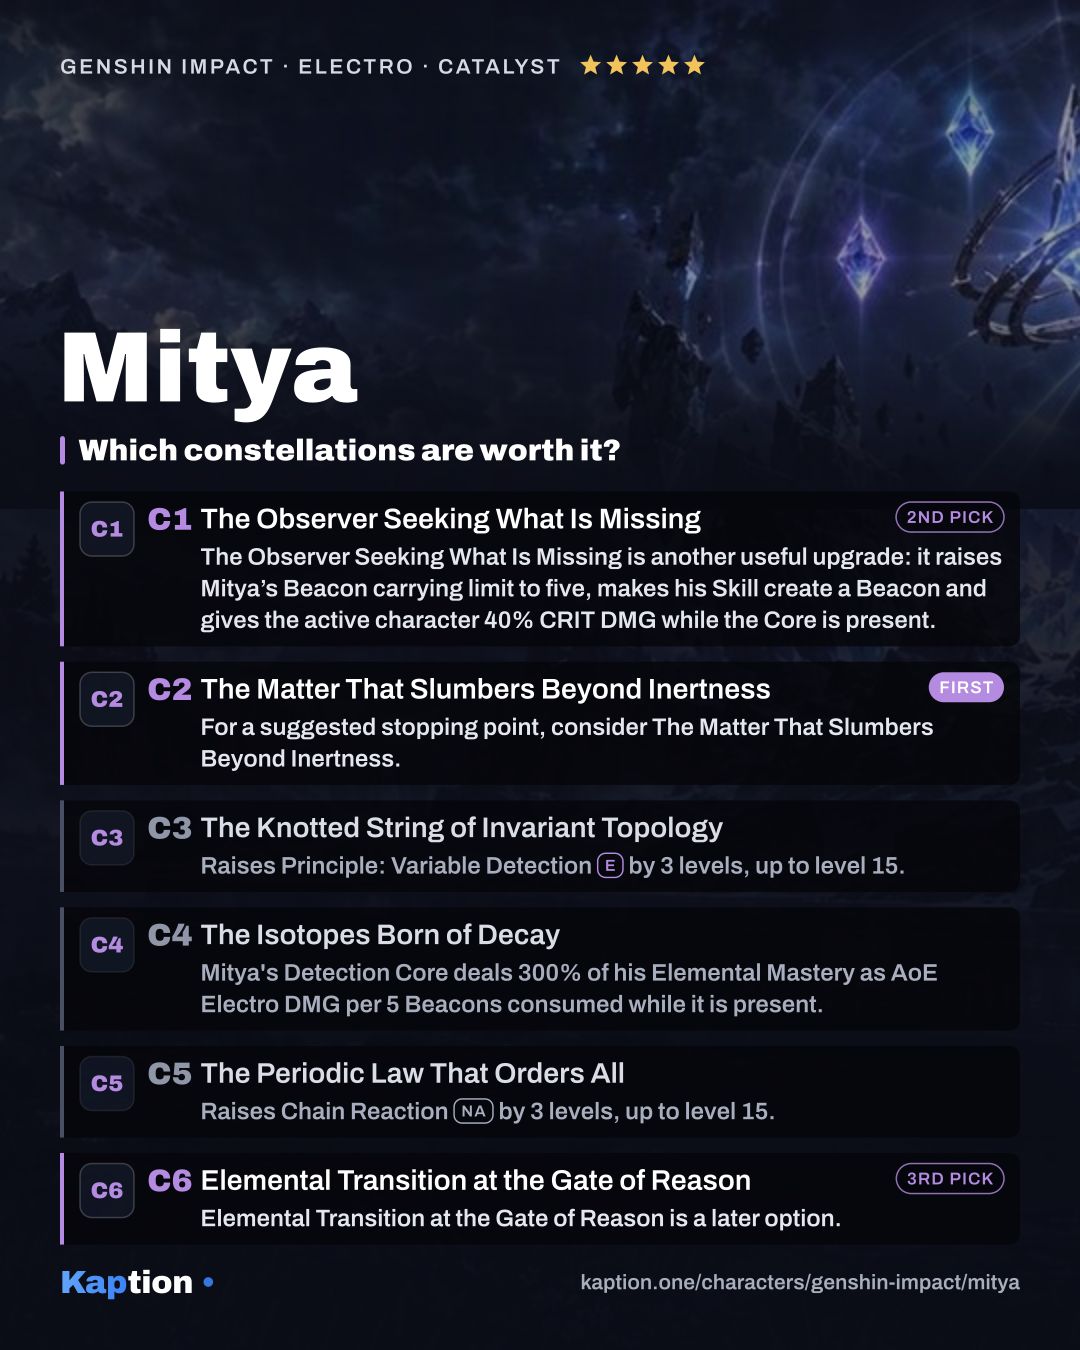
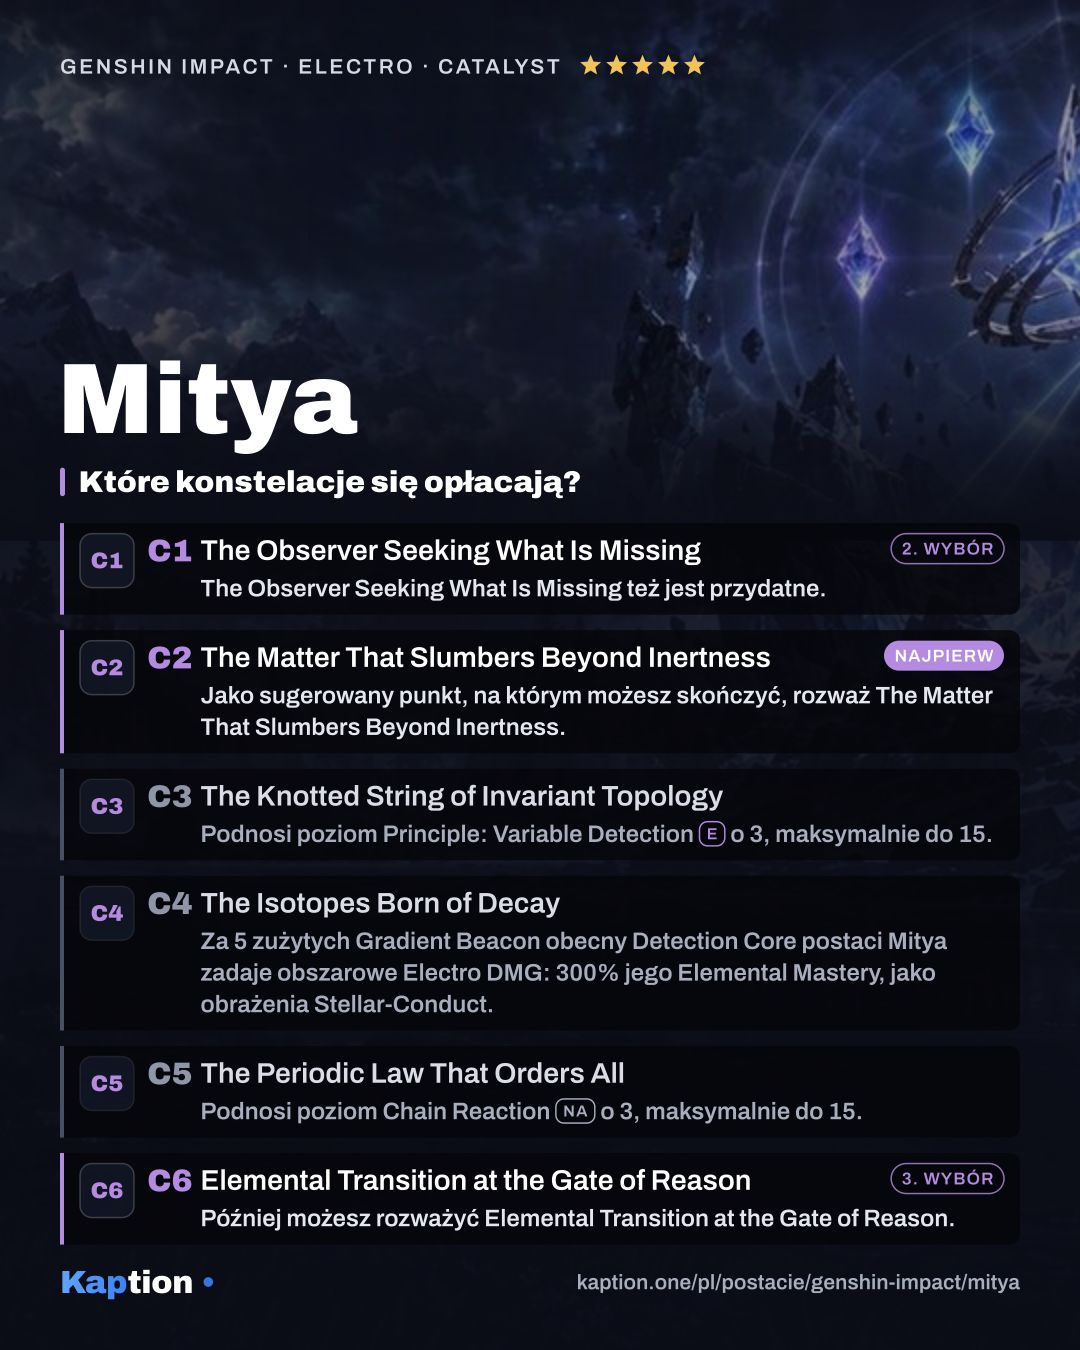
For a suggested stopping point, consider The Matter That Slumbers Beyond Inertness. While the Core is present, opponents in the Polestar Field lose 20% Cryo RES and Electro RES. Steady State gives nearby party members 123 Elemental Mastery, while Overloaded gives the active character 234.
The Observer Seeking What Is Missing is another useful upgrade: it raises Mitya’s Beacon carrying limit to five, makes his Skill create a Beacon and gives the active character 40% CRIT DMG while the Core is present. A Beacon’s creation also restores Mitya 10 Energy, once every 8 seconds.
Elemental Transition at the Gate of Reason is a later option. It improves the Core in either state and Elevates nearby party members’ Stellar-Conduct DMG by 20%. The Knotted String of Invariant Topology and The Periodic Law That Orders All only add talent levels, so you can leave them for later. The Isotopes Born of Decay adds a Core hit for every five Beacons consumed while it is on the field, but is also optional.
Teams
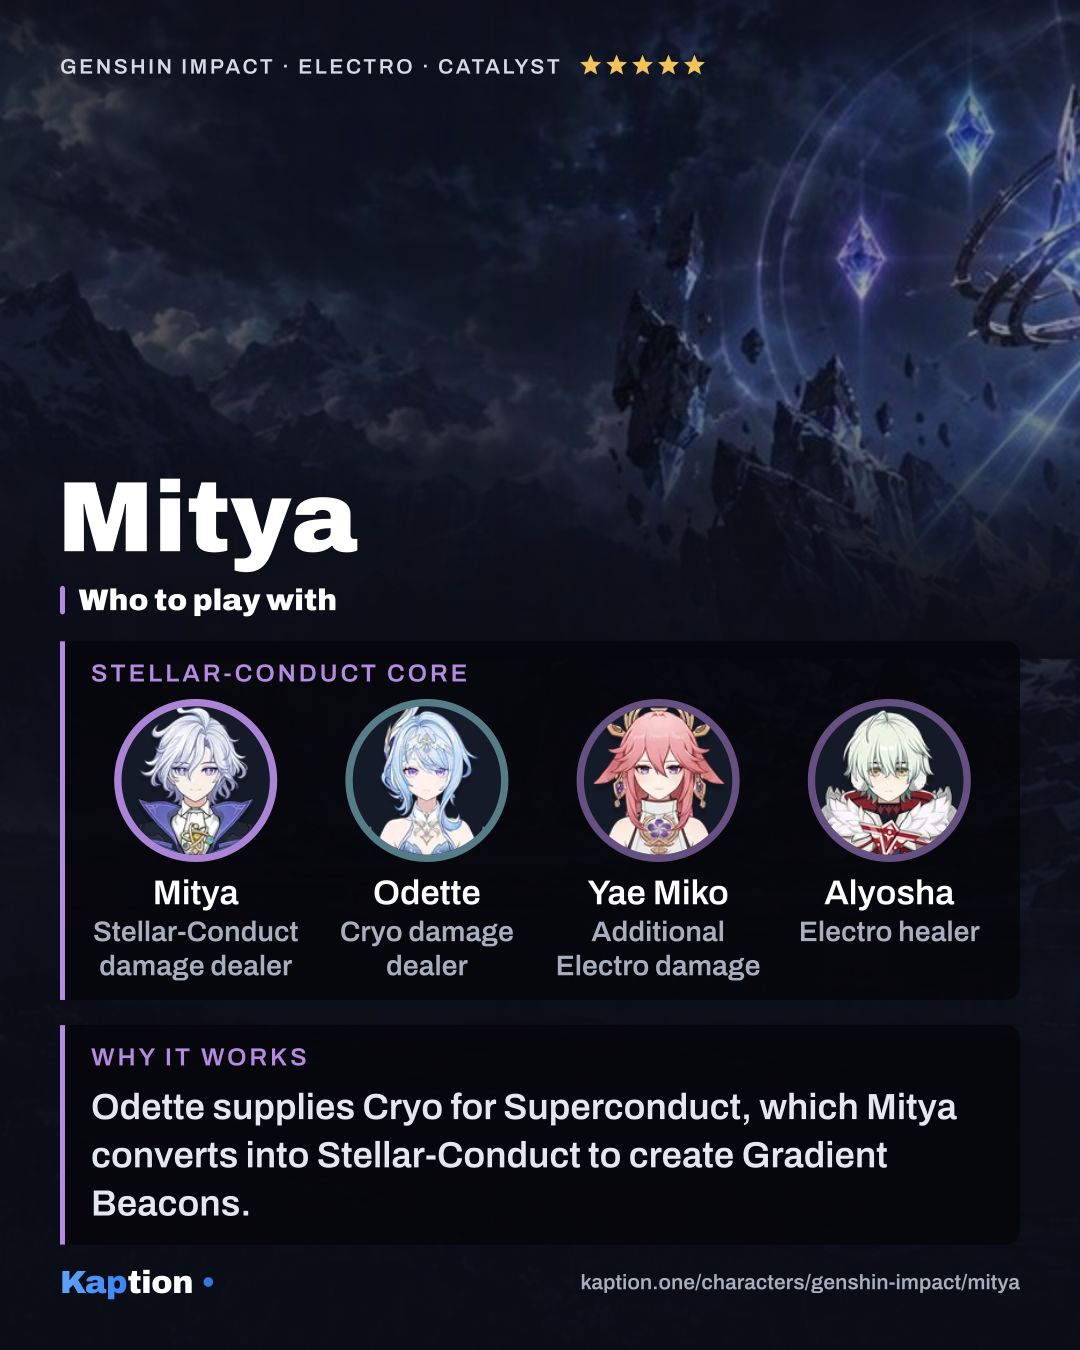
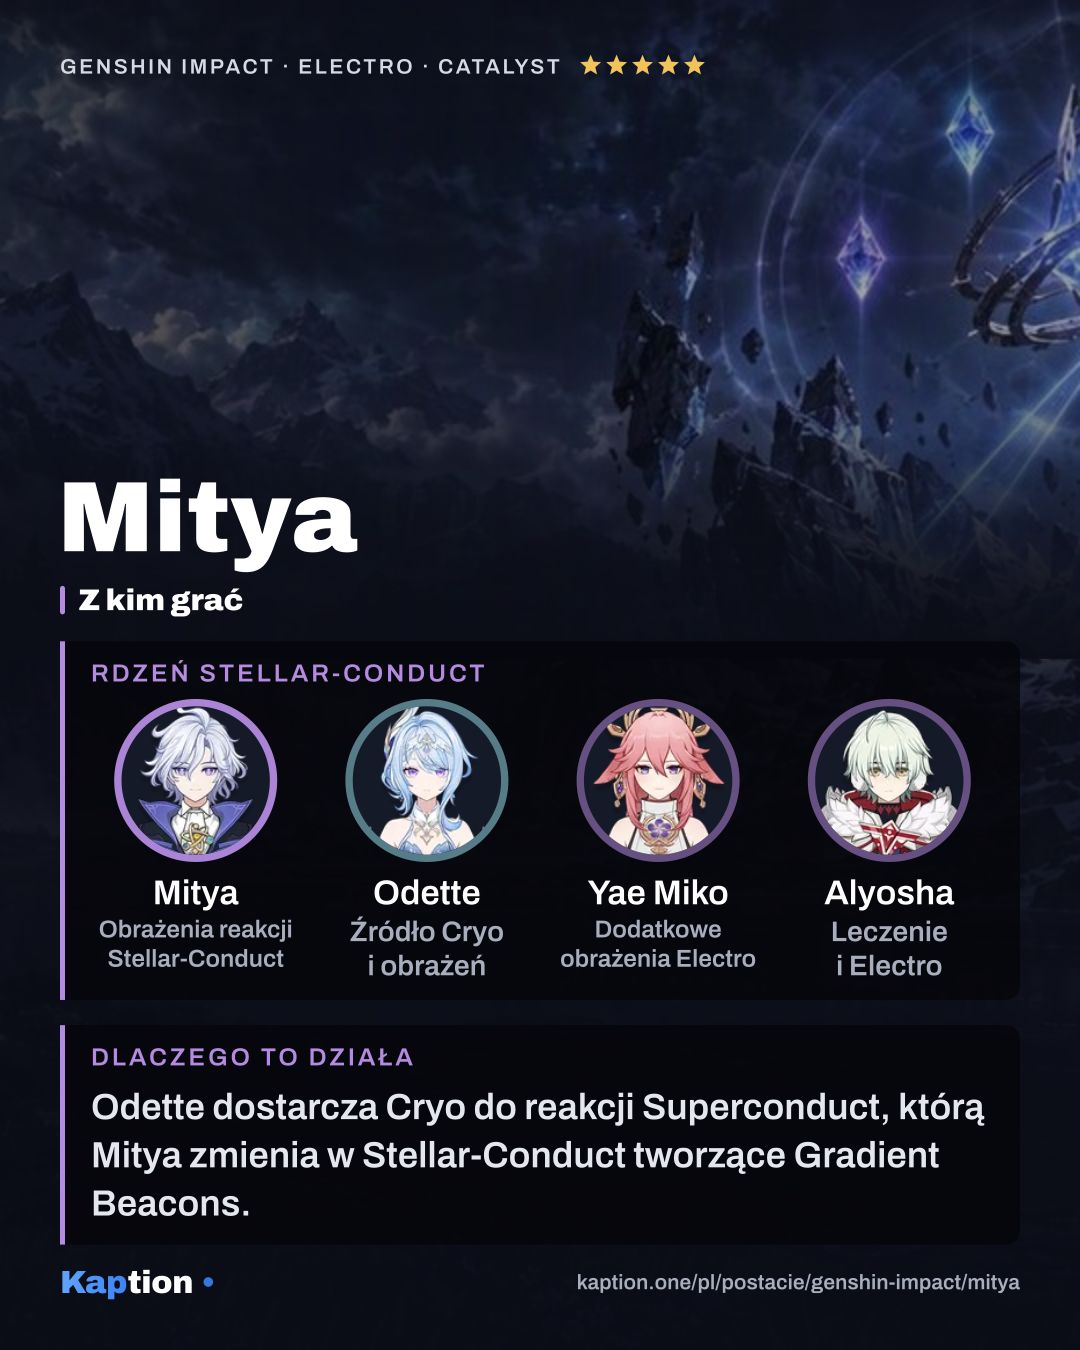
Mitya gives these teams a party-wide increase to Base Stellar-Conduct DMG based on his Elemental Mastery. Steady State adds Elemental Mastery based on his current Beacons; Overloaded instead helps create more Beacons after reactions. Choose the state around whether you want the team buff or his special Charged Attack.
Common mistakes
Do not hold Charged Attack expecting Gradient Detonation without Mitya’s own Overloaded Detection Core and at least one Gradient Beacon. In Steady State, you get the team Mastery buff instead; switch the Core’s state when you want the special attack.
Do not leave Beacons unused for too long. Their duration is 10 seconds with Explosive Reagent: Safe Limits Exceeded, so create them and spend them while the Core is ready. Analysis: Gradient Theory creates three, and Stellar-Conduct reactions help generate more.
Do not judge your CRIT Rate from artifacts alone. Beacon creation can give Mitya up to 20% CRIT Rate, and Disenchantment in Deep Shadow has its own conditional 16% for attacks against affected opponents. Check whether those conditions are active before adding more CRIT Rate.