





































Genshin Impact character

Sangonomiya Kokomi (Genshin Impact)

Guide, build and skills

  • 5-star
  • Element Hydro
  • Weapon Catalyst
  • Game data 7.2.0

Hydro application and healing

HP strengthens Kokomi's healing and garment damage, while Healing Bonus also increases her garment's Normal and Charged Attack bonus.

Sangonomiya Kokomi from Genshin Impact with a Kaption Polish subtitle
How Kaption shows Sangonomiya Kokomi in Polish: "Jaki jest ich cel? Czy żołnierze mają rację? Czy rzeczywiście mogą być w zmowie z Komisją Tenryou?"

At a glance

Sangonomiya Kokomi is a Hydro Catalyst character who heals while applying Hydro to nearby opponents. She can leave her summoned Bake-Kurage on the field for the active character, or stay on the field herself to attack and heal the whole party.

Max HP supports both her healing and the damage bonuses from her Burst. Flawless Strategy gives her 25% Healing Bonus but reduces her CRIT Rate by 100%, so a conventional CRIT build is a poor use of her stats.

Video guide

COMPLETE KOKOMI GUIDE (SUPPORT & DPS) - Best Kokomi Build & Showcase | Genshin Impact

Video by Zy0x on YouTube · 24 min · 677.6K views · September 2021

The YouTube player loads only after you click.

Build

Suggested build The game doesn't recommend a build for this character.

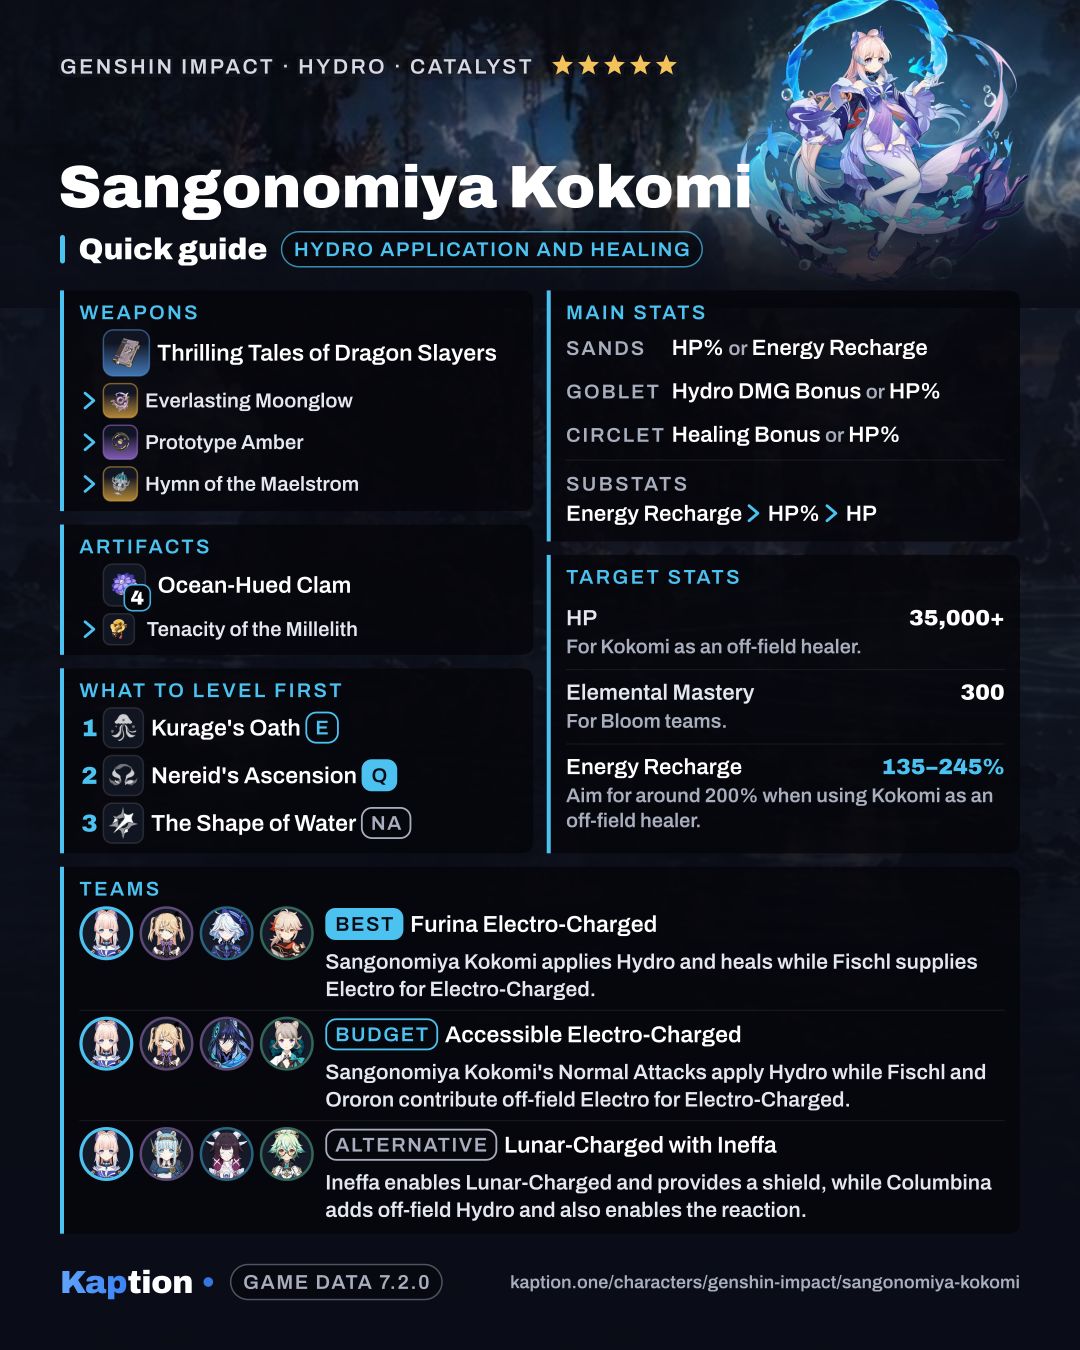
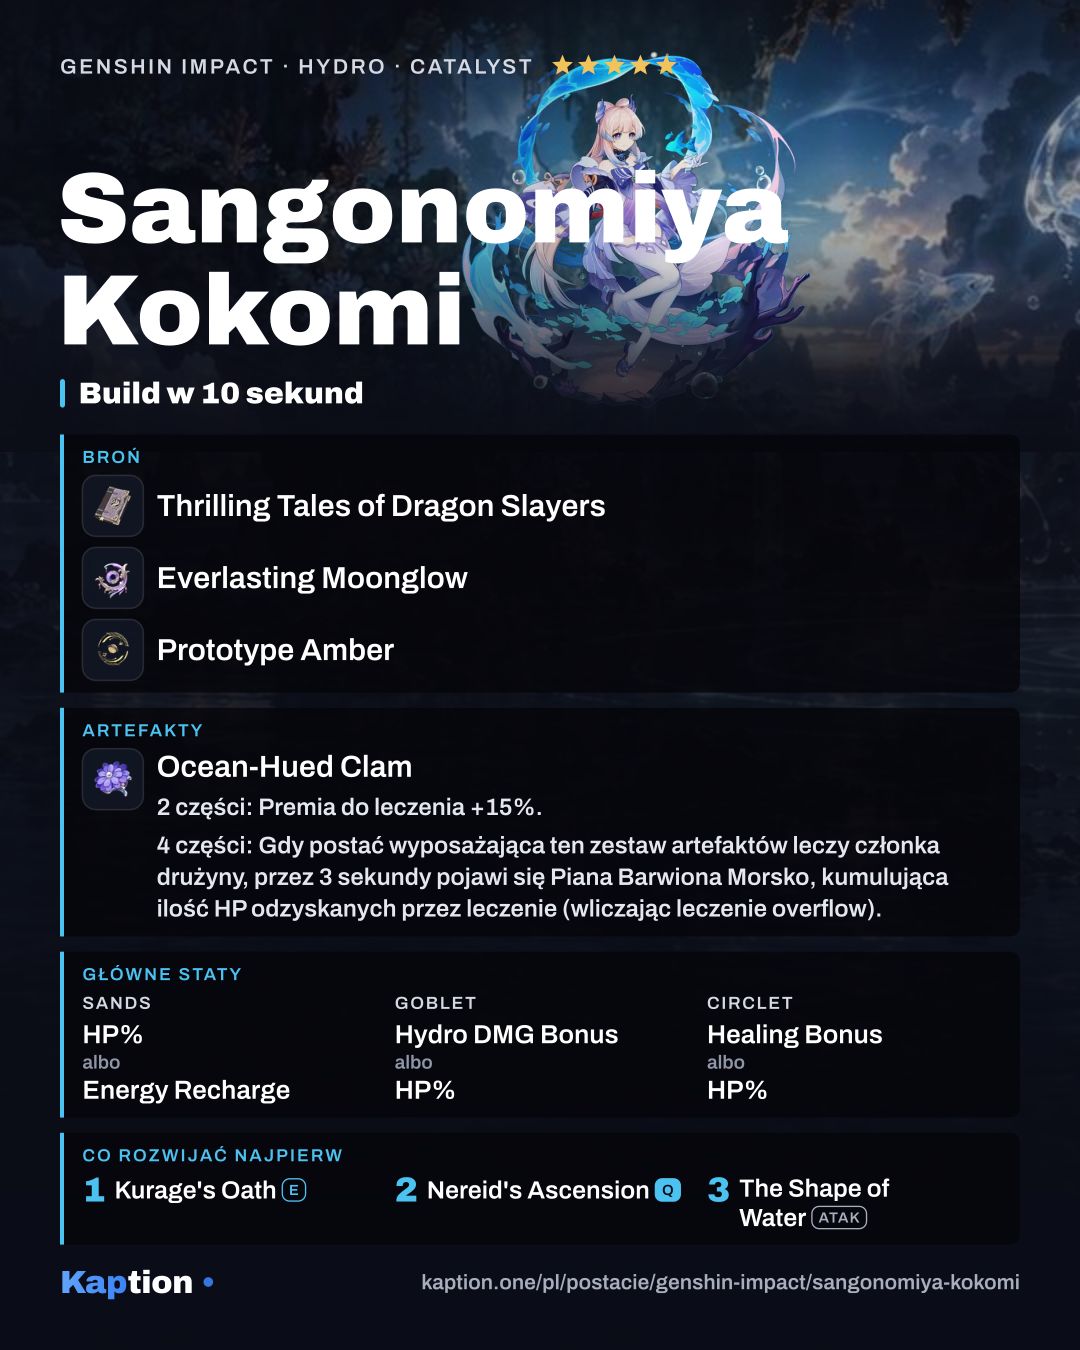
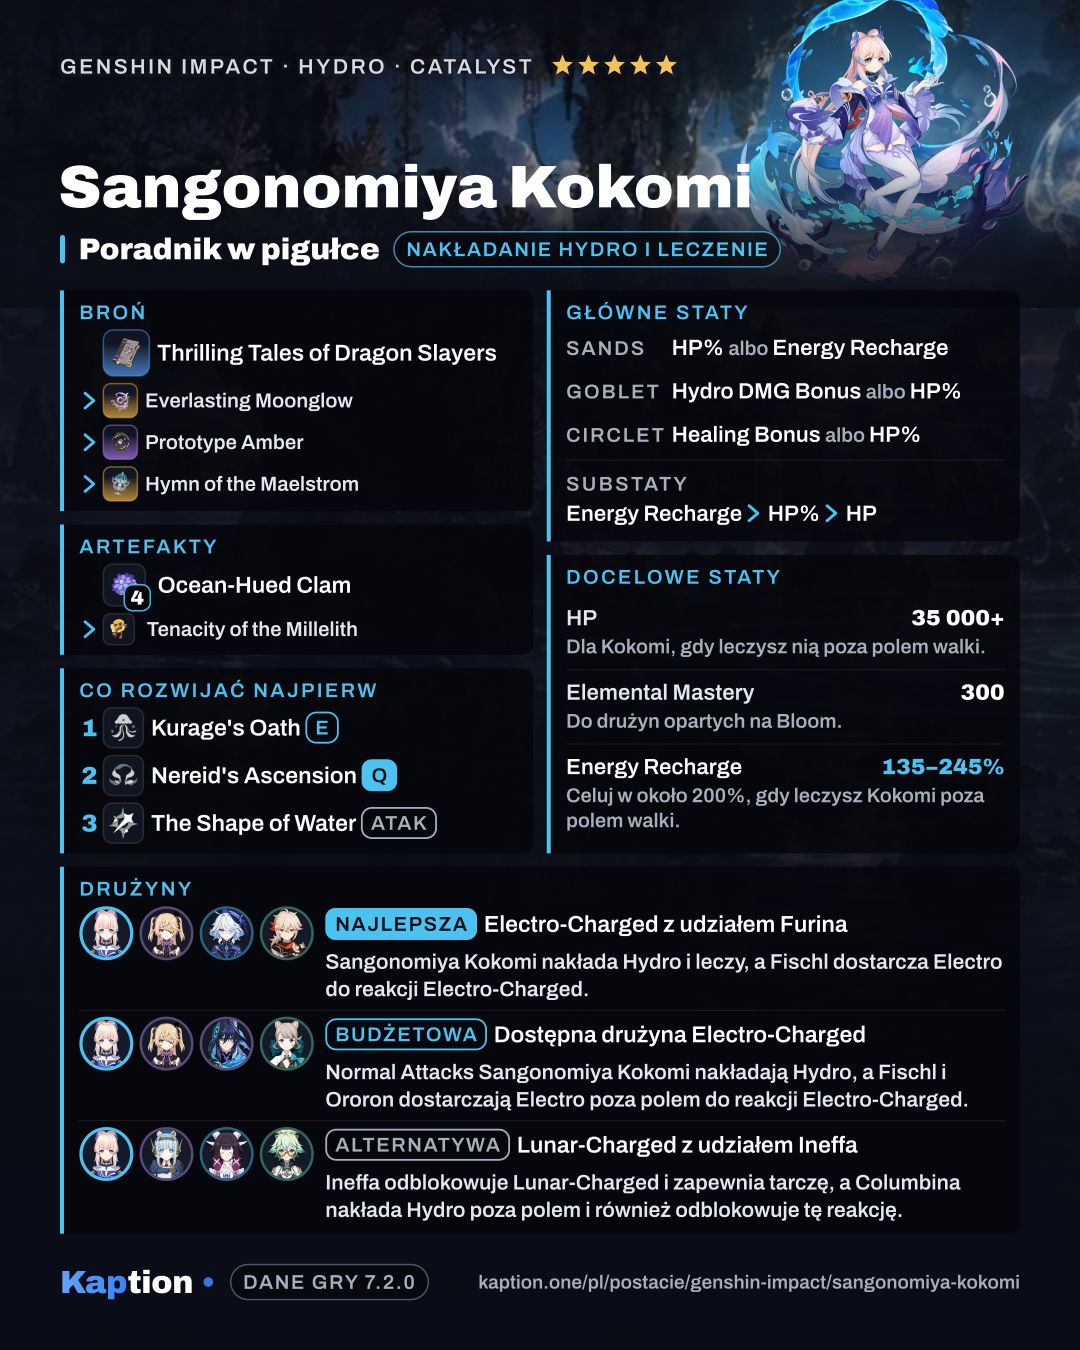
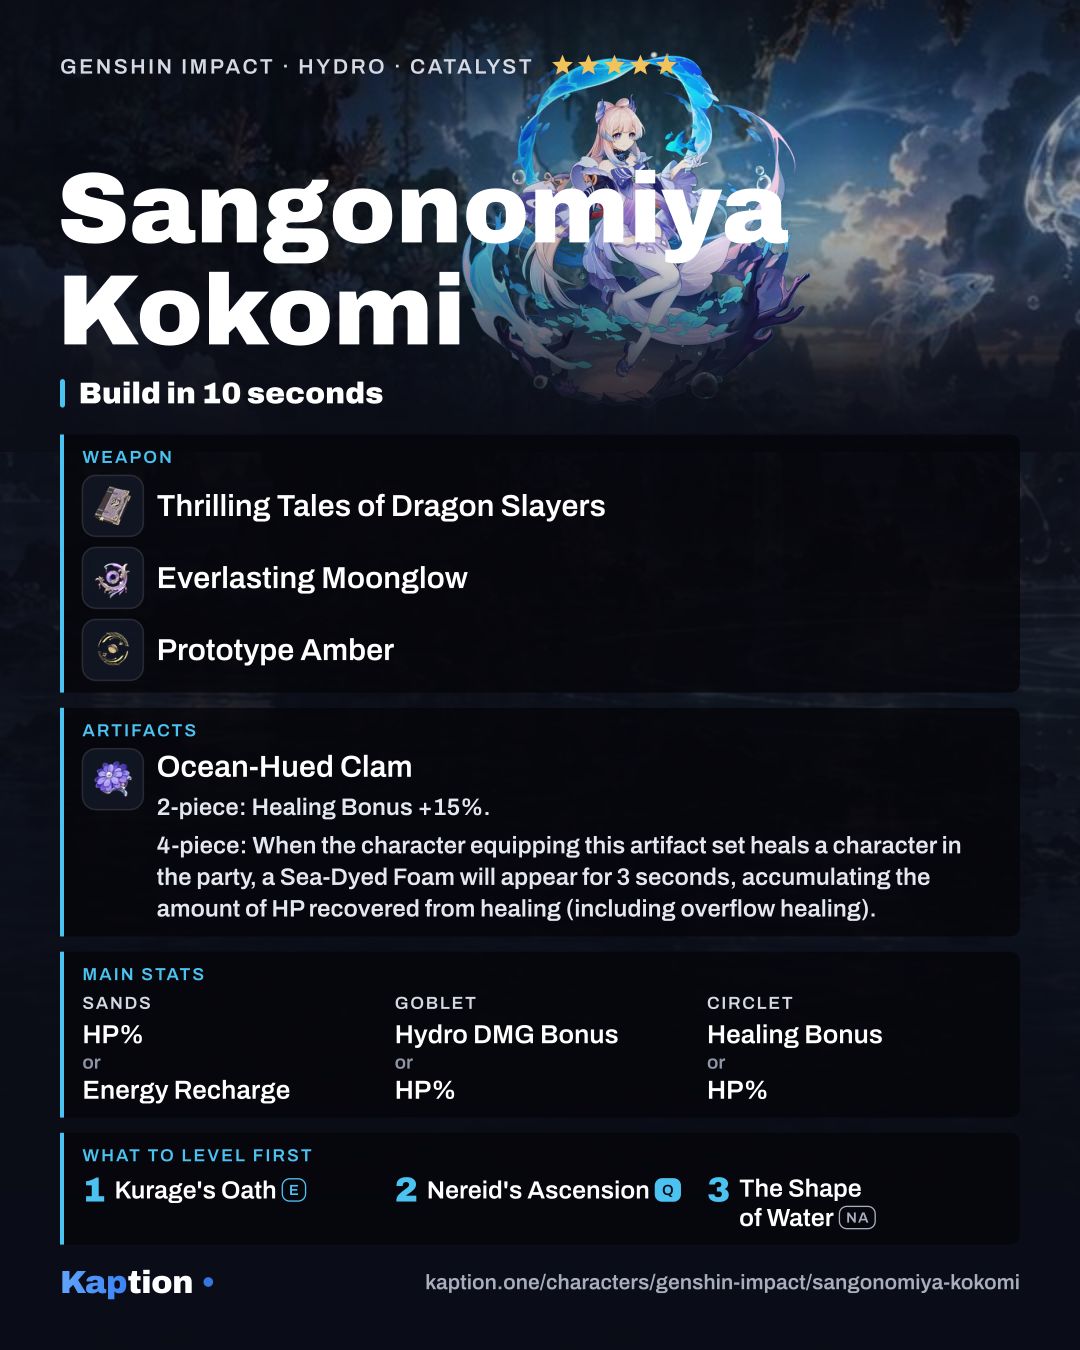
4× Ocean-Hued Clam · Sands HP% or Energy Recharge · Goblet Hydro DMG Bonus or HP% · Circlet Healing Bonus or HP% · substats Energy Recharge > HP% > HP

HP strengthens Kokomi's healing and garment damage, while Healing Bonus also increases her garment's Normal and Charged Attack bonus.

Artifacts

Artifact set

  1. Song of Days Past
    Song of Days Past
    • 2-piece bonus: Healing Bonus +15%.
    Show effect
    • 4-piece bonus: When the equipping character heals a party member, the Yearning effect will be created for 6s, which records the total amount of healing provided (including overflow healing). When the duration expires, the Yearning effect will be transformed into the "Waves of Days Past" effect: When your active party member hits an opponent with a Normal Attack, Charged Attack, Plunging Attack, Elemental Skill, or Elemental Burst, the DMG dealt will be increased by 8% of the total healing amount recorded by the Yearning effect. The "Waves of Days Past" effect is removed after it has taken effect 5 times or after 10s. A single instance of the Yearning effect can record up to 15,000 healing, and only a single instance can exist at once, but it can record the healing from multiple equipping characters. Equipping characters on standby can still trigger this effect.

4 pieces · Artifact set

  1. Ocean-Hued Clam
    Ocean-Hued Clam
    • 2-piece bonus: Healing Bonus +15%.
    Show effect
    • 4-piece bonus: When the character equipping this artifact set heals a character in the party, a Sea-Dyed Foam will appear for 3 seconds, accumulating the amount of HP recovered from healing (including overflow healing). At the end of the duration, the Sea-Dyed Foam will explode, dealing DMG to nearby opponents based on 90% of the accumulated healing. (This DMG is calculated similarly to Reactions such as Electro-Charged, and Superconduct, but is not affected by Elemental Mastery, Character Levels, or Reaction DMG Bonuses). Only one Sea-Dyed Foam can be produced every 3.5 seconds. Each Sea-Dyed Foam can accumulate up to 30,000 HP (including overflow healing). There can be no more than one Sea-Dyed Foam active at any given time. This effect can still be triggered even when the character who is using this artifact set is not on the field.

4 pieces · Artifact set

  1. Tenacity of the Millelith
    Tenacity of the Millelith
    • 2-piece bonus: HP +20%
    Show effect
    • 4-piece bonus: When an Elemental Skill hits an opponent, the ATK of all nearby party members is increased by 20% and their Shield Strength is increased by 30% for 3s. This effect can be triggered once every 0.5s. This effect can still be triggered even when the character who is using this artifact set is not on the field.

2 + 2 pieces · Artifact set

Wear both sets, 2 pieces each.

  1. Tenacity of the Millelith
    Tenacity of the Millelith
    • 2-piece bonus: HP +20%
  2. Maiden Beloved
    Maiden Beloved
    • 2-piece bonus: Character Healing Effectiveness +15%

Main stats

Sands
HP% or Energy Recharge
Goblet
Hydro DMG Bonus or HP%
Circlet
Healing Bonus or HP%

Substats

  1. Energy Recharge
  2. HP%
  3. HP

Target stats

Totals to aim for on the character's stat screen.

StatTarget
HP 35,000+ For Kokomi as an off-field healer.
Elemental Mastery 300 For Bloom teams.
Energy Recharge 135–245% Aim for around 200% when using Kokomi as an off-field healer.

Recommended weapons

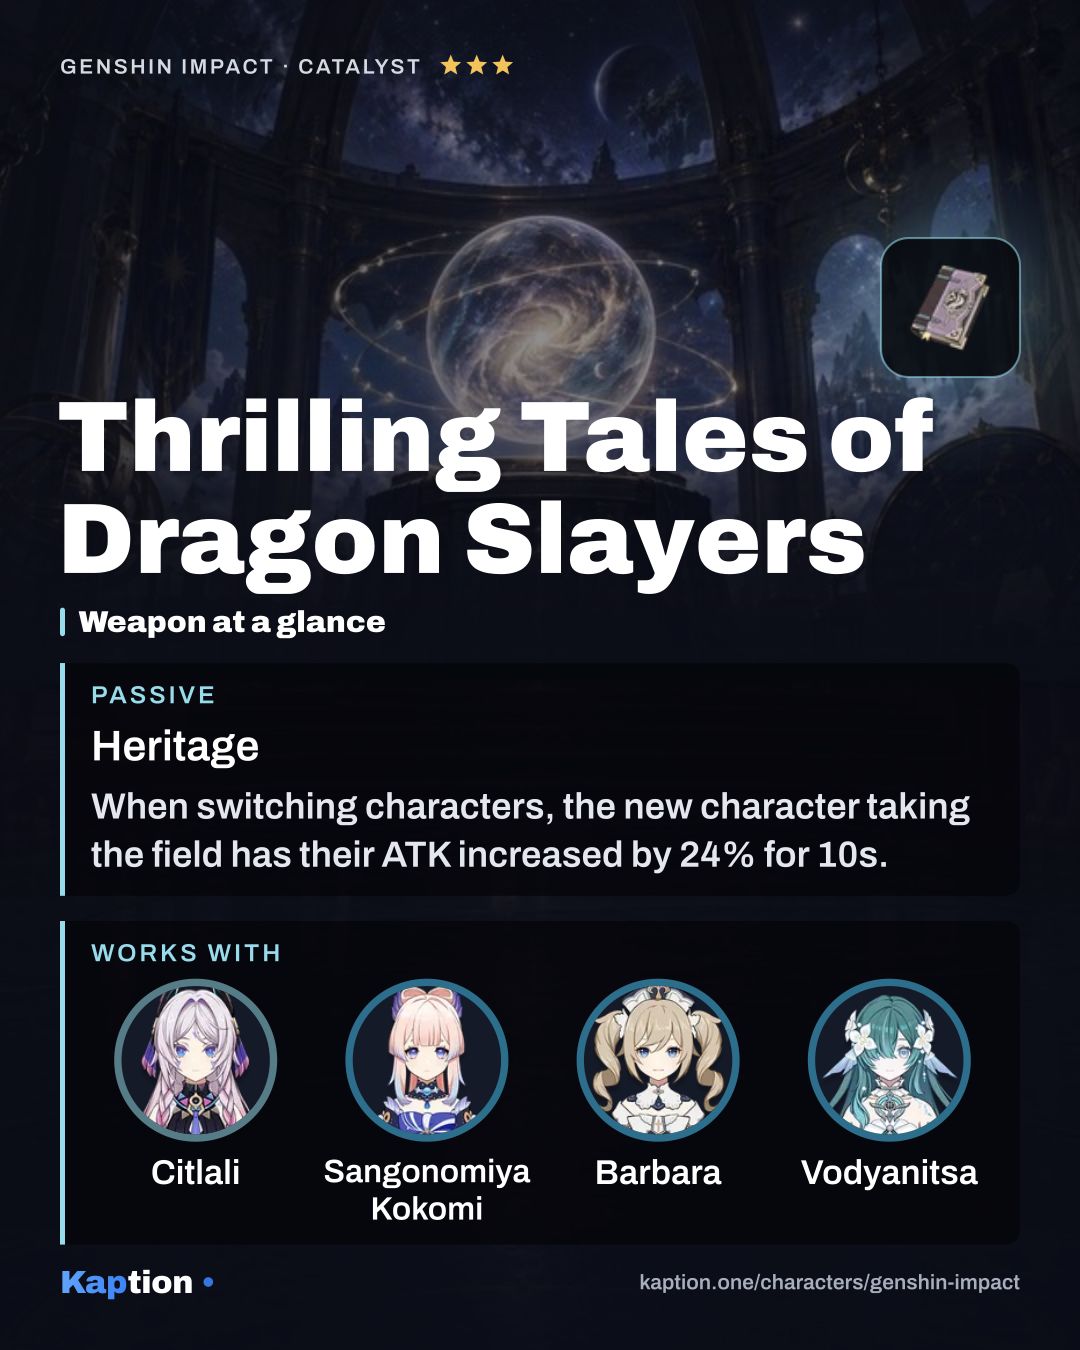
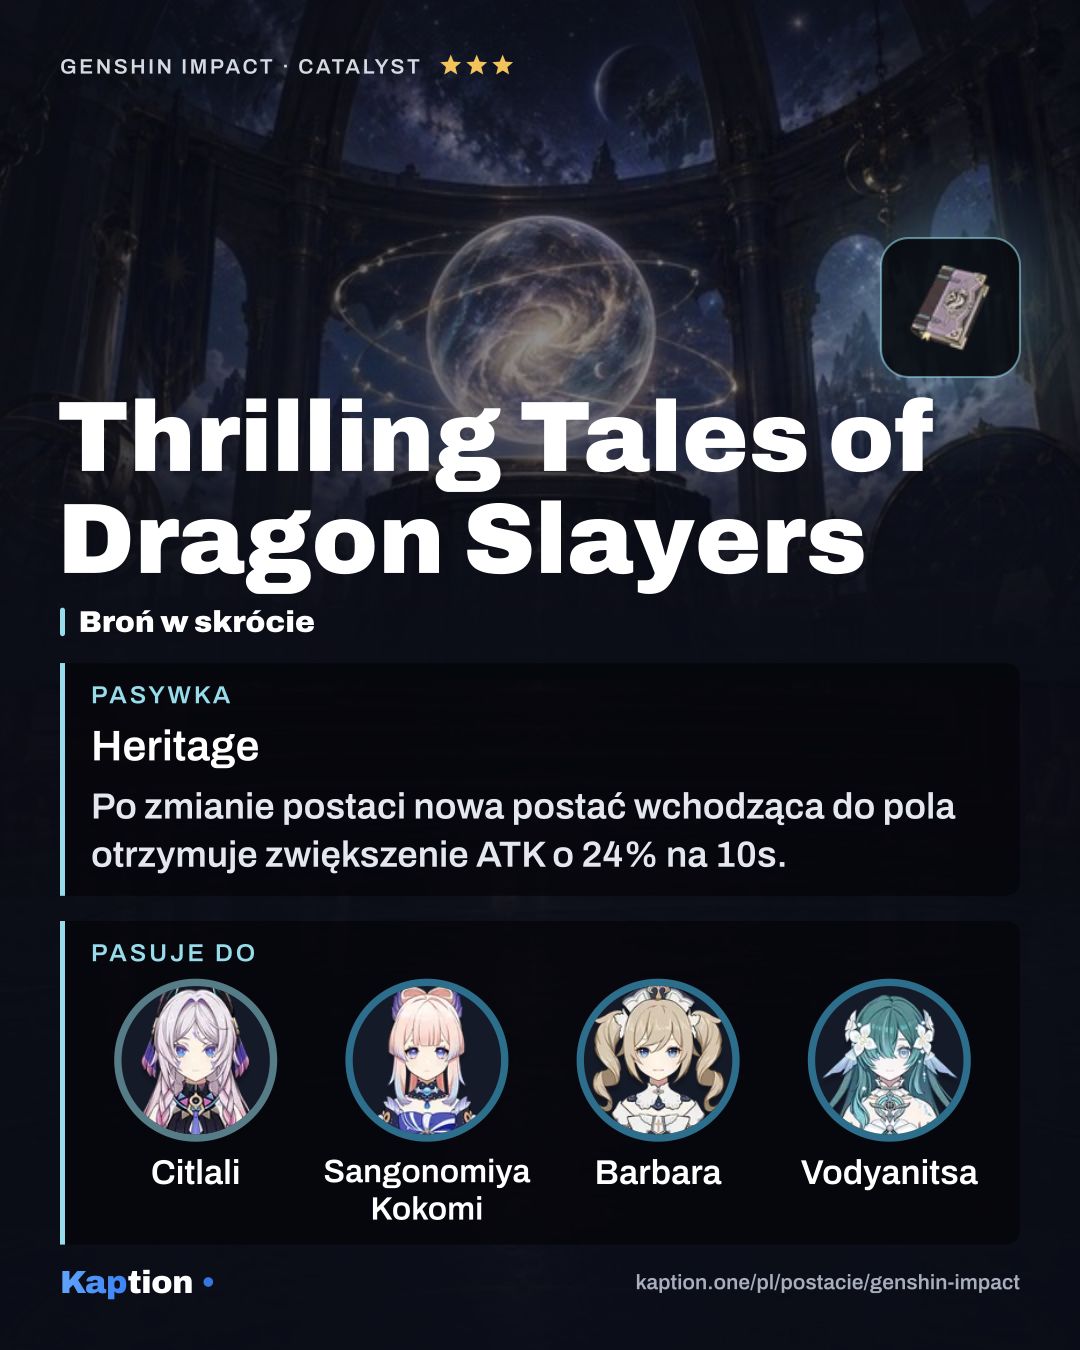
  1. Thrilling Tales of Dragon Slayers
    Thrilling Tales of Dragon Slayers 3-star
    Heritage Show effect

    When switching characters, the new character taking the field has their ATK increased by 24% for 10s. This effect can only occur once every 20s.

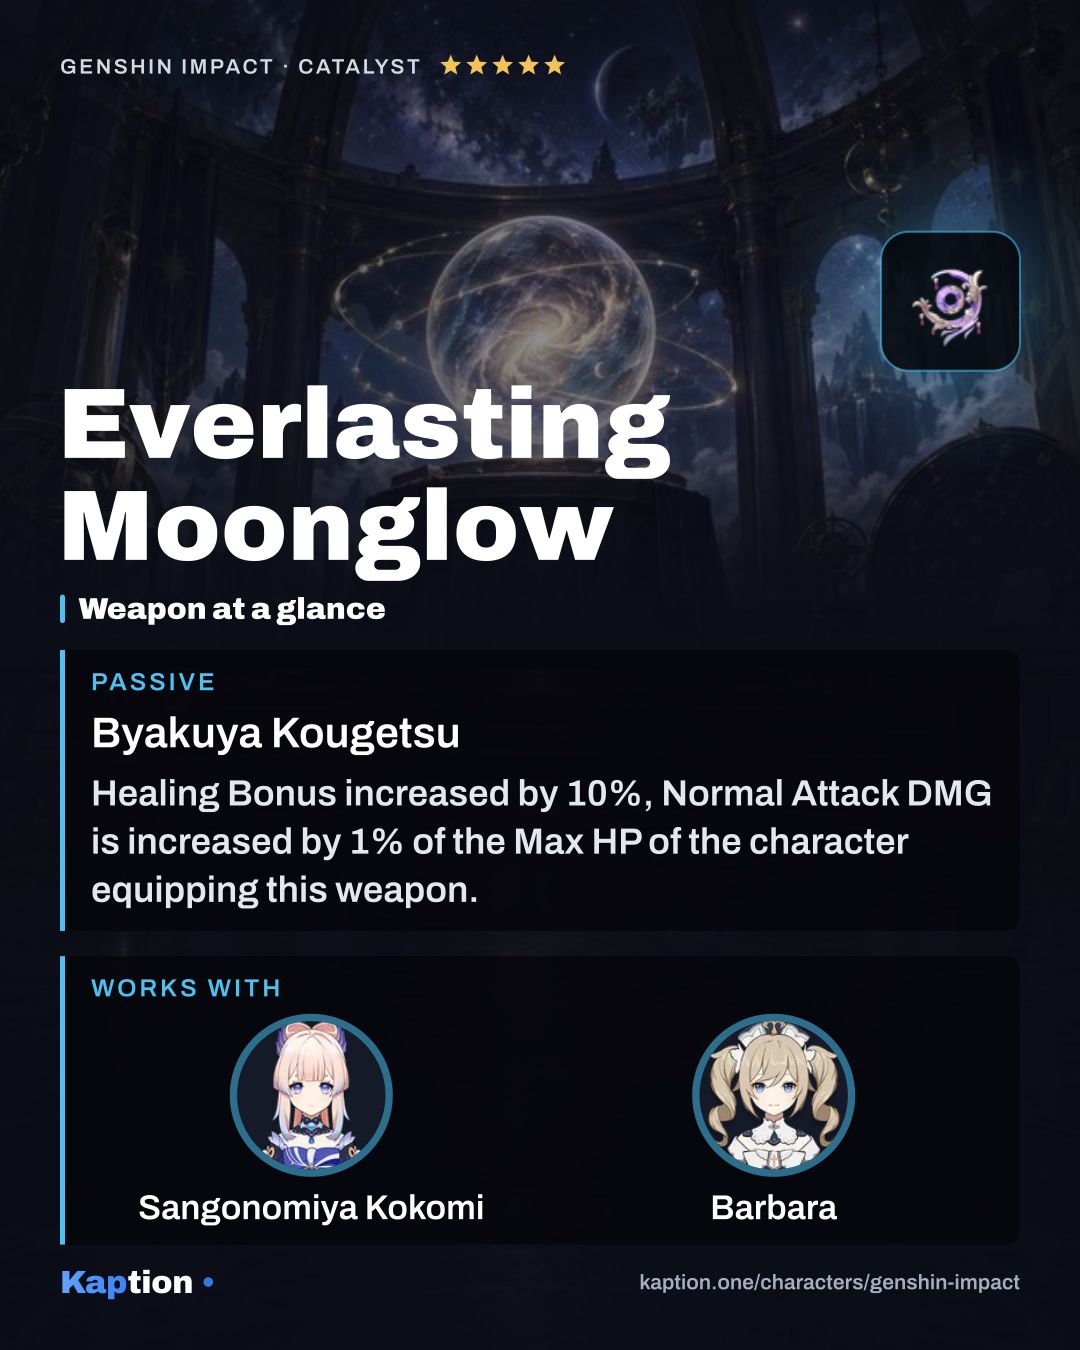
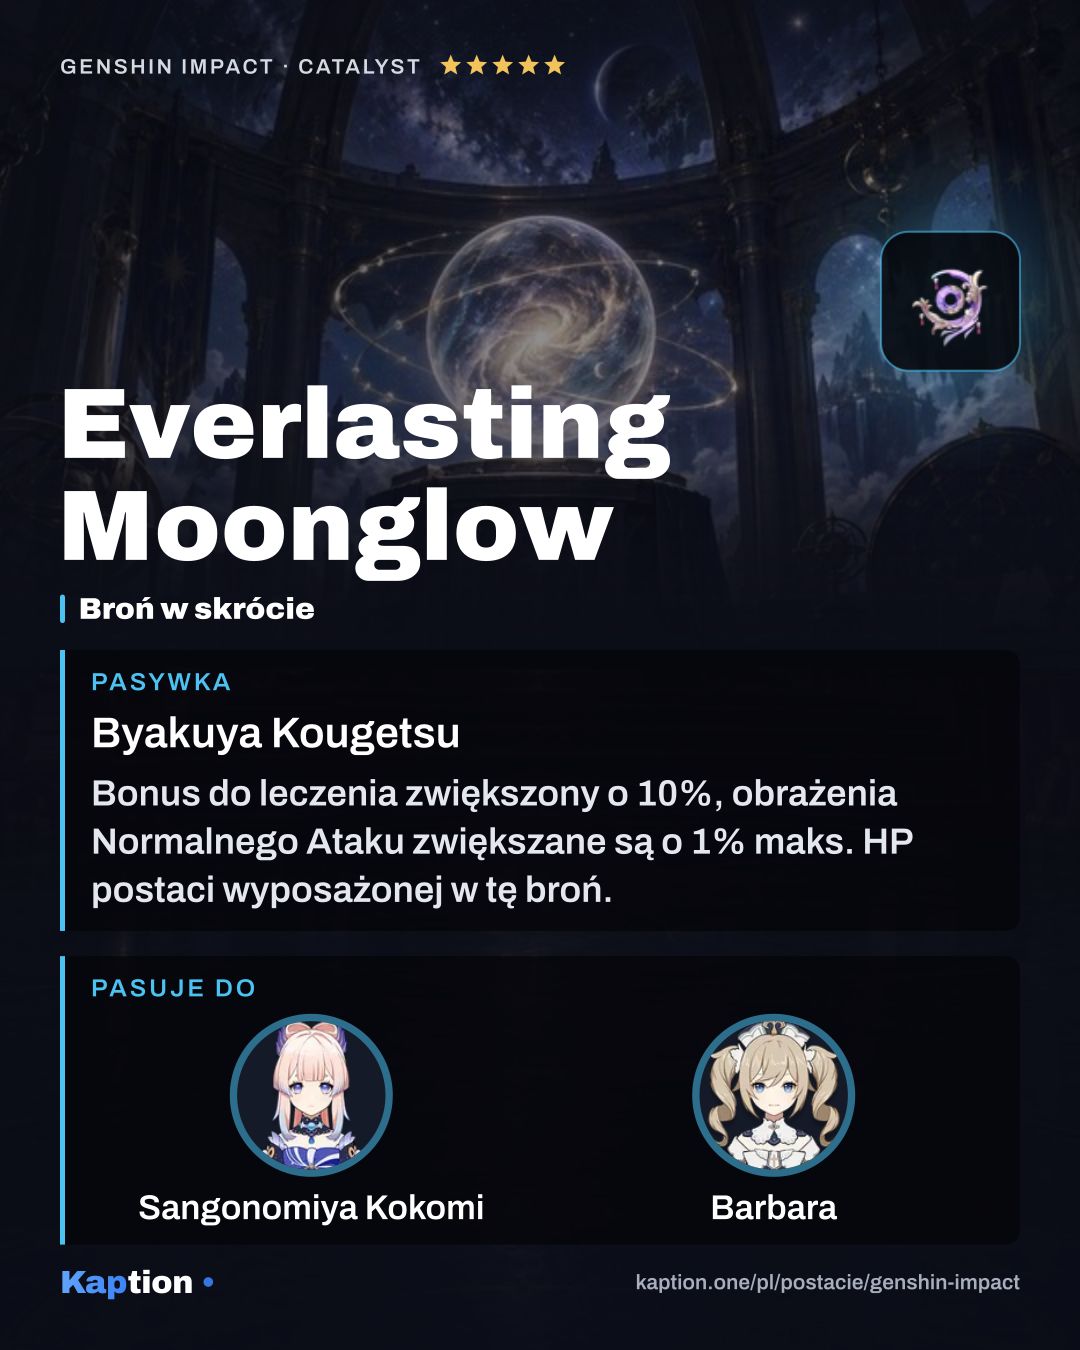
  2. Everlasting Moonglow
    Everlasting Moonglow 5-star
    Byakuya Kougetsu Show effect

    Healing Bonus increased by 10%, Normal Attack DMG is increased by 1% of the Max HP of the character equipping this weapon. For 12s after using an Elemental Burst, Normal Attacks that hit opponents will restore 0.6 Energy. Energy can be restored this way once every 0.1s.

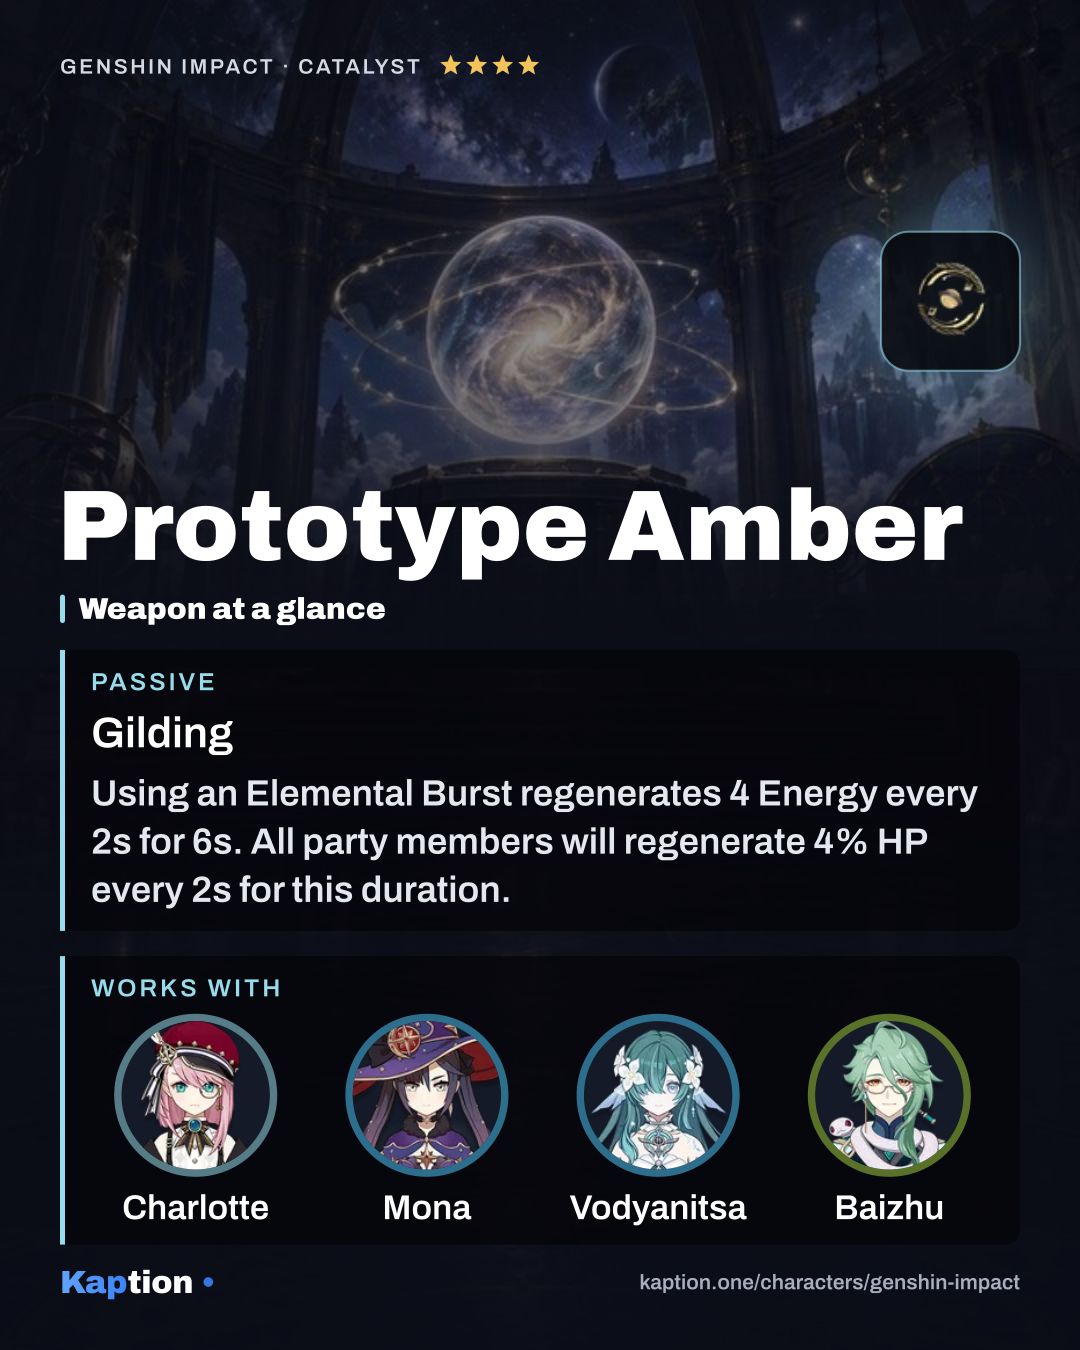
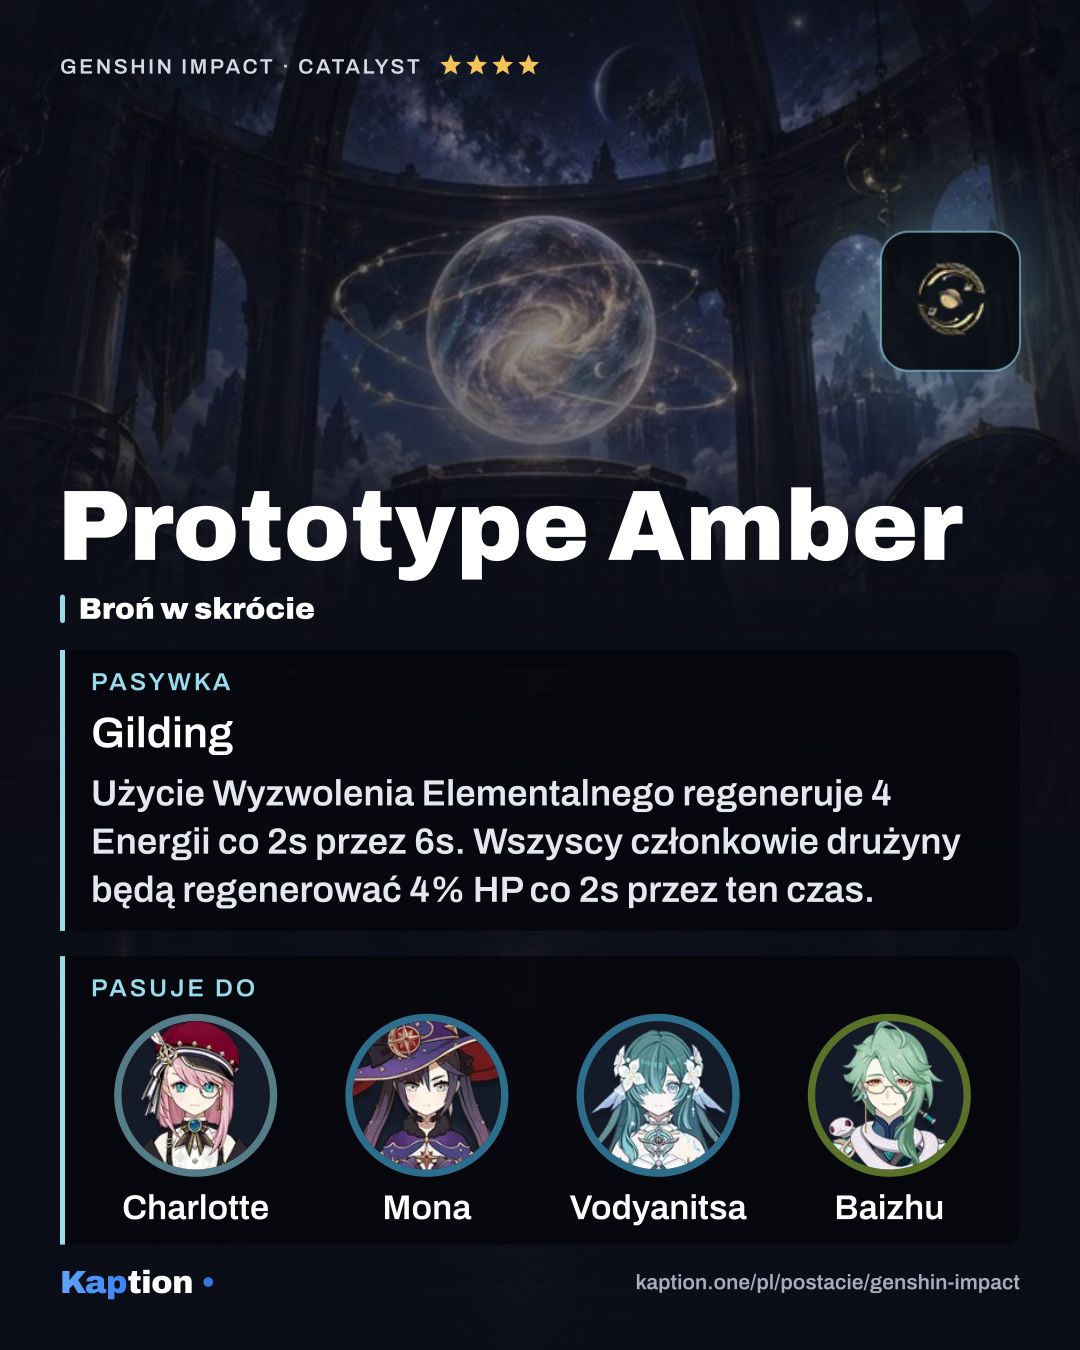
  3. Prototype Amber
    Prototype Amber 4-star
    Gilding Show effect

    Using an Elemental Burst regenerates 4 Energy every 2s for 6s. All party members will regenerate 4% HP every 2s for this duration.

  4. Hymn of the Maelstrom
    Hymn of the Maelstrom 5-star
    Rondo of Slumber Show effect

    Increases Healing Bonus by 4%. When performing healing, the equipping character gains the "Vatsamonga's Vatic Vintage" effect, which increases Max HP by 4% as well as increases the currently active party member's ATK by 0.4% for every 1,000 Max HP the equipping character has over 40,000. A maximum of 8% ATK can be gained in this way. This effect lasts 10s, max 3 stacks. When a nearby party member triggers a Frozen or Stellar Swirl reaction, the aforementioned Max HP and ATK boosts will be further increased by 75% for the next 5s. The aforementioned effects can still trigger even when the equipping character is not on the field.

  5. Waveriding Whirl
    Waveriding Whirl 4-star
    Fangs Flying To and Fro Show effect

    Decreases Swimming Stamina consumption by 15%. In addition, for 10s after using an Elemental Skill, Max HP is increased by 20%. For every Hydro Elemental Type character in the party, Max HP is increased by another 12%, and the maximum increase that can be achieved in this way is 24%. Can be triggered once every 15s.

  6. Surf's Up
    Surf's Up 5-star
    Aqua Remembrance Show effect

    Max HP increased by 20%. Once every 15s, for the 14s after using an Elemental Skill: Gain 4 Scorching Summer stacks. Each stack increases Normal Attack DMG by 12%. For the duration of the effect, once every 1.5s, lose 1 stack after a Normal Attack hits an opponent; once every 1.5s, gain 1 stack after triggering a Vaporize reaction on an opponent. Max 4 Scorching Summer stacks.

Have this character? Make a card of your own build from your UID Stats, artifacts, weapon and talents from your in-game showcase, as a PNG in a dozen layouts.

Teams

Show more teams (4)Show less

Also plays in

Other characters' teams with a place for Sangonomiya Kokomi.

Show more (17)

Skills

Names in English, as in the game · underlined ones open their card · Priority = level-up order

  1. Basic attack

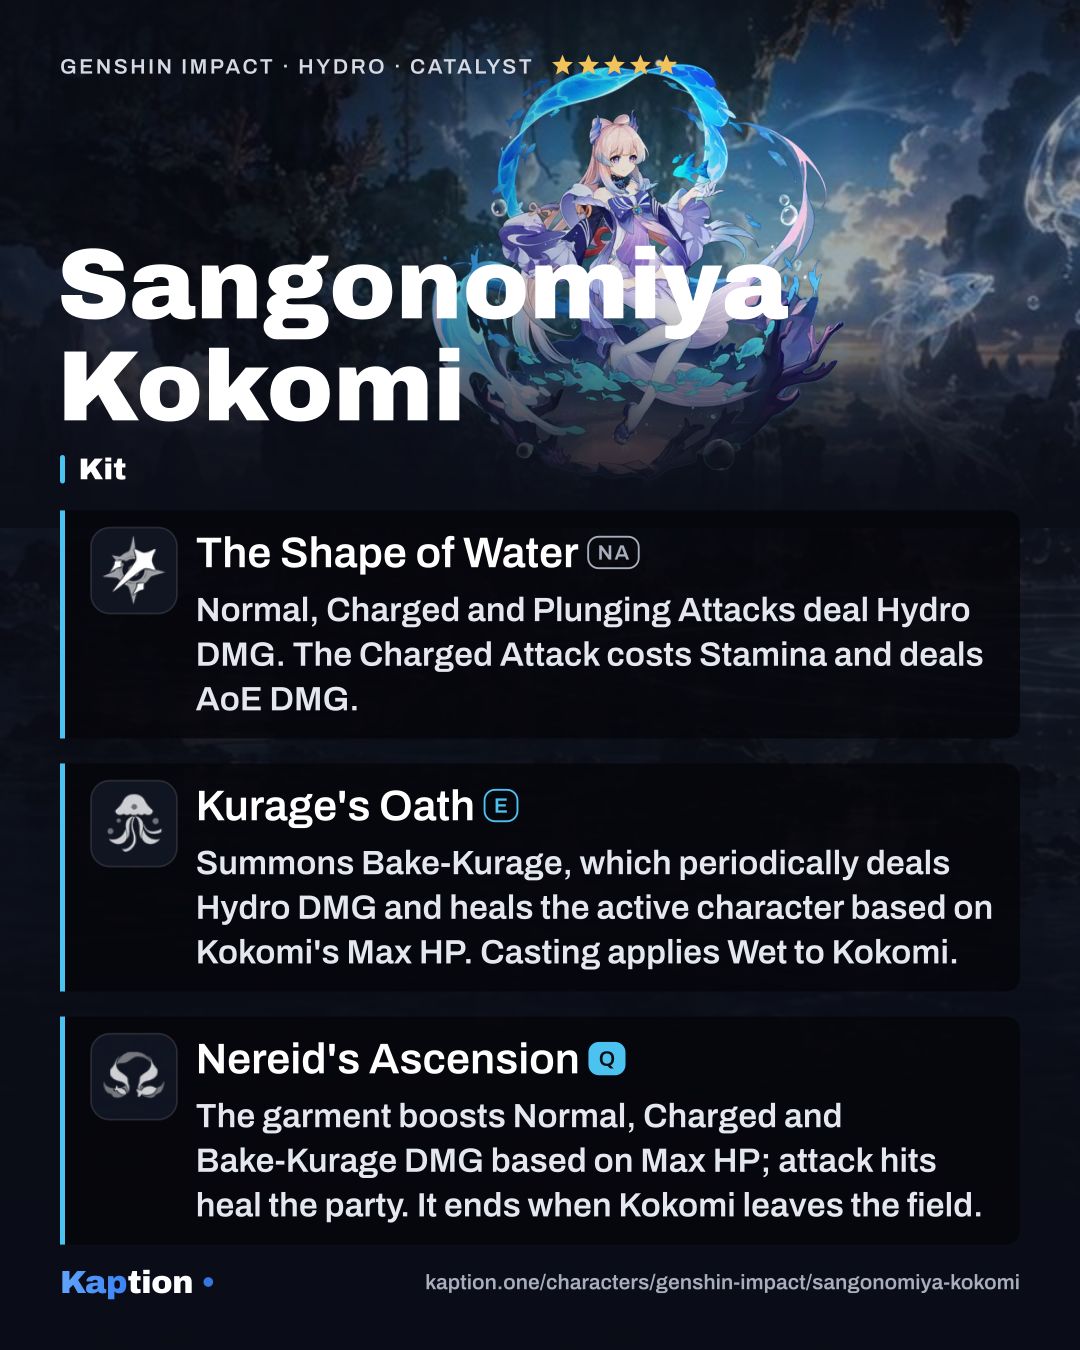
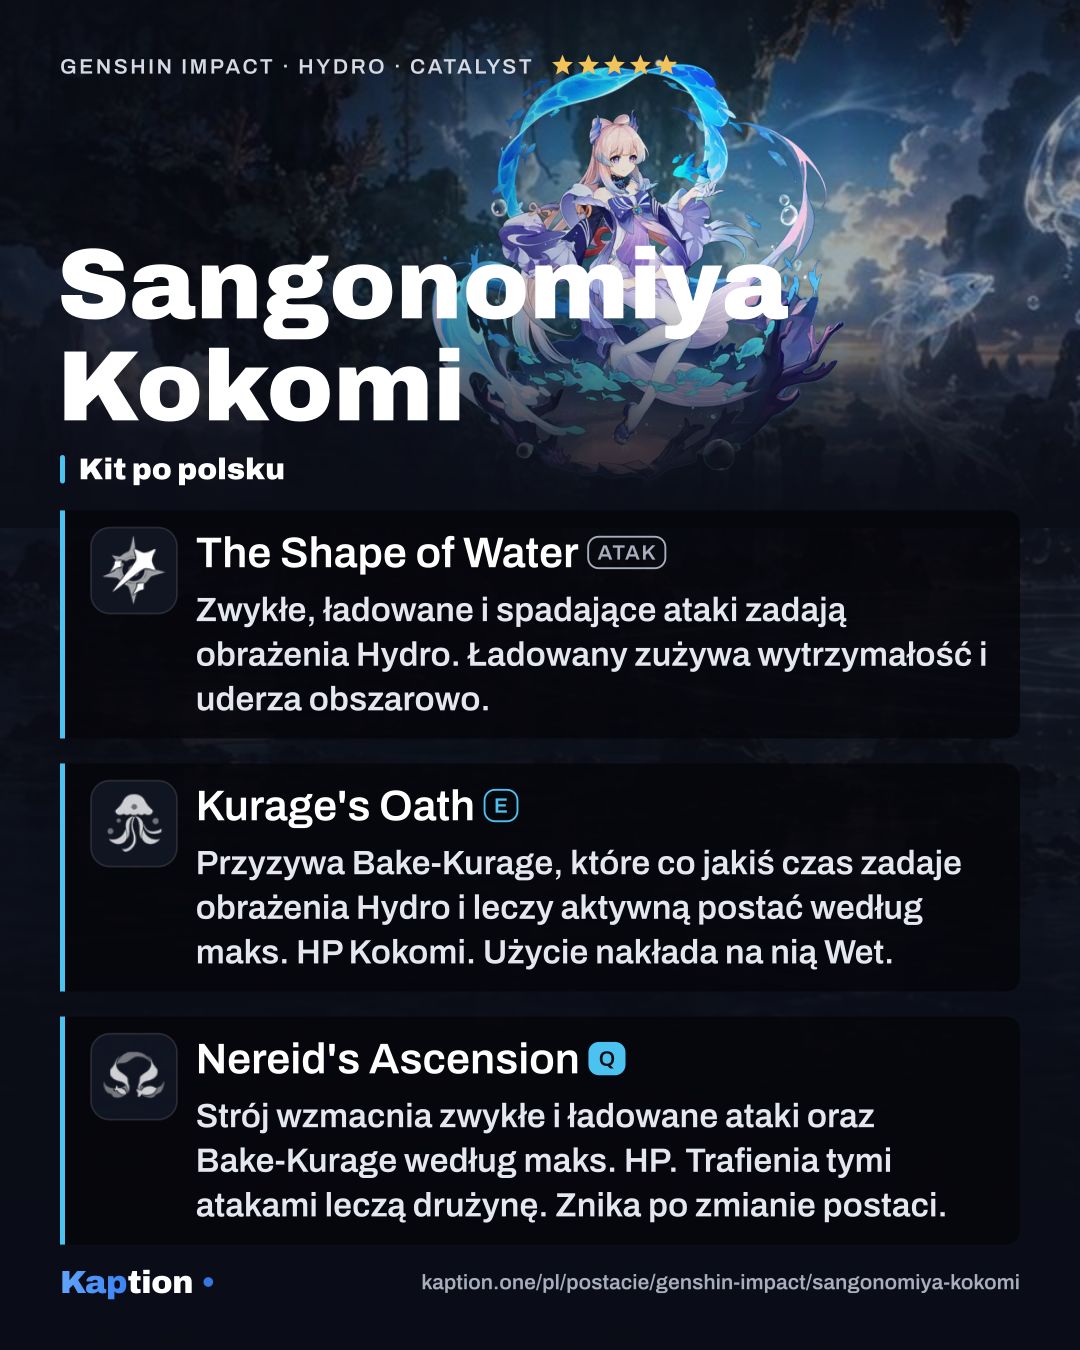
    The Shape of WaterAttack

    Level priority 3 of 3

    Normal, Charged and Plunging Attacks deal Hydro DMG. The Charged Attack costs Stamina and deals AoE DMG.

    Normal Attack Performs up to 3 consecutive attacks that take the form of swimming fish, dealing Hydro DMG. Charged Attack Consumes a certain amount of Stamina to deal AoE Hydro DMG after a short casting time. Plunging Attack Gathering the might of Hydro, Kokomi plunges towards the ground from mid-air, damaging all opponents in her path. Deals AoE Hydro DMG upon impact with the ground.

  2. Skill

    Kurage's OathE

    Level priority 1 of 3

    Summons Bake-Kurage, which periodically deals Hydro DMG and heals the active character based on Kokomi's Max HP. Casting applies Wet to Kokomi.

    Summons a "Bake-Kurage" created from water that can heal her allies. Using this skill will apply the Wet status to Sangonomiya Kokomi. Bake-Kurage Deals Hydro DMG to surrounding opponents and heals nearby active characters at fixed intervals. This healing is based on Kokomi's Max HP. Kokomi needs timely "refreshment" in order to maintain optimal work efficiency.

  3. Ultimate

    Nereid's AscensionQ

    Level priority 2 of 3

    The garment boosts Normal, Charged and Bake-Kurage DMG based on Max HP; attack hits heal the party. It ends when Kokomi leaves the field.

    Summons the might of Watatsumi, dealing Hydro DMG to surrounding opponents, before robing Kokomi in a Ceremonial Garment made from the flowing waters of Sangonomiya. Ceremonial Garment ·Sangonomiya Kokomi's Normal Attack, Charged Attack and Bake-Kurage DMG are increased based on her Max HP. ·When her Normal and Charged Attacks hit opponents, Kokomi will restore HP for all nearby party members, and the amount restored is based on her Max HP. ·Increases Sangonomiya Kokomi's resistance to interruption and allows her to walk on the water's surface. These effects will be cleared once Sangonomiya Kokomi leaves the field. Clear light coalesces into robes around Her Excellency, Sangonomiya Kokomi, reflecting her magnificent form.

Passives

  1. Passive

    Tamakushi CasketPassive

    Using the Burst while Kokomi's Bake-Kurage is on the field refreshes its duration.

    If Sangonomiya Kokomi's own Bake-Kurage is on the field when she uses Nereid's Ascension, the Bake-Kurage's duration will be refreshed.

  2. Passive

    Song of PearlsPassive

    In the garment, the Max HP-based Normal and Charged Attack DMG bonus gains a further increase based on 15% of Healing Bonus.

    While donning the Ceremonial Garment created by Nereid's Ascension, the Normal and Charged Attack DMG Bonus Sangonomiya Kokomi gains based on her Max HP will receive a further increase based on 15% of her Healing Bonus.

  3. Passive

    Princess of WatatsumiPassive

    Party members use 20% less Stamina while swimming. This does not stack with identical passive effects.

    Decreases swimming Stamina consumption for your own party members by 20%. Not stackable with Passive Talents that provide the exact same effects.

  4. Passive

    Flawless StrategyPassive

    Kokomi gains 25% Healing Bonus but loses 100% CRIT Rate.

    Sangonomiya Kokomi has a 25% Healing Bonus, but a 100% decrease in CRIT Rate.

Constellations

  1. C1

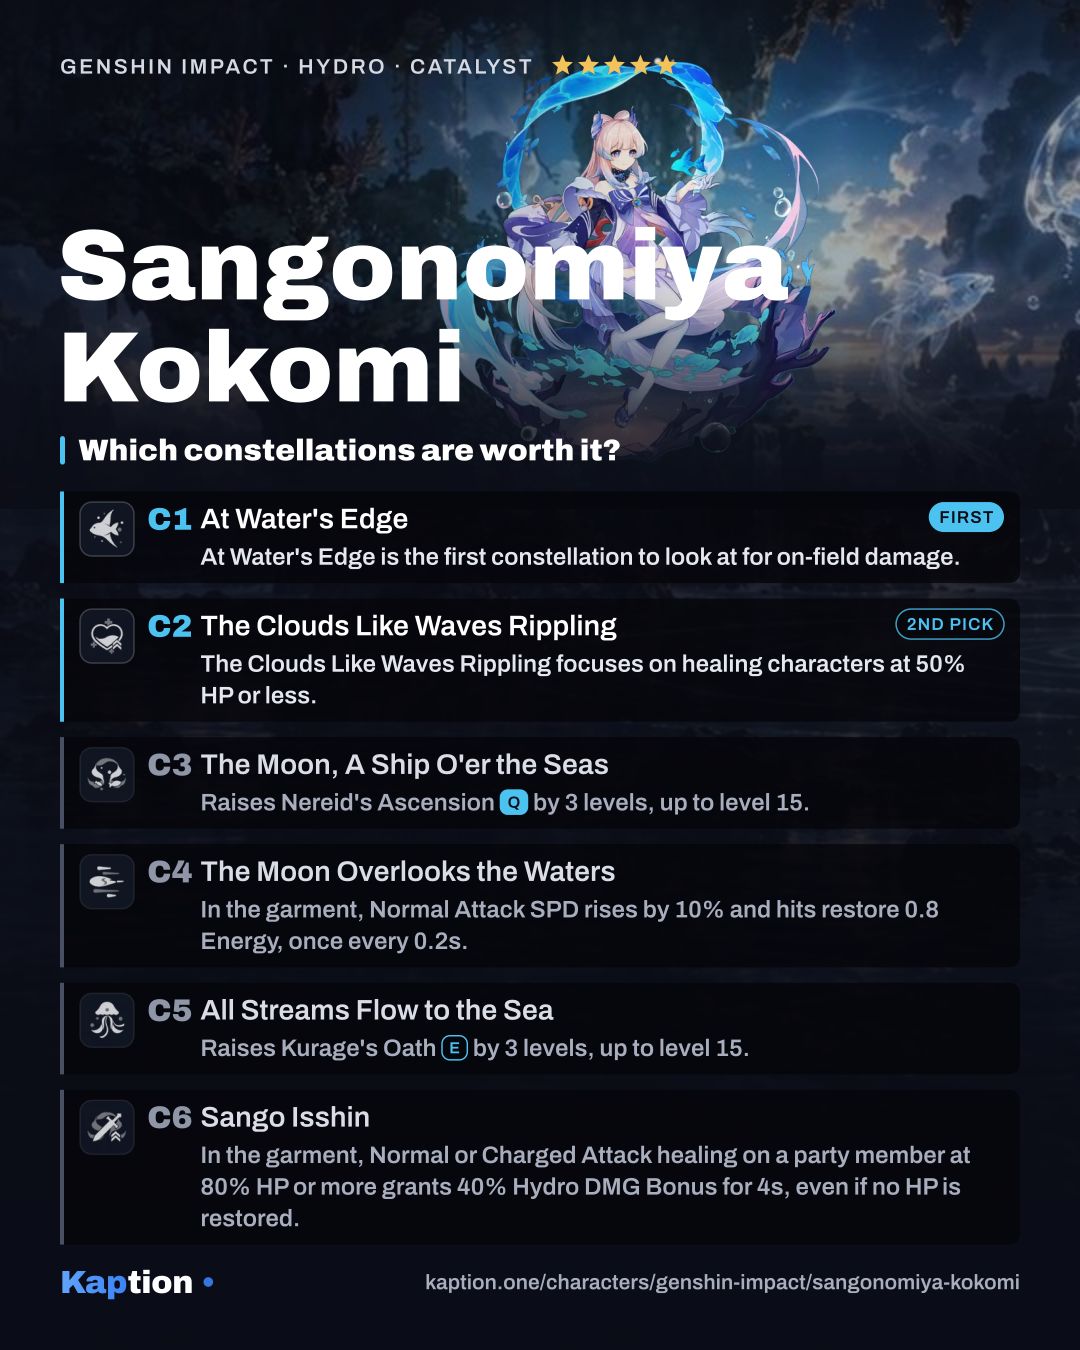
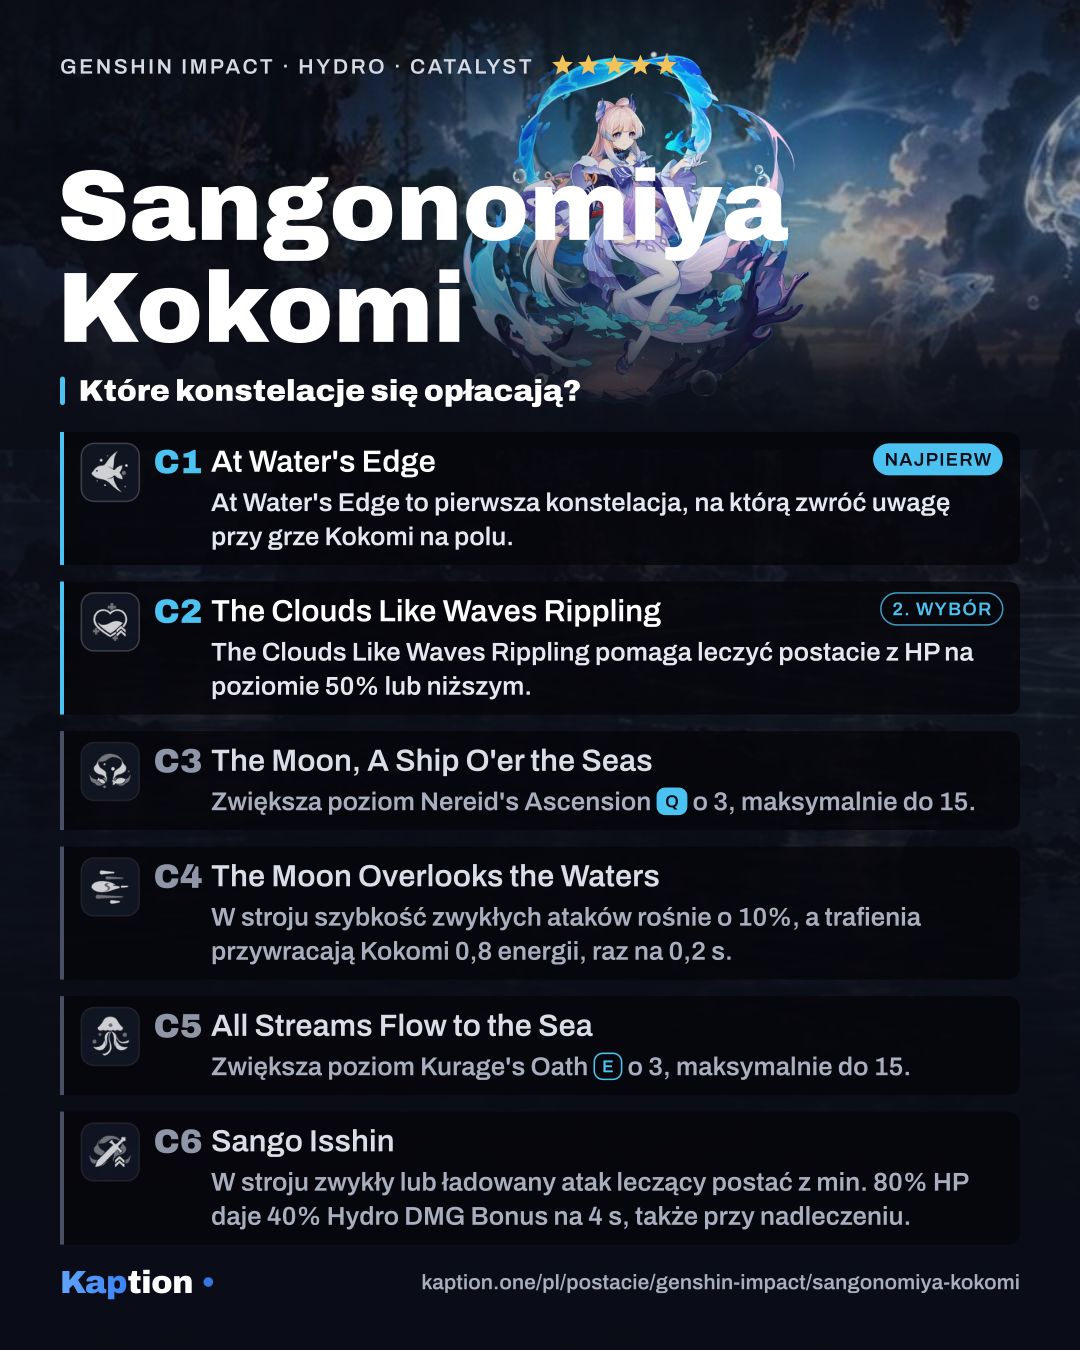
    At Water's Edge

    Worth it

    At Water's Edge (C1) is the first constellation to look at for on-field damage.

    While donning the Ceremonial Garment created by Nereid's Ascension, the final Normal Attack in Sangonomiya Kokomi's combo will unleash a swimming fish to deal 30% of her Max HP as Hydro DMG. This DMG is not considered Normal Attack DMG.

  2. C2

    The Clouds Like Waves Rippling

    Worth it

    The Clouds Like Waves Rippling (C2) focuses on healing characters at 50% HP or less.

    Sangonomiya Kokomi gains the following Healing Bonuses with regard to characters with 50% or less HP via the following methods: ·Kurage's Oath Bake-Kurage: 4.5% of Kokomi's Max HP. ·Nereid's Ascension Normal and Charged Attacks: 0.6% of Kokomi's Max HP.

  3. C3

    The Moon, A Ship O'er the Seas

    Increases the Level of Nereid's Ascension by 3. Maximum upgrade level is 15.

  4. C4

    The Moon Overlooks the Waters

    While donning the Ceremonial Garment created by Nereid's Ascension, Sangonomiya Kokomi's Normal Attack SPD is increased by 10%, and Normal Attacks that hit opponents will restore 0.8 Energy for her. This effect can occur once every 0.2s.

  5. C5

    All Streams Flow to the Sea

    Increases the Level of Kurage's Oath by 3. Maximum upgrade level is 15.

  6. C6

    Sango Isshin

    While donning the Ceremonial Garment created by Nereid's Ascension, Sangonomiya Kokomi gains a 40% Hydro DMG Bonus for 4s when her Normal and Charged Attacks heal, or would heal, any party member with 80% or more HP.

Materials

Ascension, to max level

  • Mora Mora × 420,000
  • Sango Pearl Sango Pearl × 168
  • Varunada Lazurite Sliver Varunada Lazurite Sliver × 1
  • Varunada Lazurite Fragment Varunada Lazurite Fragment × 9
  • Varunada Lazurite Chunk Varunada Lazurite Chunk × 9
  • Varunada Lazurite Gemstone Varunada Lazurite Gemstone × 6
  • Spectral Husk Spectral Husk × 18
  • Spectral Heart Spectral Heart × 30
  • Spectral Nucleus Spectral Nucleus × 36
  • Dew of Repudiation Dew of Repudiation × 46

All skills to max

  • Mora Mora × 4,957,500
  • Crown of Insight Crown of Insight × 3
  • Teachings of Transience Teachings of Transience × 9
  • Guide to Transience Guide to Transience × 63
  • Philosophies of Transience Philosophies of Transience × 114
  • Spectral Husk Spectral Husk × 18
  • Spectral Heart Spectral Heart × 66
  • Spectral Nucleus Spectral Nucleus × 93
  • Hellfire Butterfly Hellfire Butterfly × 18

Guide

How the kit works

Start with Kurage's Oath to summon Bake-Kurage. It periodically deals Hydro DMG to nearby opponents and heals nearby active characters based on Kokomi's Max HP. Using the skill also applies Wet to Kokomi. You can then switch to a teammate while Bake-Kurage remains on the field.

Use Nereid's Ascension while Kokomi's own Bake-Kurage is still present. The passive Tamakushi Casket refreshes its duration when the Burst is used. The Burst also deals Hydro DMG and gives Kokomi a Ceremonial Garment, increasing her Normal Attack, Charged Attack and Bake-Kurage damage based on Max HP.

During the garment, use The Shape of Water (NA) to hit opponents. Normal and Charged Attack hits heal all nearby party members. Song of Pearls increases their garment damage bonus further by 15% of Kokomi's Healing Bonus. The garment also improves interruption resistance, but its effects end when Kokomi leaves the field. She can walk on water while it lasts.

Build and why

For a damage build, use four pieces of Ocean-Hued Clam. Its Healing Bonus helps Kokomi, and its four-piece effect records healing, including excess healing, before dealing damage to nearby opponents. Each Sea-Dyed Foam can record up to 30,000 HP and deals damage based on 90% of the recorded amount. The effect can trigger while Kokomi is off-field.

Four pieces of Tenacity of the Millelith are a strong team-support alternative. Bake-Kurage hits can grant nearby party members 20% ATK and 30% Shield Strength for 3 seconds, even while Kokomi is off-field. Song of Days Past is another option: it records healing and uses it to increase the active character's damage. Two pieces each of Tenacity of the Millelith and Maiden Beloved are a useful mix for Max HP and healing.

Use HP Percentage or Energy Recharge on the sands, Hydro DMG Bonus or HP Percentage on the goblet, and Healing Bonus or HP Percentage on the circlet. Look for Energy Recharge first in substats, followed by HP Percentage and HP. Healing Bonus helps both healing and the garment's attack bonus, while Hydro DMG Bonus suits a Kokomi who spends time attacking.

Thrilling Tales of Dragon Slayers is the first weapon to consider for team support: switching characters gives the incoming character 24% ATK for 10 seconds, once every 20 seconds. Everlasting Moonglow suits on-field play with Healing Bonus, Max HP-based Normal Attack damage and Energy restoration after a Burst. Prototype Amber is another option that restores Energy and party HP after a Burst.

Leveling priority

A good leveling order is Kurage's Oath, Nereid's Ascension, then The Shape of Water (NA). The skill is useful even when Kokomi leaves the field, while the Burst improves her on-field damage and party healing. Raise Normal Attacks earlier if you spend a lot of time attacking with her.

For maximum ascension, collect 420,000 Mora, 168 Sango Pearl, 46 Dew of Repudiation, 1 Varunada Lazurite Sliver, 9 Varunada Lazurite Fragment, 9 Varunada Lazurite Chunk and 6 Varunada Lazurite Gemstone. You also need 18 Spectral Husk, 30 Spectral Heart and 36 Spectral Nucleus.

For all three talents, the total is 4,957,500 Mora, 3 Crown of Insight, 9 Teachings of Transience, 63 Guide to Transience, 114 Philosophies of Transience, 18 Spectral Husk, 66 Spectral Heart, 93 Spectral Nucleus and 18 Hellfire Butterfly.

Constellations worth it

At Water's Edge is the first constellation to look at for on-field damage. While the Ceremonial Garment is active, the final hit of Kokomi's Normal Attack combo releases a fish that deals Hydro DMG equal to 30% of her Max HP. That fish damage is not considered Normal Attack damage.

The Clouds Like Waves Rippling focuses on healing characters at 50% HP or less. It adds healing based on 4.5% of Kokomi's Max HP to Bake-Kurage and 0.6% to the garment's Normal and Charged Attack healing. Its value depends on whether you need that extra healing at low HP.

The Moon Overlooks the Waters is worth considering for on-field play: the garment gives Normal Attacks 10% more speed, and hits restore 0.8 Energy, up to once every 0.2 seconds. Sango Isshin grants 40% Hydro DMG Bonus for 4 seconds when garment attacks heal or would heal a party member at 80% HP or more. You can stop at C0; C3 and C5 raise talent levels rather than adding a new way to play.

Teams

Kokomi fits teams that want Hydro and healing in one slot. For a Frozen team, pair her with a Cryo damage dealer such as Kamisato Ayaka and consider an Anemo character such as Venti. Place Bake-Kurage where it can reach opponents and the active character.

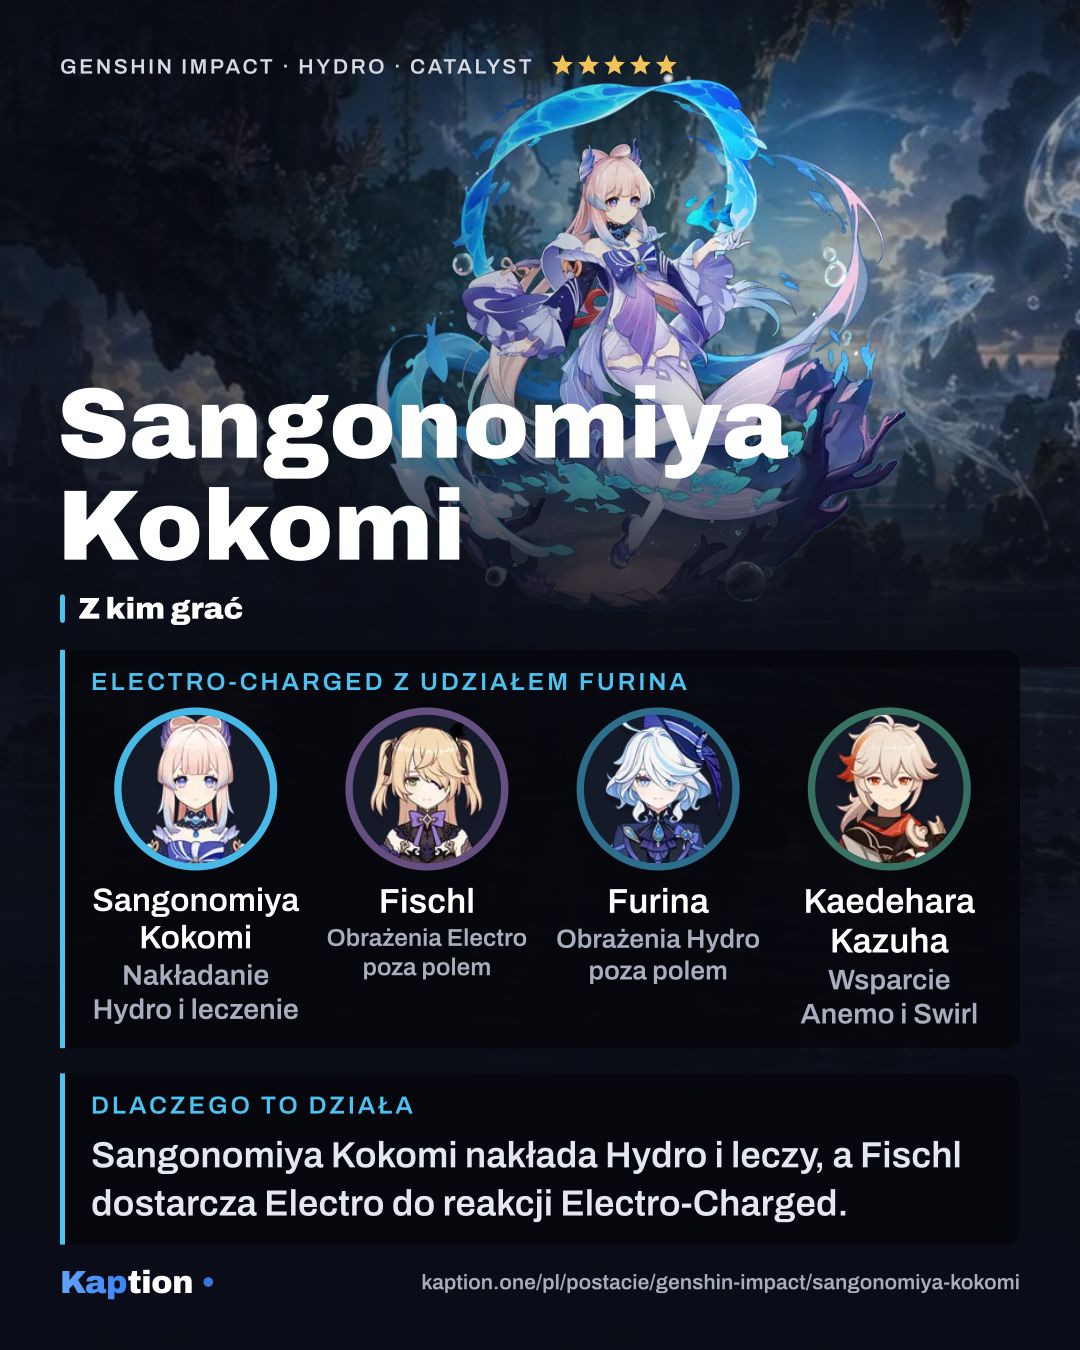
For Bloom teams, Nahida provides a Dendro teammate and Nilou is another named option. Fischl or Beidou can be considered for an Electro-Charged team. Kokomi can stay on the field during her Burst when the team needs her attacks and party-wide healing, or switch out after placing Bake-Kurage when another character needs field time.

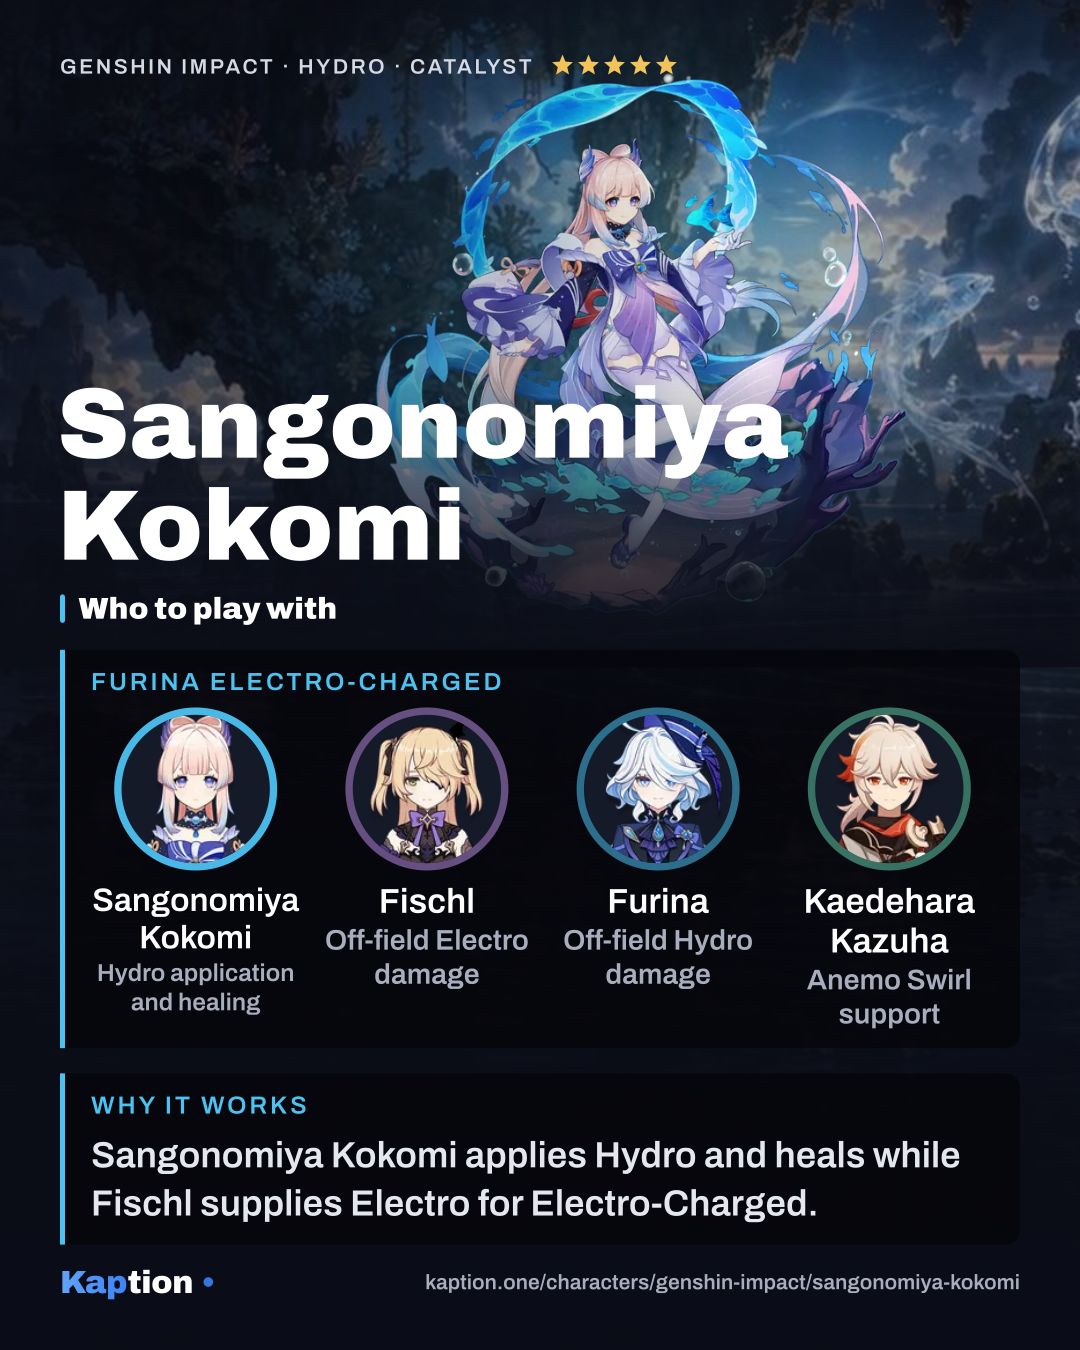
Furina is another Hydro teammate to consider. Kokomi's Burst healing reaches all nearby party members when her attacks hit, while Bake-Kurage heals the nearby active character between those on-field turns.

Common mistakes

Do not use Nereid's Ascension expecting a refresh after Bake-Kurage has disappeared. Kokomi's own summon must still be on the field when she casts it. Also avoid switching away immediately if you want to use the Ceremonial Garment: its effects end when she leaves.

Do not build around CRIT Rate without accounting for Flawless Strategy's 100% reduction. Keep enough Energy Recharge to use the Burst when you need it, and choose HP Percentage and Healing Bonus for the parts of the kit that scale with them.

Watch who receives healing. Kurage's Oath heals nearby active characters, while garment-enhanced attack hits heal all nearby party members. Remember that casting the skill also applies Wet to Kokomi.

Sangonomiya Kokomi in Polish

Story lines the way Kaption shows them in Polish, with the English original underneath.

  • Sangonomiya Kokomi · Rumors Abound Jaki jest ich cel? Czy żołnierze mają rację? Czy rzeczywiście mogą być w zmowie z Komisją Tenryou? What's their objective? Are the soldiers right? Could they really be in collusion with the Tenryou Commission?
  • Sangonomiya Kokomi · New Beginning Nie chcę was słyszeć, dopóki wszyscy nie będziecie w stanie walczyć z dwoma Shogunowymi Samurajami naraz! I don't want to hear from any of you again until all of you can take on two Shogunate Samurai at a time!
  • Sangonomiya Kokomi · Her Secret Yae Publishing House wydało to w zeszłym miesiącu, ale nie miałem jeszcze okazji tego zdobyć... Nie ma odwrotu, dobrze? The Yae Publishing House published it last month, but I haven't had the chance to get my hands on it... No backing out now, okay?
  • Sangonomiya Kokomi · Her Secret Naprawdę? Tak! Chcę najnowszy tom Teyvat Art of War! Really? Yes! I want the latest volume of the Teyvat Art of War!
  • Sangonomiya Kokomi · Rumors Abound Miałem/miałam nadzieję poruszyć to podczas rozmów pokojowych i omówić to porządnie. Żale trzeba w końcu puścić... I've been hoping to raise all this at the peace talks and discuss it properly. Grievances have to be let go eventually...
  • Sangonomiya Kokomi · Victory Banquet Niedawno nasza wojna z Armią Szoguna dobiegła końca i w końcu zniesiono Dekret Polowania na Wizje. Recently, our war with the Shogun's Army came to an end, and we finally saw the abolition of the Vision Hunt Decree.
  • Sangonomiya Kokomi · Rumors Abound Spotkajmy się jutro przy wejściu do Sanktuarium Sangonomiya. Potem przygotujemy się do Uczty Zwycięstwa. Let's rendezvous tomorrow at the entrance to Sangonomiya Shrine. Then we'll go and make preparations for the Victory Feast.
  • Sangonomiya Kokomi · Victory Banquet Wygląda na to, że noc minęła bez problemów. Cieszę się, że wszystko idzie sprawnie. Tonight seems to have gone off without a hitch. I'm so glad it's all going smoothly.

Frequently asked questions

What's the best build for Sangonomiya Kokomi?

Artifacts: Song of Days Past, Ocean-Hued Clam ×4 or Tenacity of the Millelith ×4. Main stats: Sands: HP% or Energy Recharge, Goblet: Hydro DMG Bonus or HP%, Circlet: Healing Bonus or HP%. Recommended weapons: Thrilling Tales of Dragon Slayers, Everlasting Moonglow or Prototype Amber.

What should I level first on Sangonomiya Kokomi?

Kurage's OathE first, then Nereid's AscensionQ and The Shape of WaterAttack.

Which constellations are worth getting for Sangonomiya Kokomi?

The biggest upgrades: C1 At Water's Edge and C2 The Clouds Like Waves Rippling.

Who should Sangonomiya Kokomi team up with?

Good teammates: Fischl, Furina and Kaedehara Kazuha.

Is Sangonomiya Kokomi in Polish in Genshin Impact?

The game has no Polish language option. Kaption shows Polish subtitles for the dialogue right on the game screen, so Sangonomiya Kokomi's lines read in Polish. Skill and item names stay in English, as in the game.

Share

Ready-made cards for Instagram, TikTok, X or Discord, in English or Polish.

4:5 for Instagram and Facebook · 9:16 for Stories, TikTok and Shorts · 16:9 for X and Discord

The build cards and quick guides of every Genshin Impact character (131) in one ZIP: 4:5 (45 MB) 9:16 (60 MB) 16:9 (31 MB)

On Discord, paste the copied link or drag the downloaded file into the chat.

Game data version 7.2.0.

← All Genshin Impact characters