











































































Guide
How the kit works
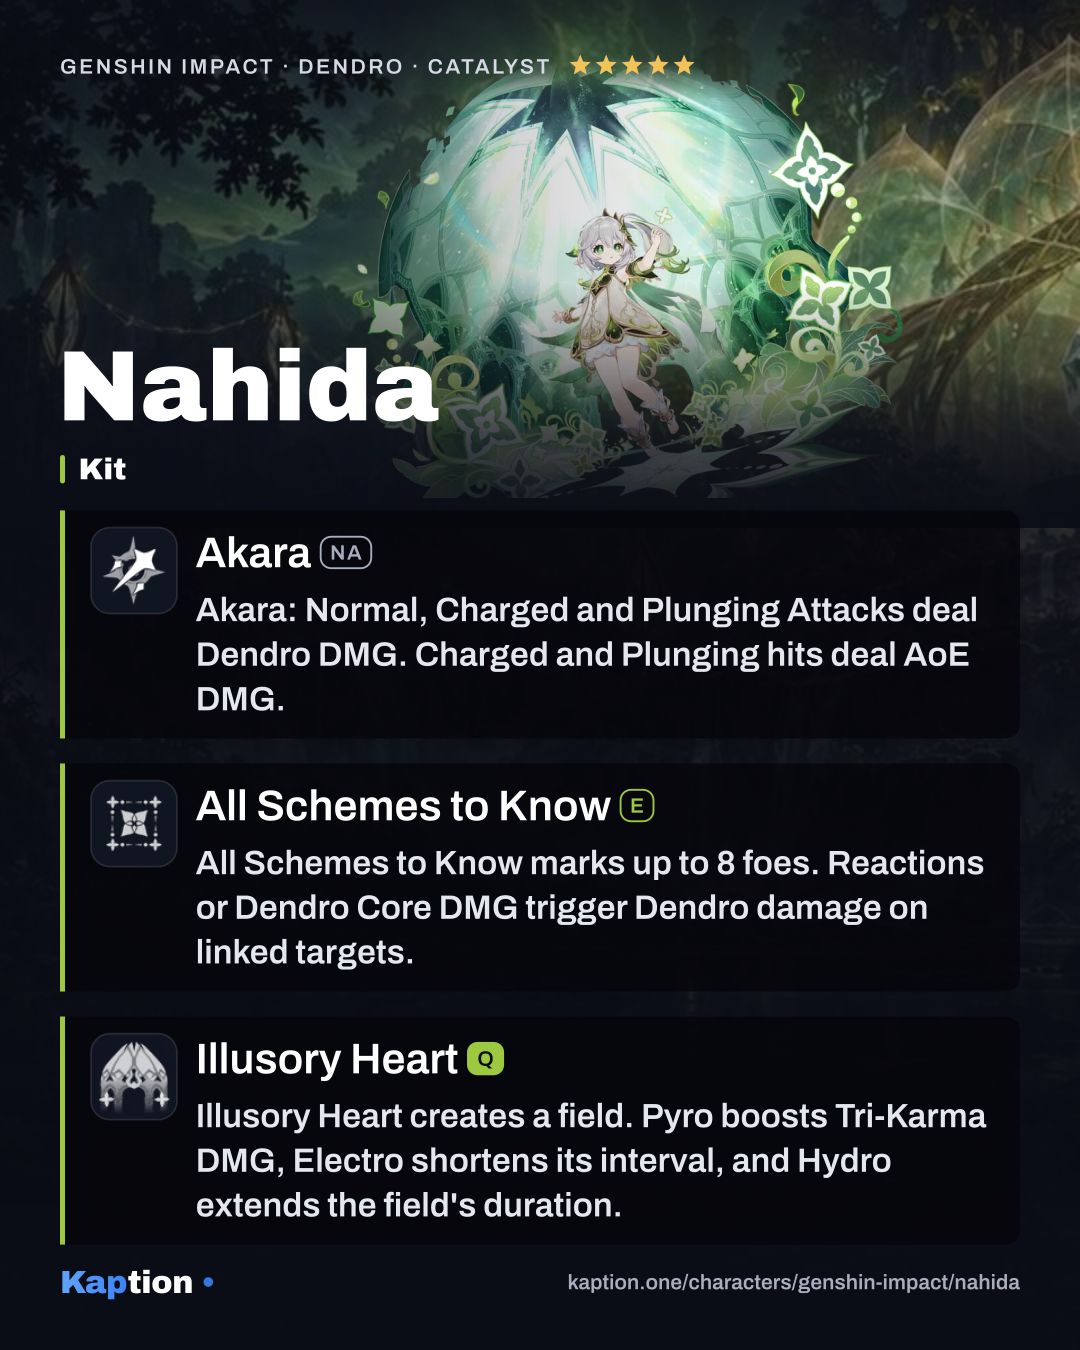
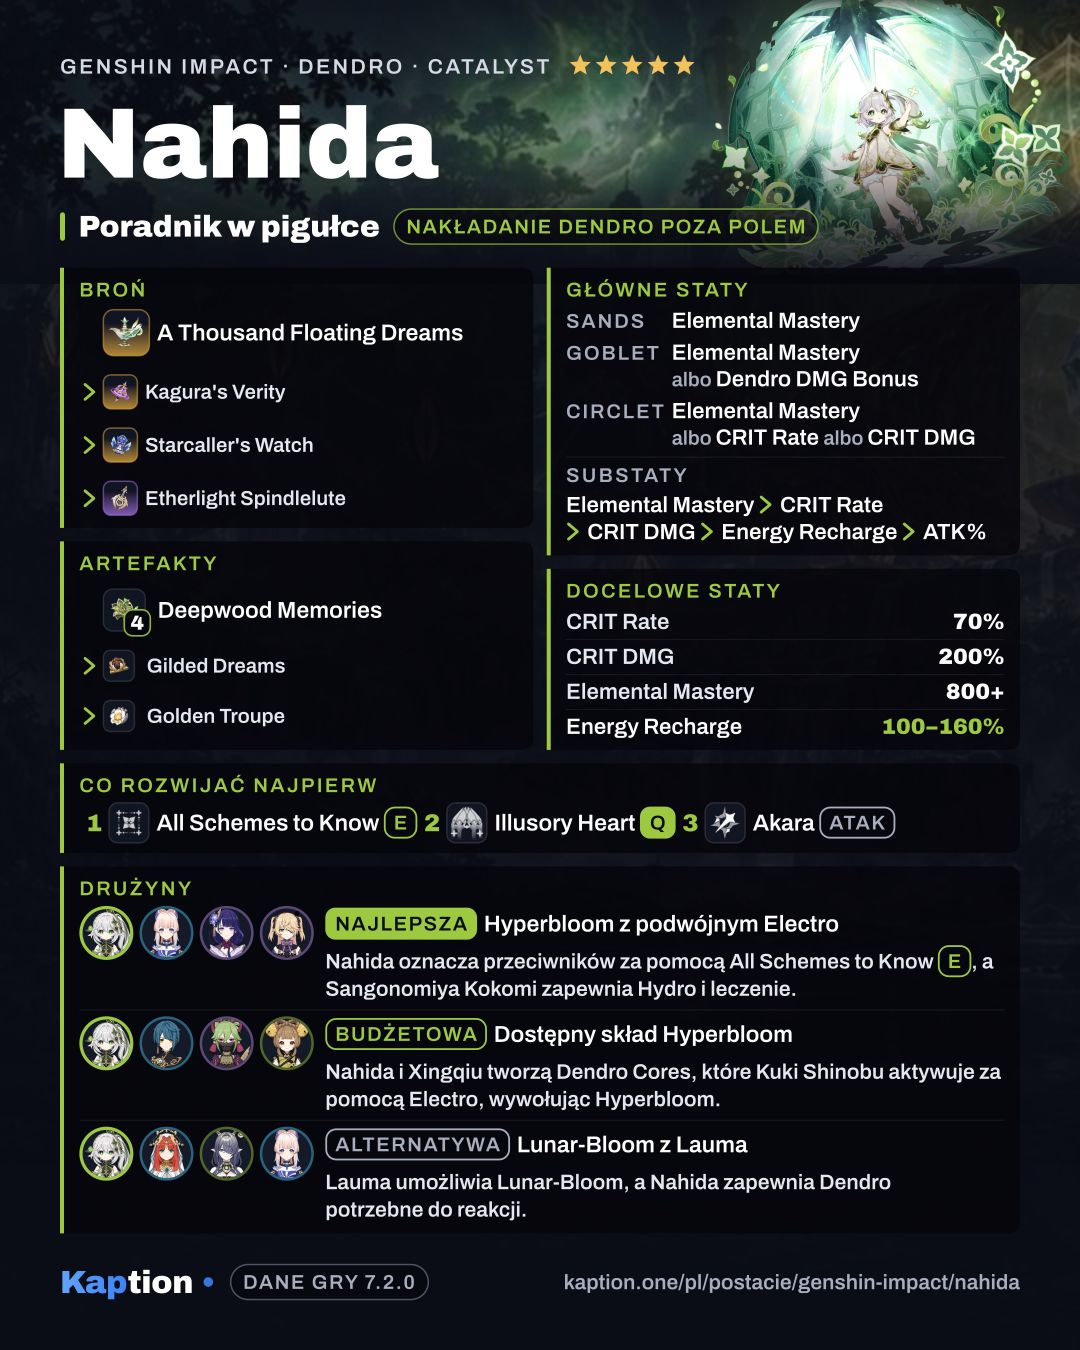
Start with All Schemes to Know. A press deals AoE Dendro DMG and marks up to eight opponents with Seed of Skandha. Hold it to enter Aiming Mode and select enemies before releasing. You can aim for up to five seconds, select up to eight opponents and gain resistance to interruption while aiming.
Marked opponents are linked within a certain distance. Trigger an Elemental Reaction on one of them, or damage one with a Dendro Core, including Hyperbloom or Burgeon damage, to trigger Tri-Karma Purification against it and connected opponents. This deals Dendro DMG based on Nahida's ATK and Elemental Mastery, with a short interval between triggers.
Use Illusory Heart to create the Shrine of Maya. Pyro party members increase Tri-Karma Purification damage, Electro members reduce its trigger interval and Hydro members extend the field's duration. Two members of an applicable element strengthen that element's effect. The bonuses can remain active while Nahida is off-field, as long as party members are inside the Shrine.
The active character inside the Shrine gains 25% of the highest Elemental Mastery in the party, up to 250. If you keep Nahida on the field, Akara (NA) gives her Dendro attacks; its Charged Attack consumes Stamina and deals AoE Dendro DMG after a short cast.
Build and why
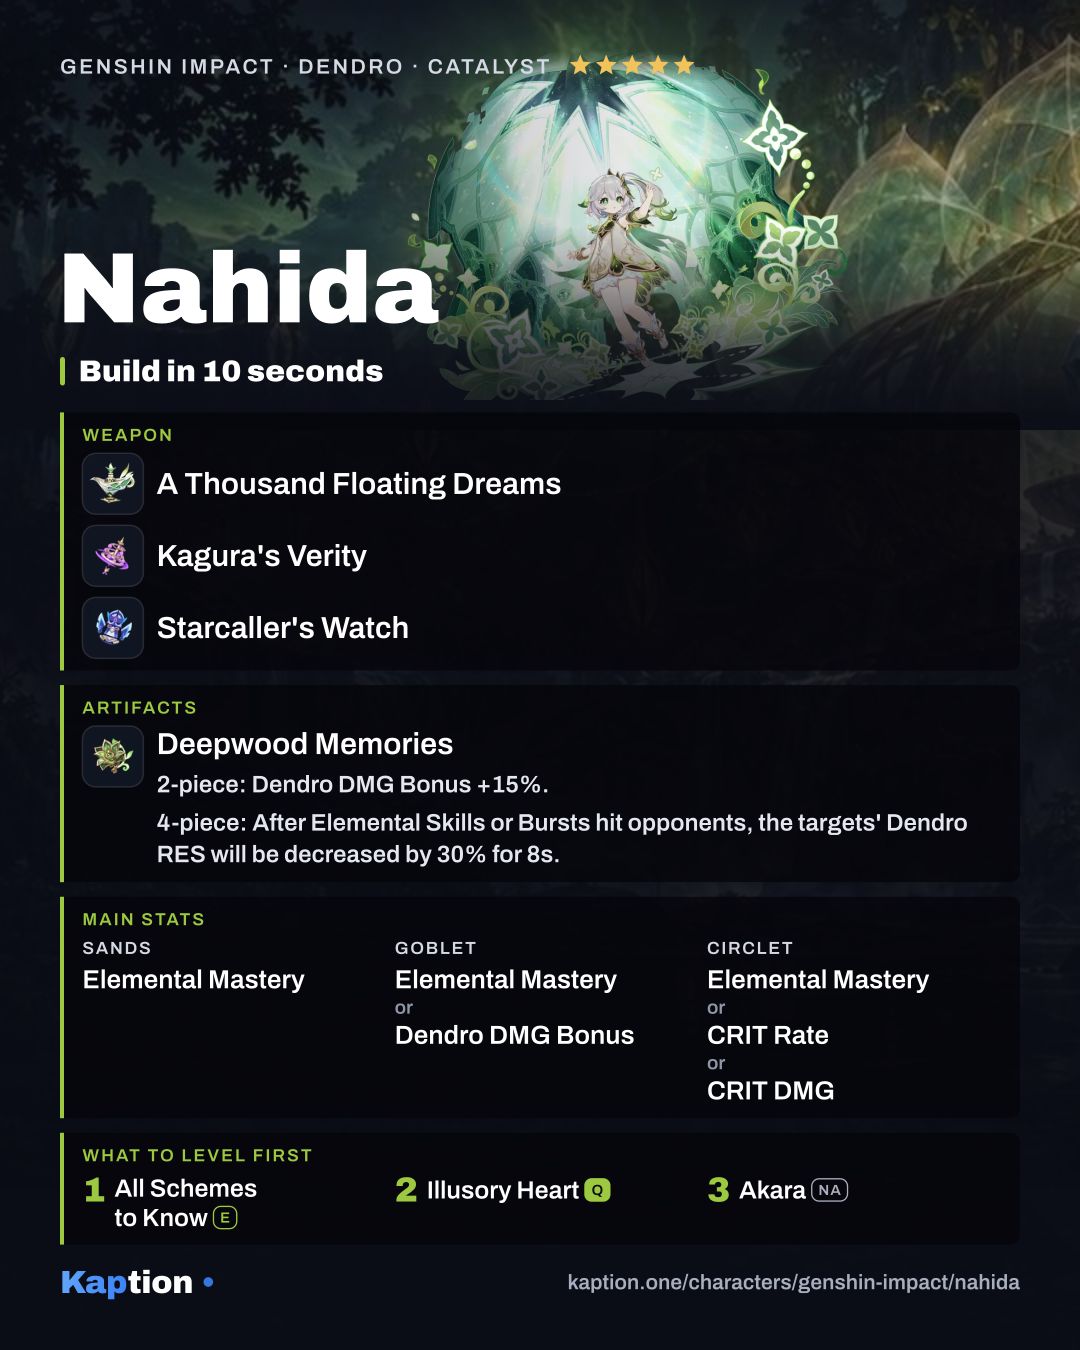
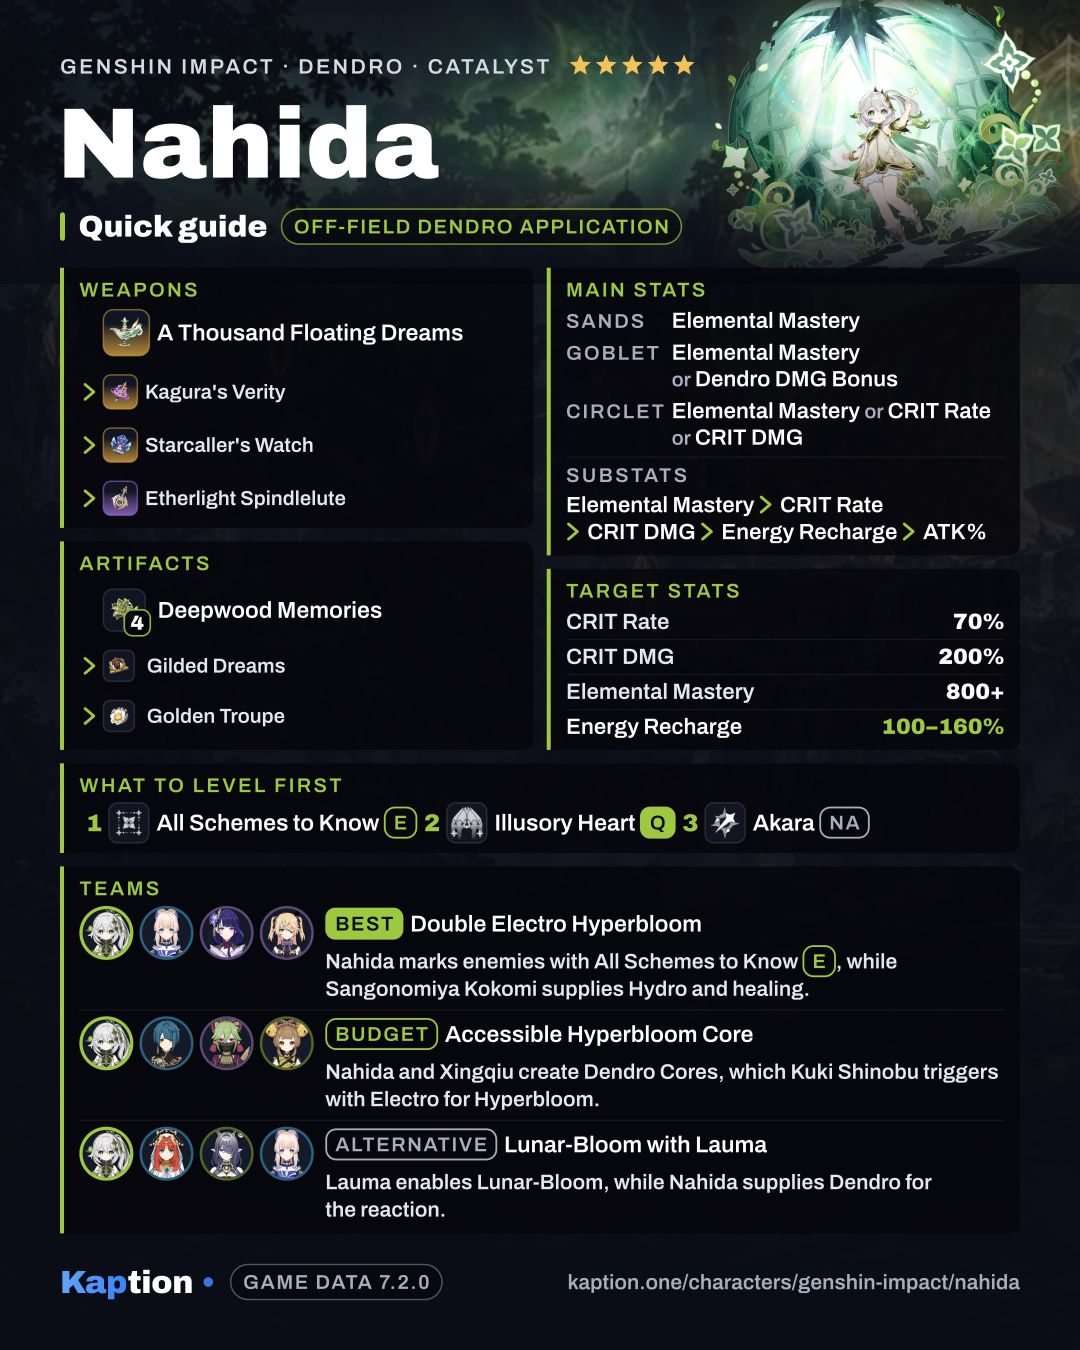
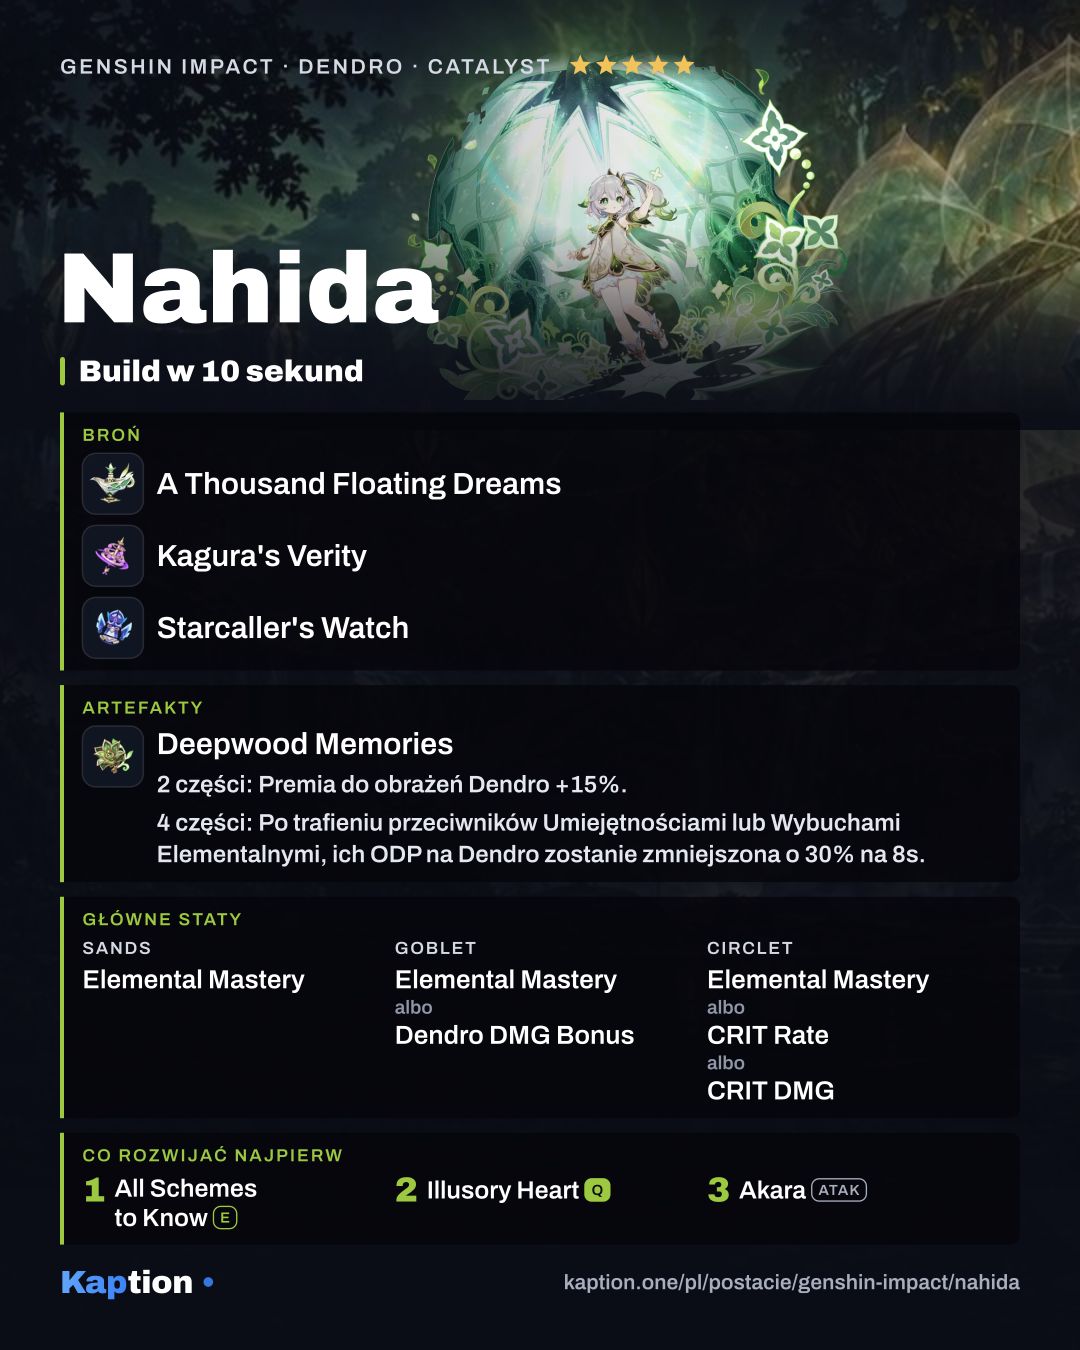
Use four pieces of Deepwood Memories as the first set to consider. Its two-piece bonus gives 15% Dendro DMG Bonus, and skill or burst hits reduce targets' Dendro RES by 30% for eight seconds. Nahida can trigger the resistance reduction while off-field, helping her Dendro damage and that of the team.
Four pieces of Gilded Dreams are an alternative, especially if another character carries Deepwood Memories. Its two-piece bonus gives 80 Elemental Mastery. After a reaction, its four-piece effect gives ATK for teammates of the same element and Elemental Mastery for those of different elements. Golden Troupe is another option: its bonuses increase Elemental Skill damage, with an extra bonus while Nahida is off-field that clears two seconds after she takes the field.
Choose Elemental Mastery on the sands. For the goblet, consider Elemental Mastery or Dendro DMG Bonus; for the circlet, consider Elemental Mastery, CRIT Rate or CRIT DMG. Look for Elemental Mastery first in substats, followed by CRIT Rate and CRIT DMG, then Energy Recharge and ATK Percentage. Above 200 Elemental Mastery, Nahida also gains damage and CRIT Rate for Tri-Karma Purification, up to the passive's limits.
A Thousand Floating Dreams is the first weapon choice. Same-element teammates give its wielder Elemental Mastery, while different-element teammates give an elemental damage bonus. Kagura's Verity increases Elemental Skill damage when the skill is used. Starcaller's Watch gives 100 Elemental Mastery, but its active-character damage bonus requires its wielder to create a shield. Sacrificial Fragments is another option: a damaging skill has a chance to reset its cooldown.
Leveling priority
A good leveling order is All Schemes to Know first, then Illusory Heart, then Akara (NA). The skill controls Tri-Karma Purification damage, while the burst improves the Shrine's effects. Normal Attacks are less urgent if Nahida mostly switches out after setting up.
For maximum ascension you need 420,000 Mora, 168 Kalpalata Lotus, 1 Nagadus Emerald Sliver, 9 Nagadus Emerald Fragment, 9 Nagadus Emerald Chunk, 6 Nagadus Emerald Gemstone and 46 Quelled Creeper. You also need 18 Fungal Spores, 30 Luminescent Pollen and 36 Crystalline Cyst Dust.
To raise all skills to their maximum, you need a separate 4,957,500 Mora, 3 Crown of Insight, 9 Teachings of Ingenuity, 63 Guide to Ingenuity, 114 Philosophies of Ingenuity and 18 Puppet Strings. Add 18 Fungal Spores, 66 Luminescent Pollen and 93 Crystalline Cyst Dust for the skills.
Constellations worth it
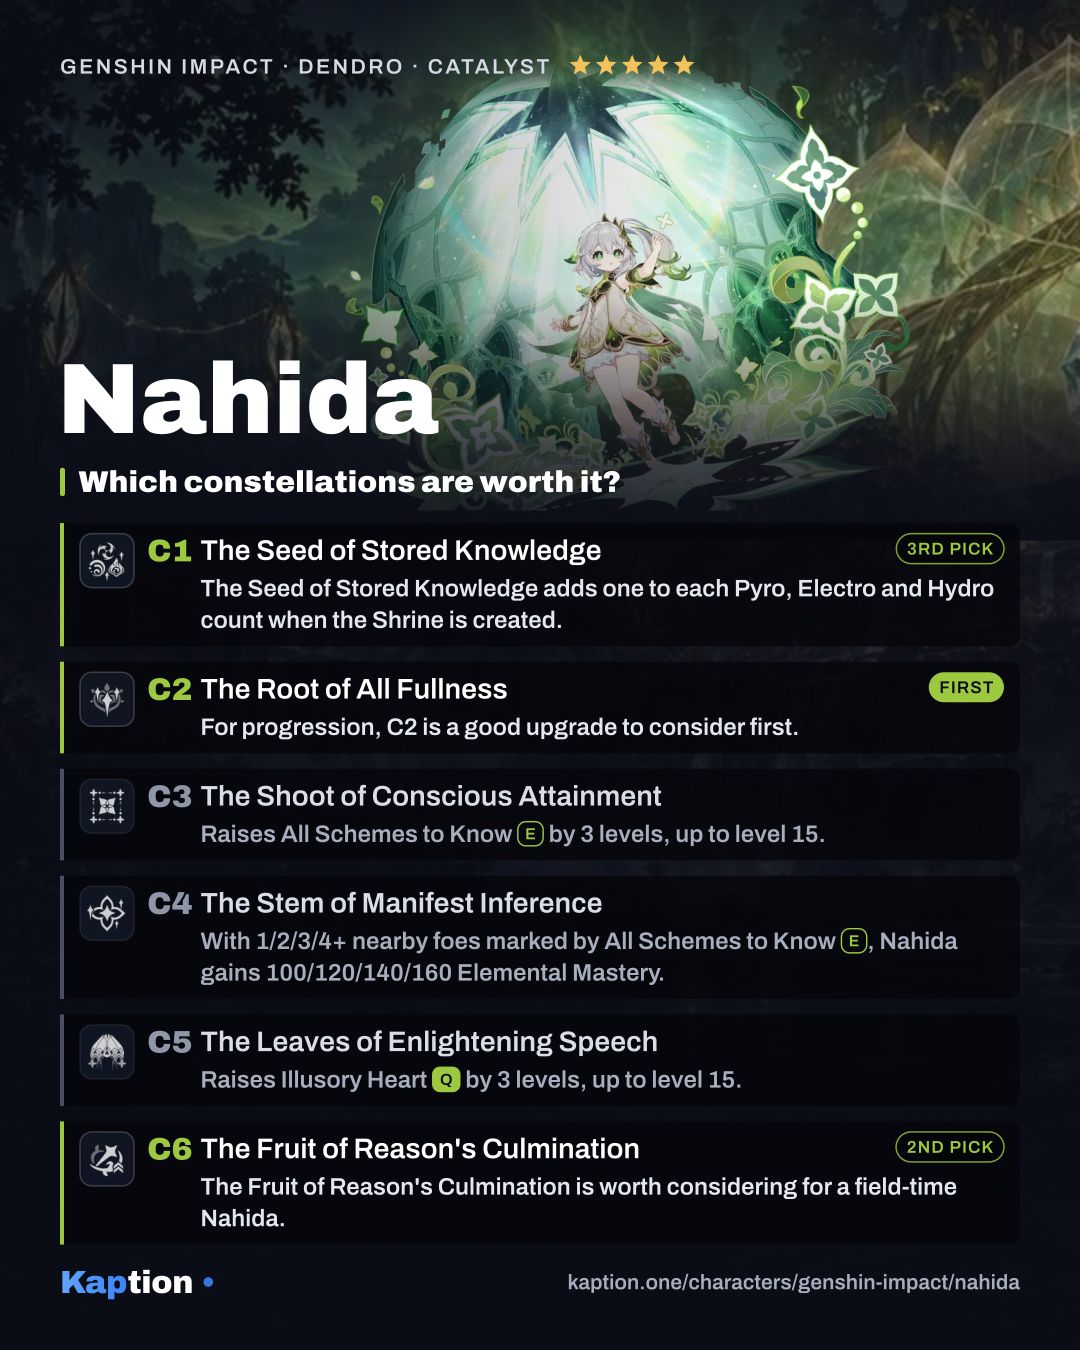
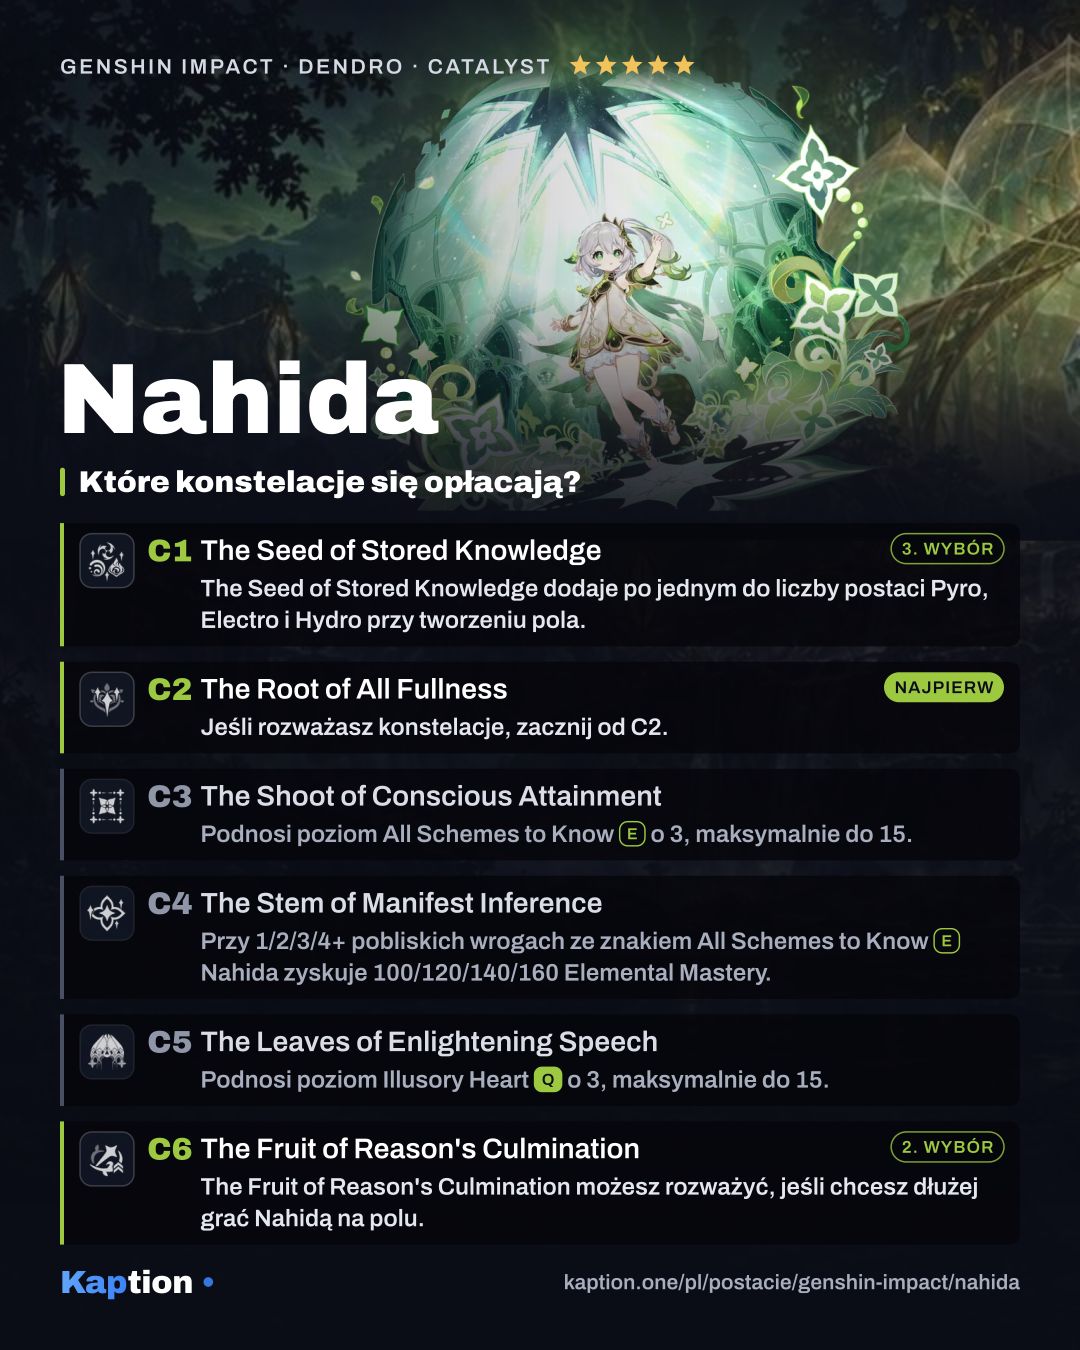
For progression, C2 is a good upgrade to consider first. The Root of All Fullness lets Burning, Bloom, Hyperbloom and Burgeon damage received by Nahida's marked opponents CRIT, with a fixed 20% CRIT Rate and 100% CRIT DMG. Quicken, Aggravate or Spread also reduces their DEF by 30% for eight seconds. It increases CRIT Rate and CRIT DMG for Lunar-Bloom damage received by marked opponents as well.
The Fruit of Reason's Culmination is worth considering for a field-time Nahida. After her burst, hitting a marked enemy with a Normal or Charged Attack triggers a special instance of Tri-Karma Purification against that enemy and connected targets. It can last up to ten seconds and ends after six instances.
The Seed of Stored Knowledge adds one to each Pyro, Electro and Hydro count when the Shrine is created. It improves the available Shrine effects without needing to fill those extra party slots. C3 raises the skill level, C4 gives Nahida Elemental Mastery based on nearby marked opponents, and C5 raises the burst level. Consider those optional if their individual benefits are not what your build needs.
Teams
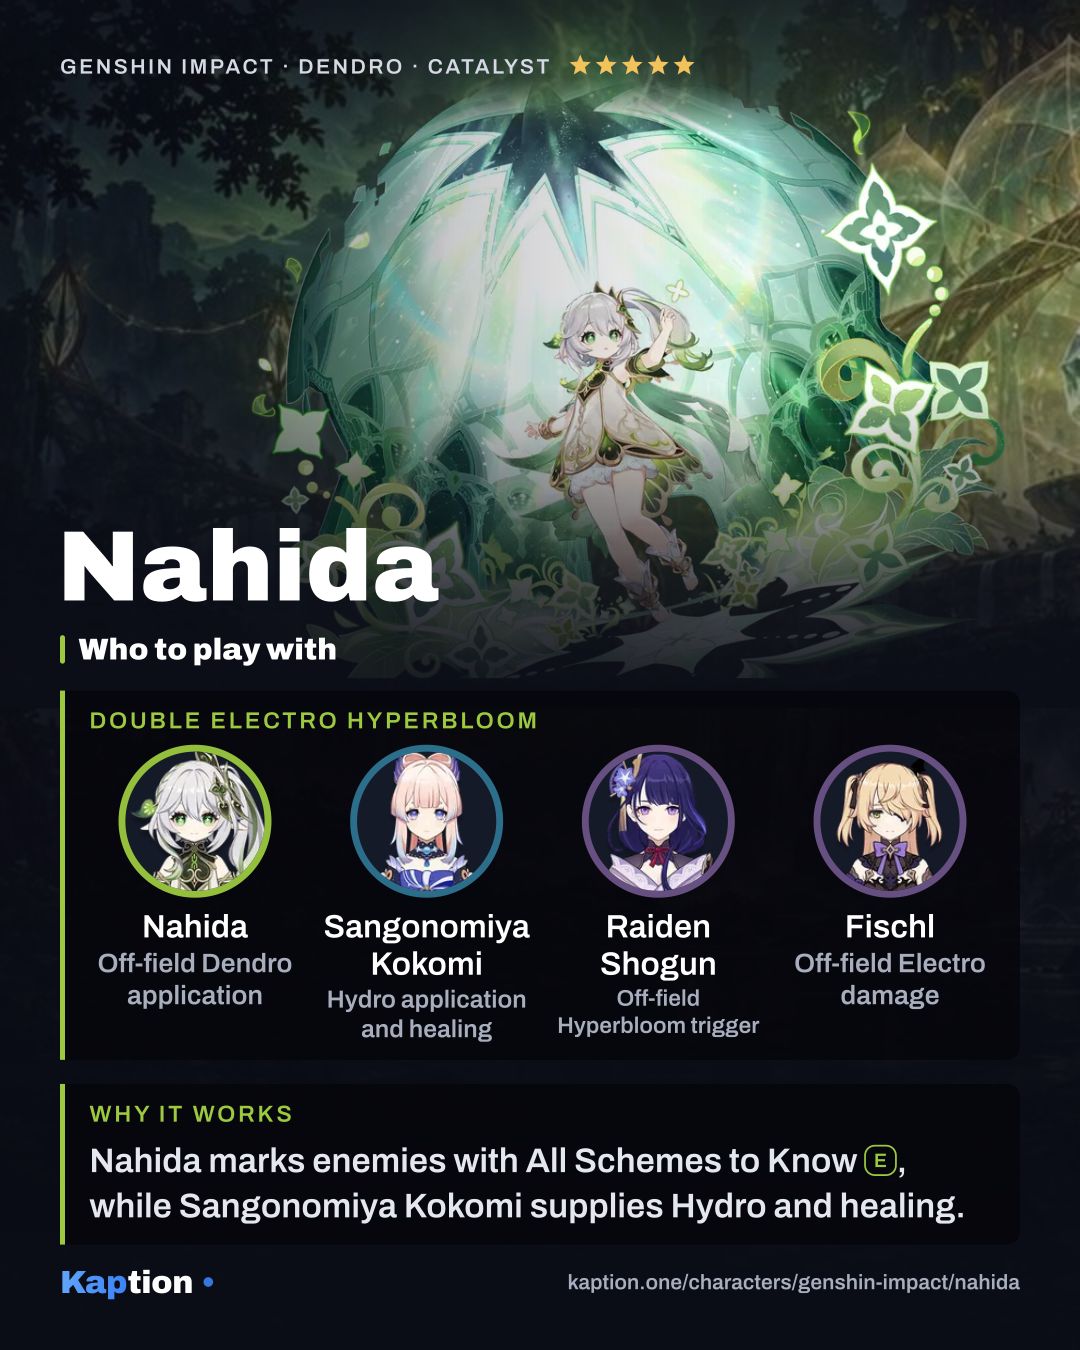
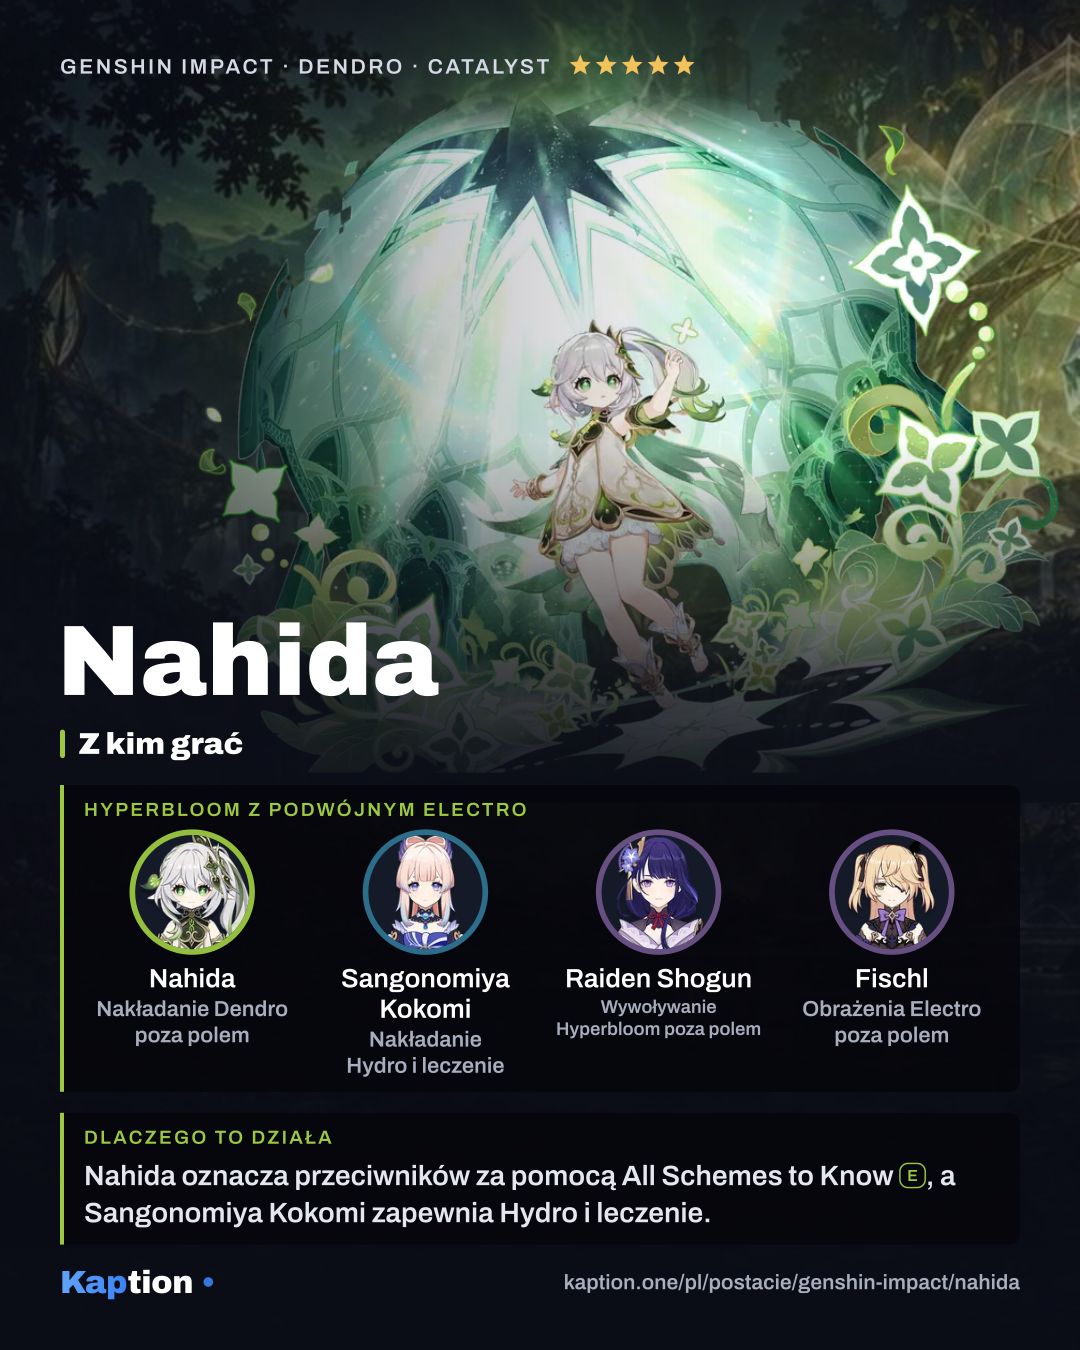
Check the elements of your actual party before using the burst: they determine which Shrine bonuses you receive. Also give the team a way to stay healthy, since Nahida's listed kit does not provide healing.
Common mistakes
Don't mark only one enemy when you can aim at a group. Hold the skill, sweep over the targets you want and release. Remember the eight-target limit and the distance requirement for links. Mark new enemies when they appear instead of expecting an earlier cast to cover them.
Don't treat the burst as a substitute for the skill's marks. Set those up and keep reactions going on marked opponents. Also watch where your active character stands: the Shrine's Elemental Mastery buff applies inside its field.
Don't build only for one stat without checking the rest of the team. Elemental Mastery helps Nahida's skill and passive, but Dendro DMG Bonus and CRIT stats are listed alternatives for main stats. Make sure someone carries Deepwood Memories if you want its Dendro RES reduction, and check a weapon's conditions before relying on its full effect.